Palatial Peonies

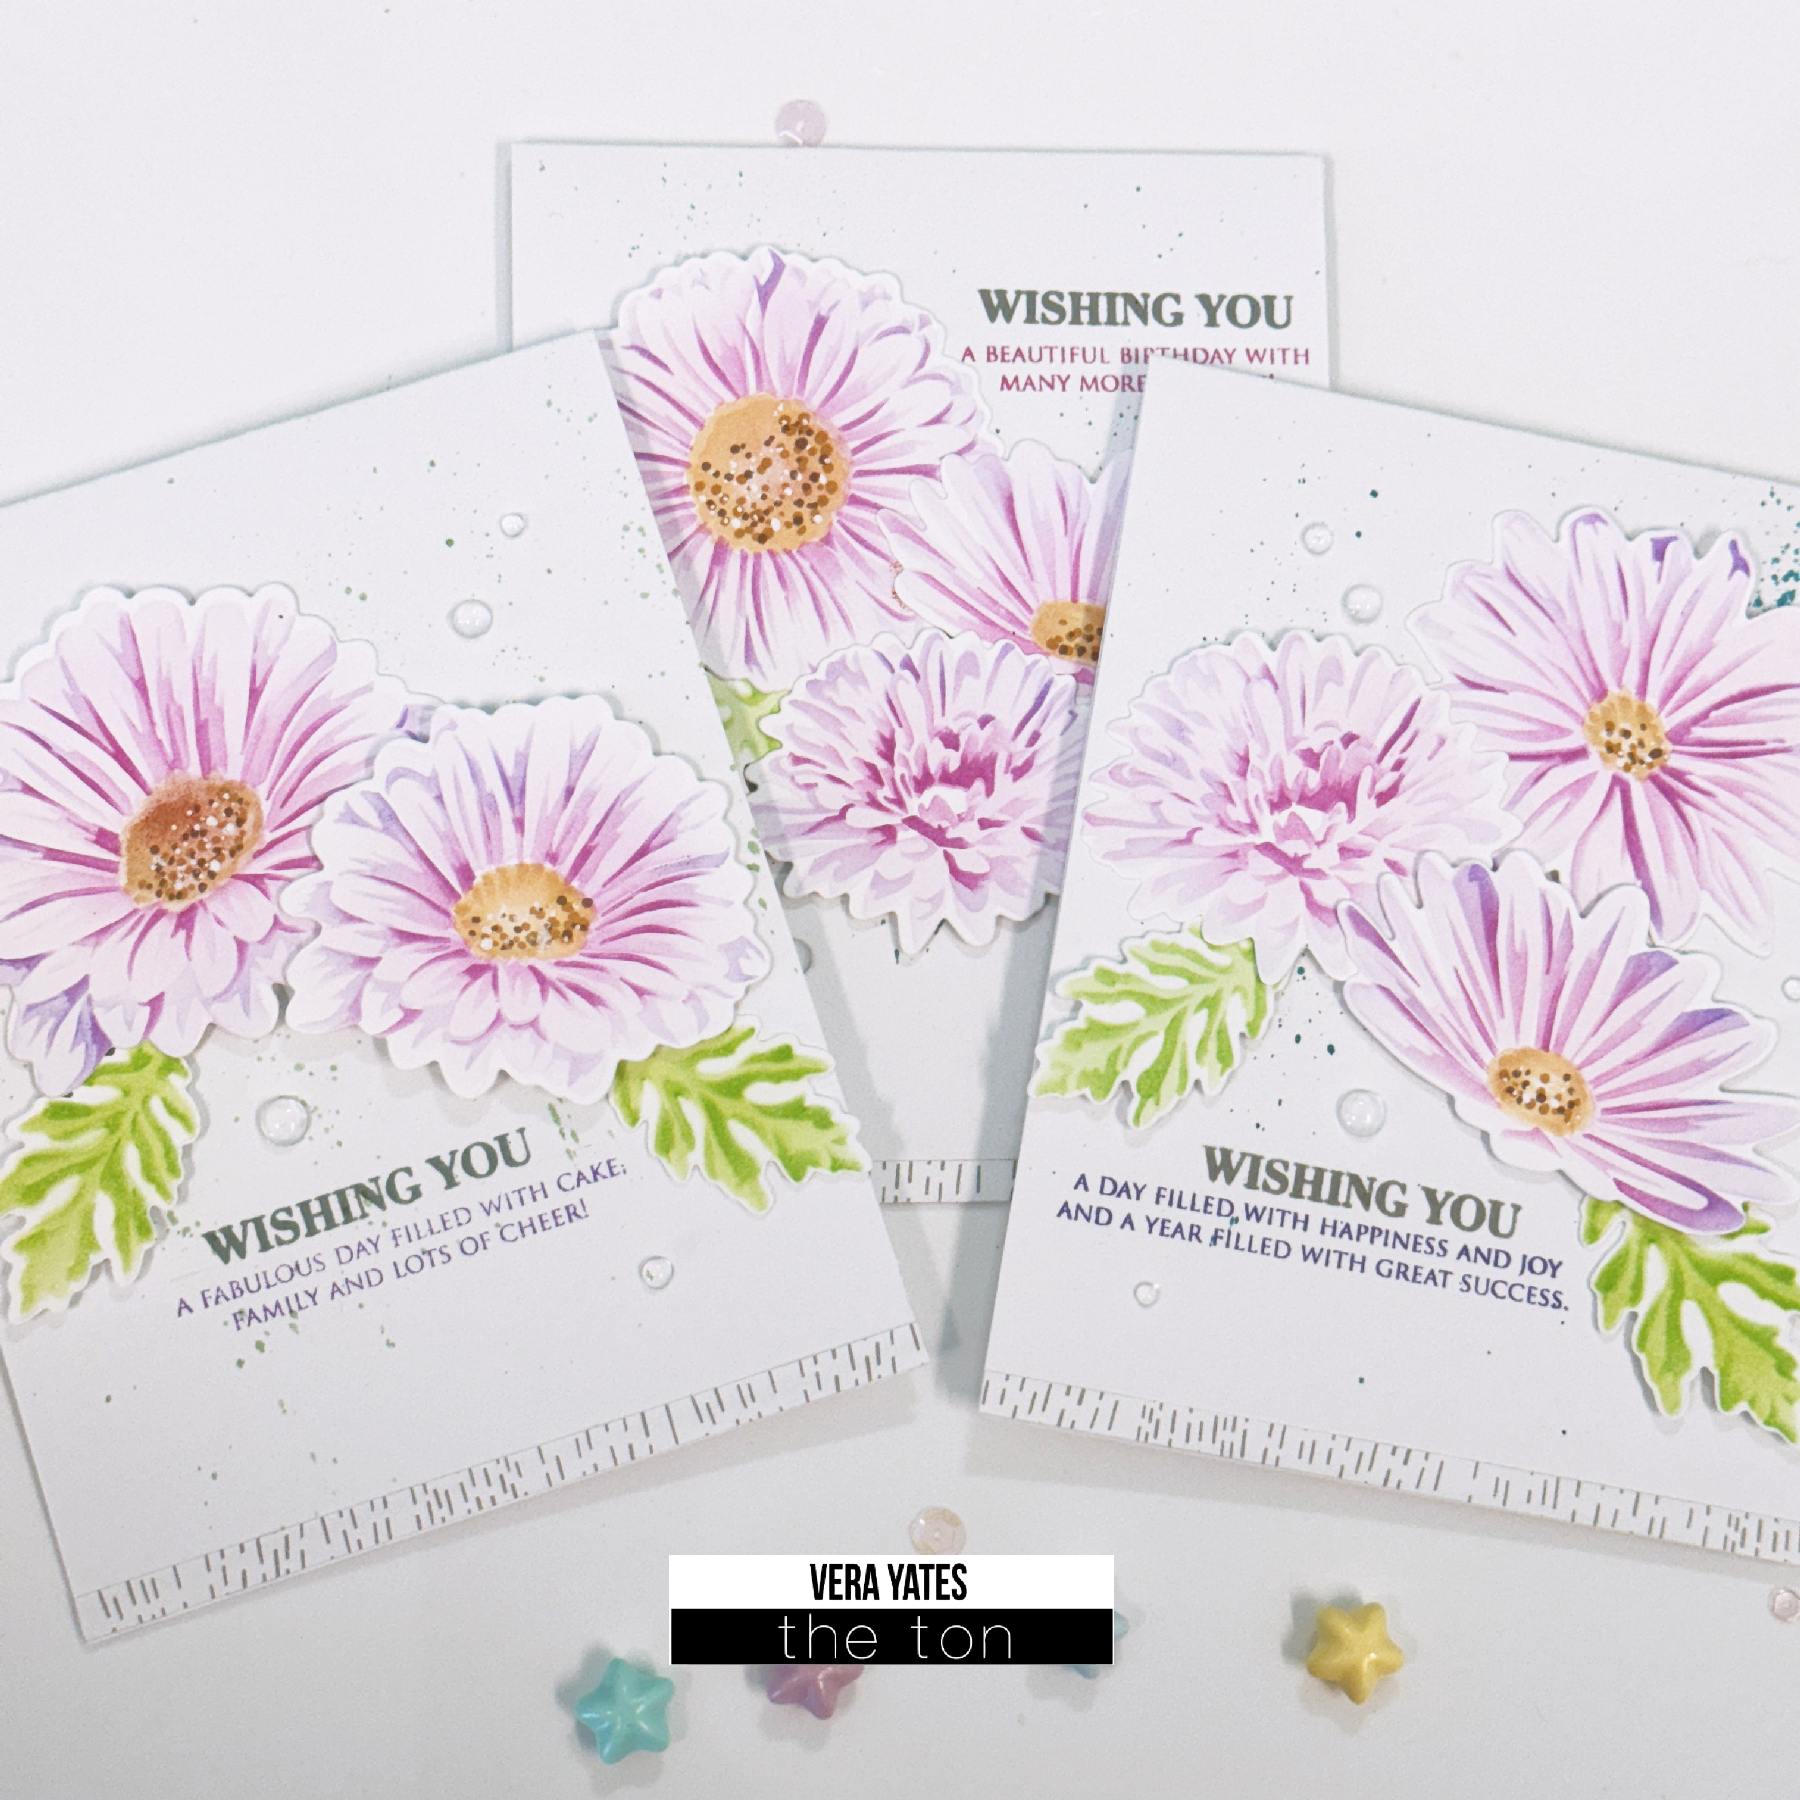
Hi friends. Happy Wednesday. Vera here. I am excited to share my cards for today as I just love the way they turned out. Today, I am showcasing the newly released Palatial Peonies Layering Stencils.

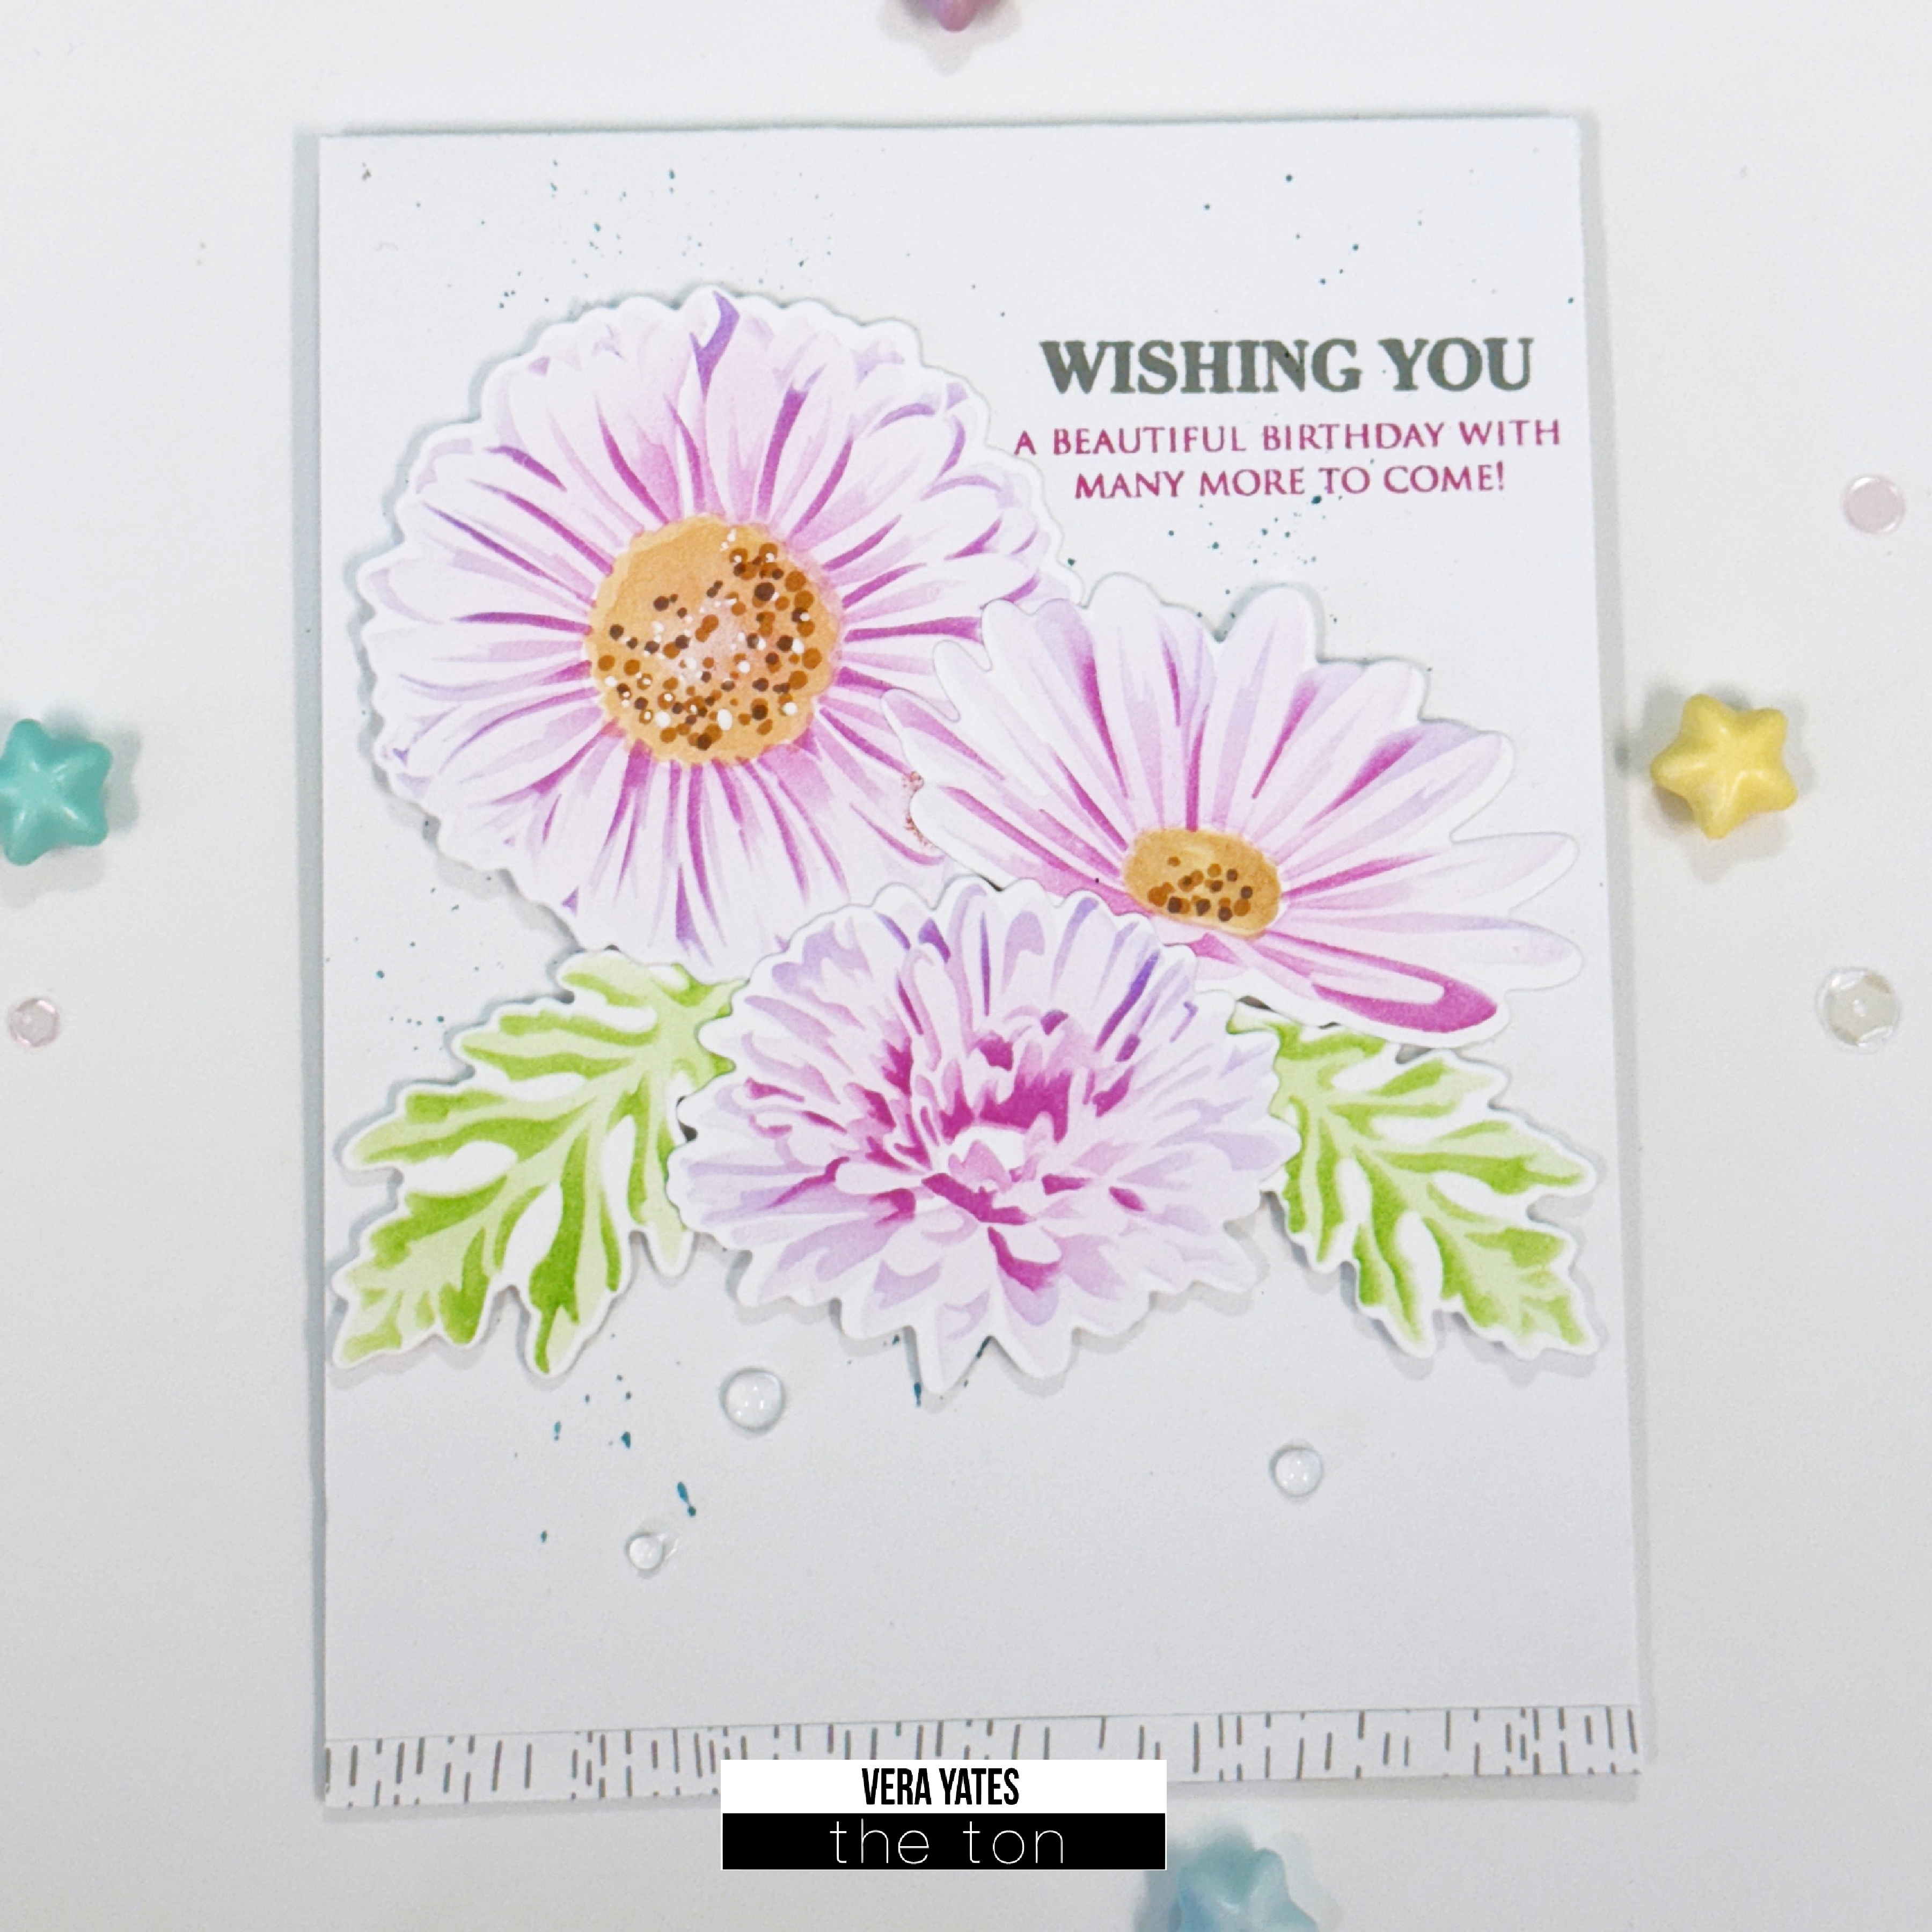
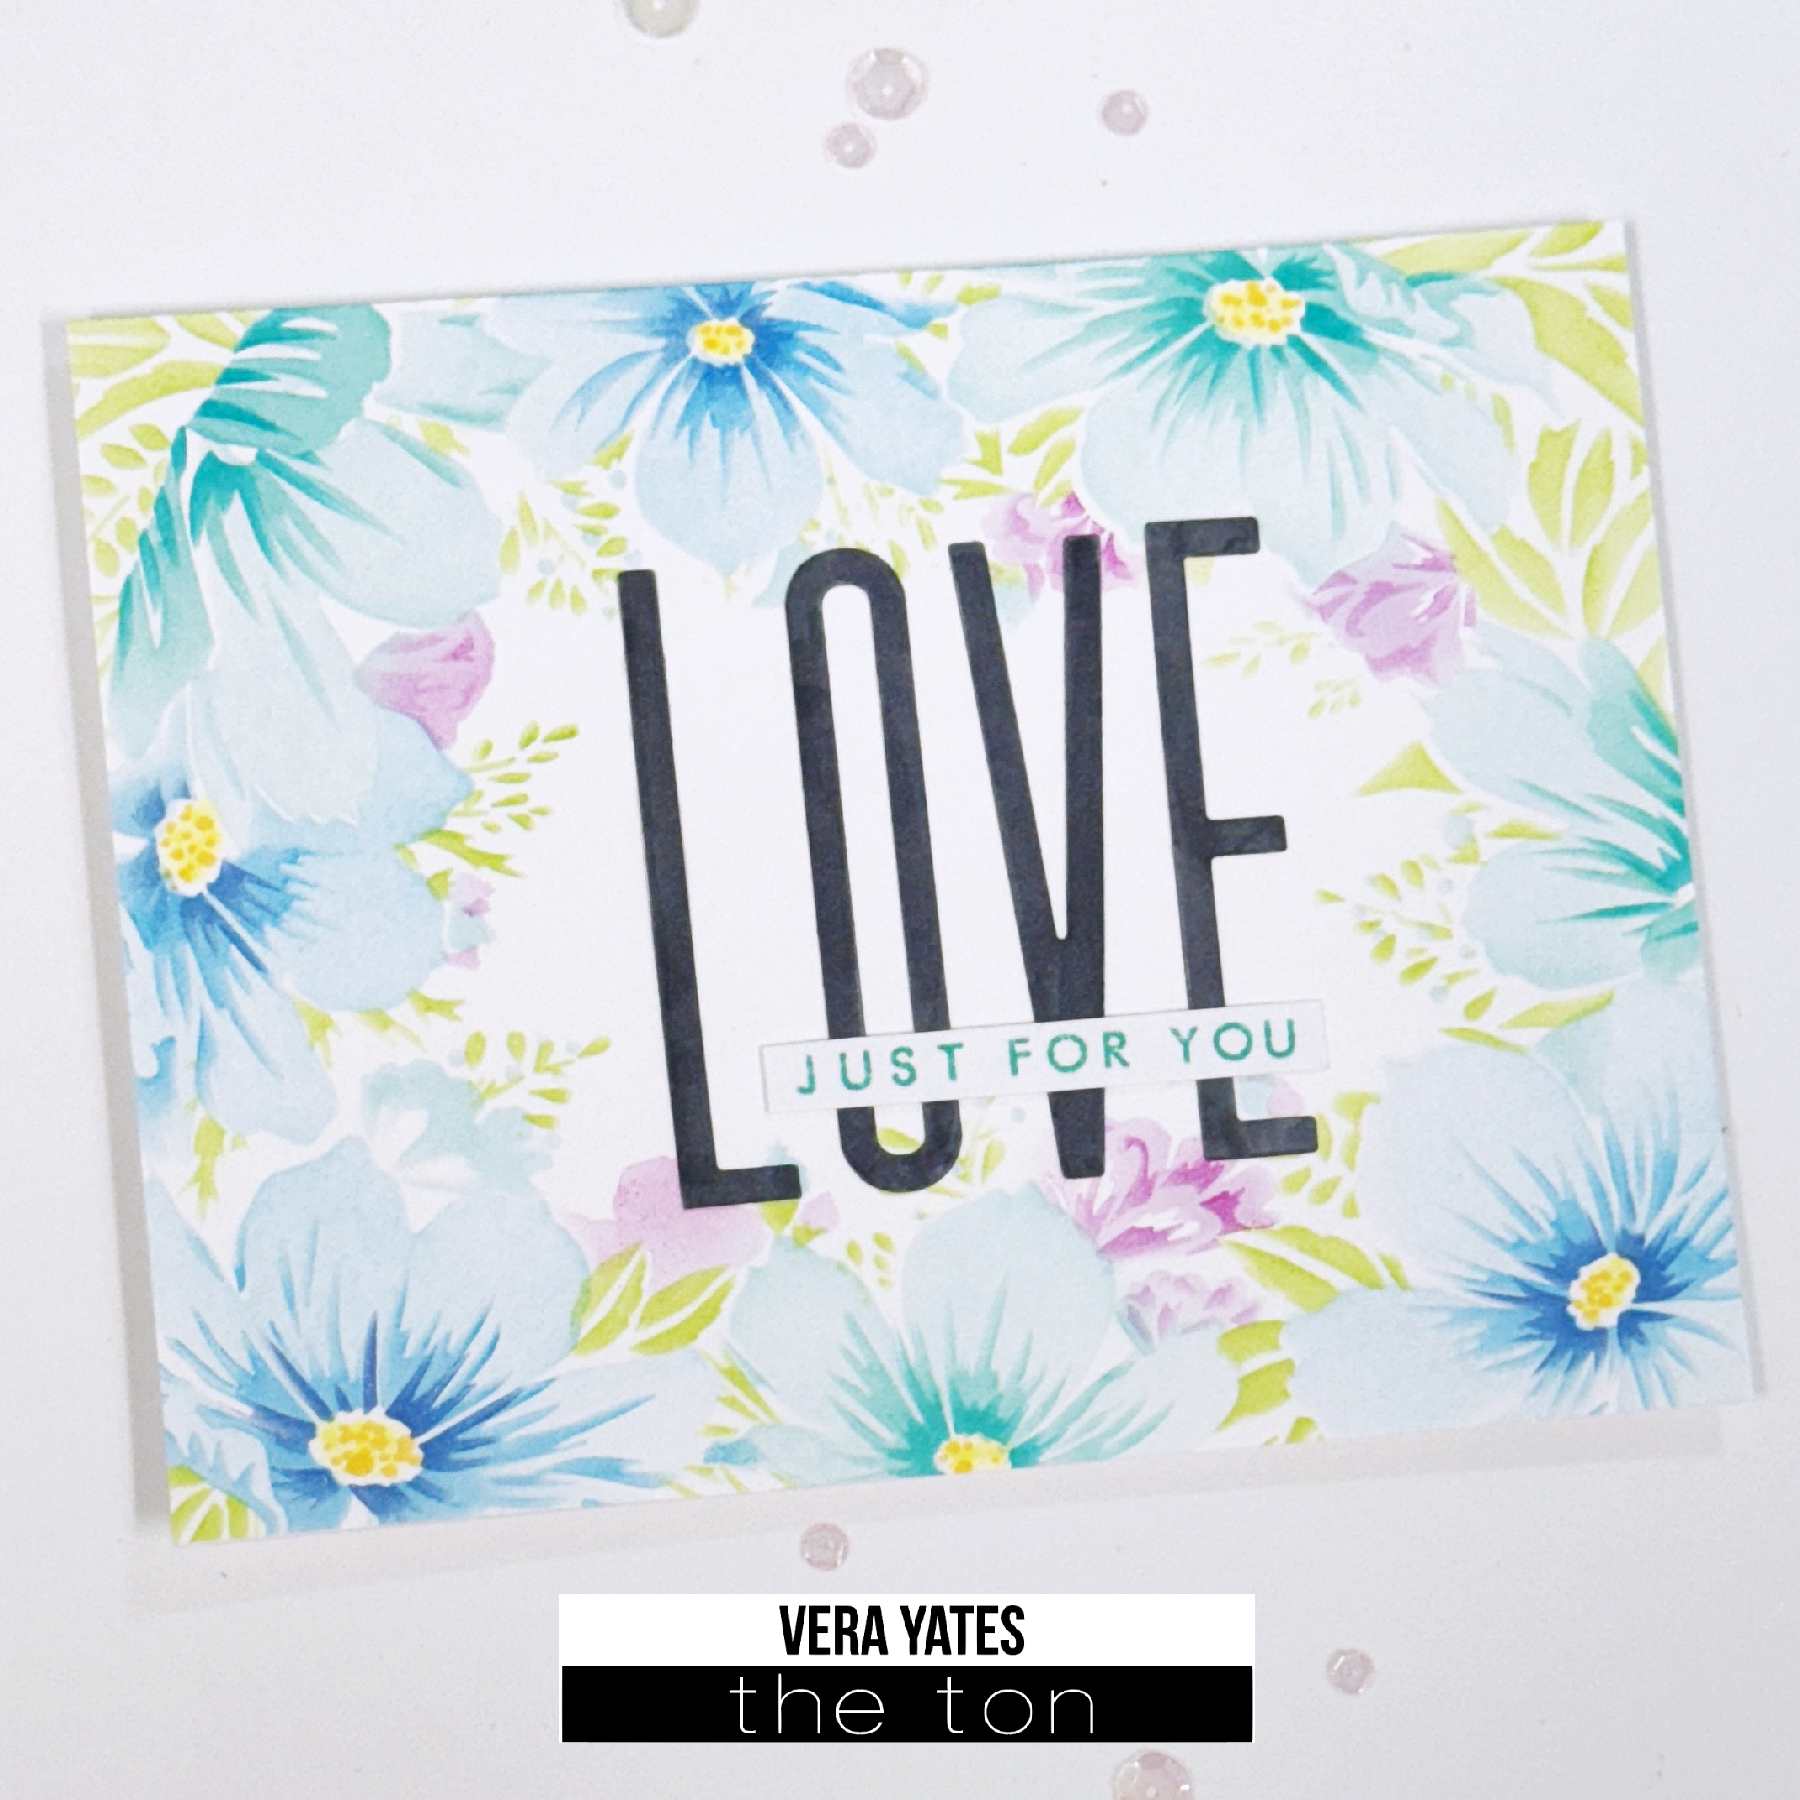
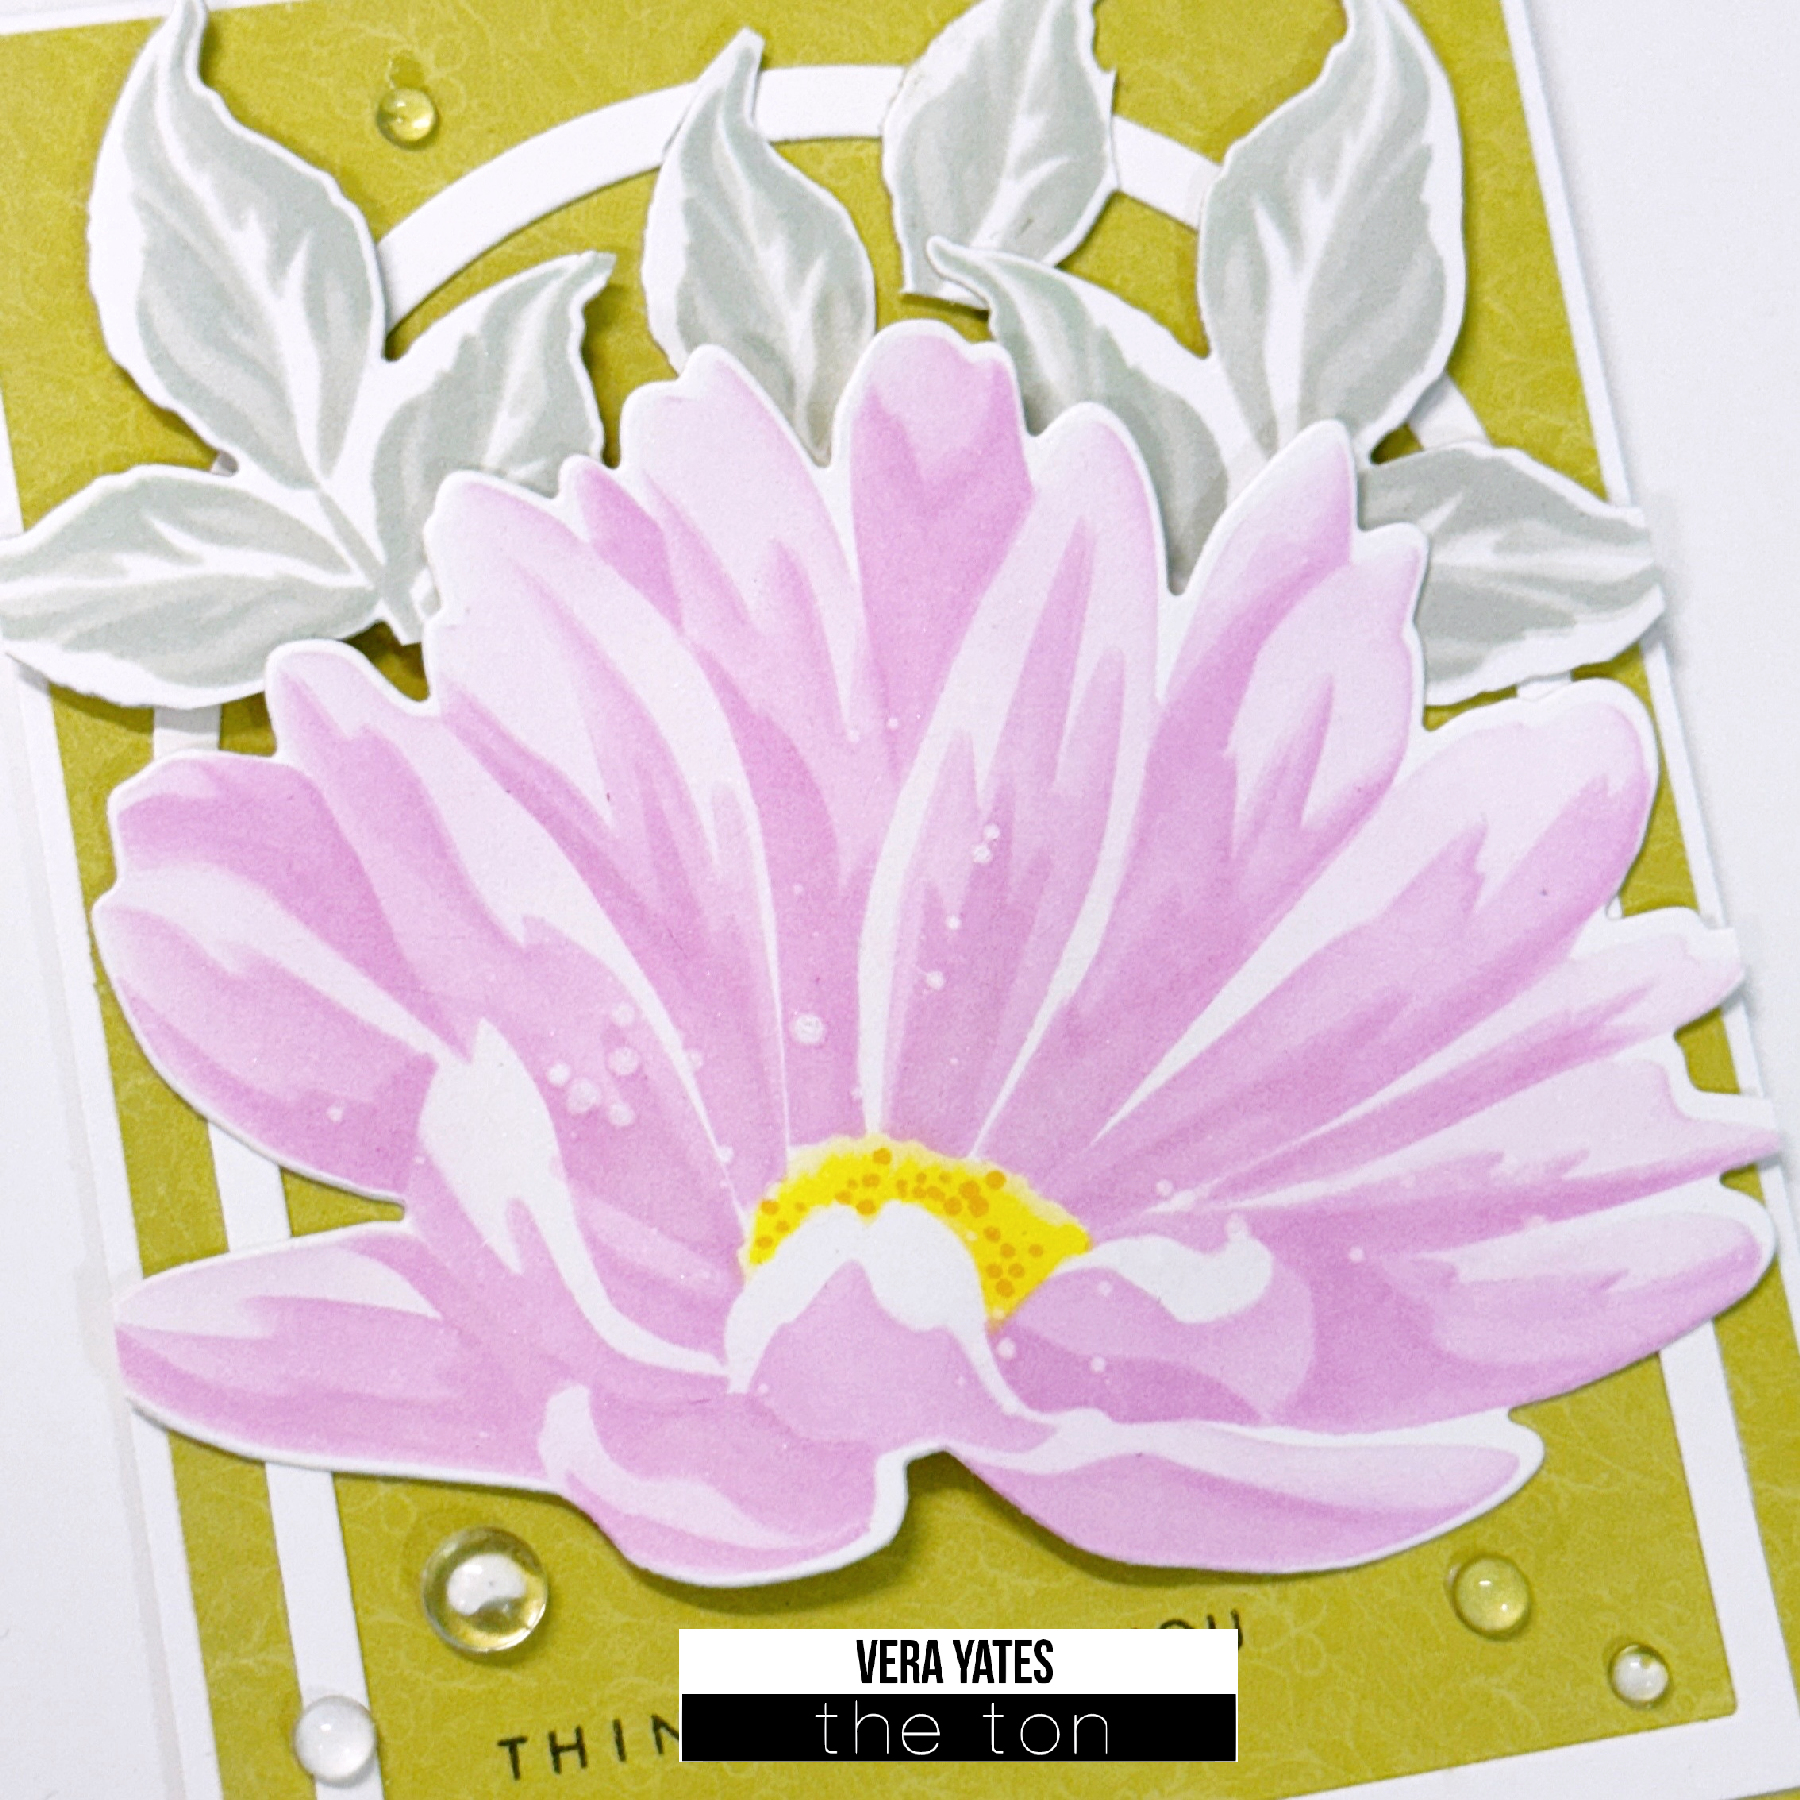
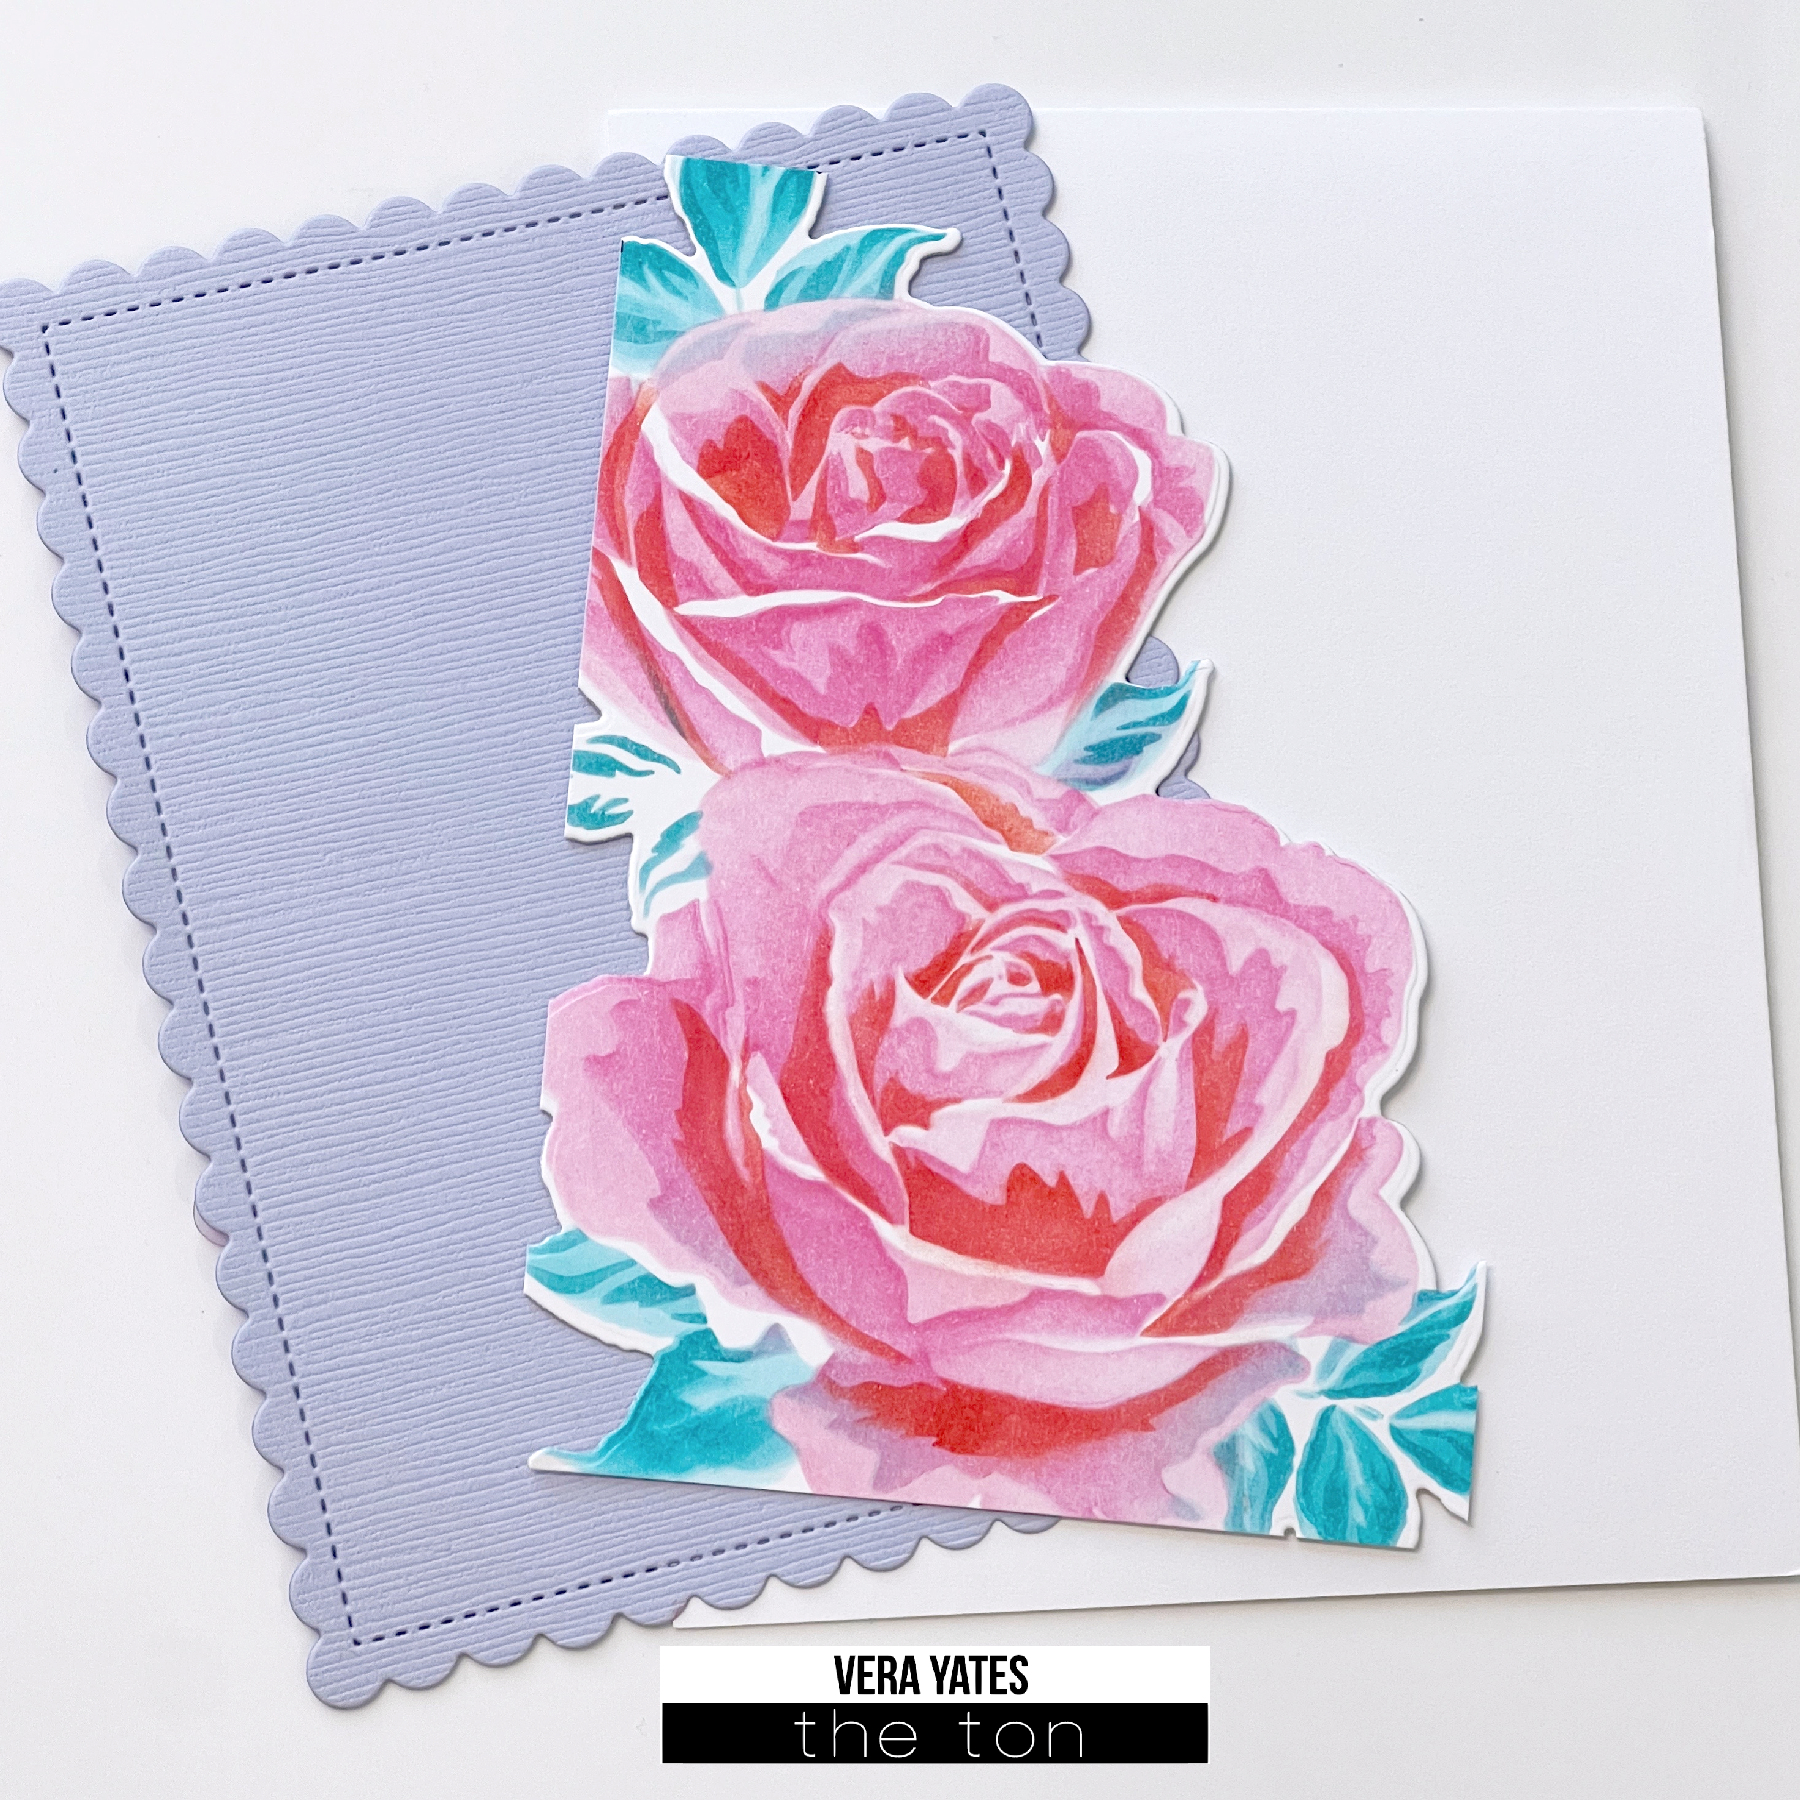
To start I inked up the stencil with Grand Fuchsia, Plum Wine, Coralline, Meadow & Matcha ink. For the very last layer for the flower, instead of ink, I used transfer gel to add silver foil. In person, this add a little shimmer to the card without overwhelming it. You can see a short reel of the card on my Instagram post (you can find me under: wirianta). Finish with sentiment from Rose Labels set and some mix size enamel drops.

I love the way this card turned out, that I decided to create another version. Pretty much I repeat the same step as above, except I didn’t use Coralline ink on the card below.

I love the way The Ton keep delighting me with their gorgeous flower sets. After all, flower is timeless in my book. I hope you enjoy today’s cards and be inspire to carve a little time to create. Till next time friends. Cheers.

Floral Damask Duo

Hi friends. Vera here. Today, I am showcasing one of the new set from The Ton, Floral Damask Layering Stencil set.

To start, I inked up the panel above with Parisian Blue, Hot Tourmaline and Periwinkle.

Trim panel and adhere to card base. Stamped sentiment from Fancy Script set and die cut it with Coordinating Fancy Script dies. Adhere the sentiment with foam adhesive.

For my next card, I repeat the same steps above and this time make a horizontal card.

When I showed this card to hubby, he said it reminded him of Greece because of the pattern and color. I’ll take that since Greece is one of my favorite place I’ve visited.

Hope you enjoy today’s cards and may you find some times to get crafty this weekend. Till next time, friends.

Pleasant Peonies Birthday

Hi friends. Vera here. We just had our November release and am excited to share today’s card featuring the newly release Pleasant Peonies set. And, since I do love to encourage people to show love to their old sets, I am also using a couple older sets from for my card.

First, I die cut the scallop frame using Inner Scallop Nested die. I love the dainty design of this scallop. Next, I cut a panel about the same size as the scallop frame. Next, I stamped the image from Heartfelt Blossoms at an angle. Put aside and die cut the Peonies from white cardstock and then colored all the pieces by ink blending Deep Peony, Bubblegum for the flower and Spring Salad for the leaves.

For texture, I adhere the scallop border with foam adhesive to the stamped panel. Adhere the whole thing to card base. Next, arrange the flower inside the frame. Finish by stamping sentiment from Rose Patch set and adding some enamel drops.

That’s all I have for today and I hope you enjoy today’s card. May your weekend starts off wonderfully. Till next time.

Pumpkin Wagon

Hi friends. Happy Fri-yay. Vera here. Today I want to share a set of cards I made using the newly released Pumpkin Wagon Layering Stencils. When I saw the sneak peek, I thought oohhh, this is a fun one and I wasn’t wrong. 🙂

Both cards that I made today are one layer card, but I think they’re far from boring. I simply ink up the stencils with Caribbean Turquoise, Dolled Up, Coralline, Spring Salad, Warm Hazelnut and Spiced Chai. I always love adding some turquoise to fall color card as I feel it brighten the card & made it more cheerful

Finished by stamping sentiment on a strip of cardstock with Smoky Quartz and some enamel drops. Repeat the same step for the card below, except I flip the stencils and use the back side. This way you can get slightly different design.

There you go, 2 fall cards that you can complete pretty quickly.

I hope you enjoy today’s cards and may this weekend be a great weekend for you, wherever you are. Thank you for all your support for The Ton. Cheers….

Set of Daisies

Hi peeps. Vera here. Today I want to share this set of cards I made using the new Daisies Unlocked Layering stencil. Originally I was only going to make one card, but when I realized how many flowers I got from this set, I pivot and decided to make a set instead.

I started by inking up the stencil with Orchid Crush, Dolled Up, Grand Fuchsia, Soft Amethyst , Iris Blooms, Meadow and Spring Salad. Die cut the whole piece using Daisies Unlocked Coordinating Die. Before adhering the flowers, I splatter some watercolors on the card base for added interest.

Once the splatter dry then simply arrange the flowers and leaves. Below are the additional 2 cards I made from this set.

There you go, 3 quick cards from just this 1 set. I hope you enjoy today’s card and may your week starts off wonderfully! Cheers….

Cosmos Love & Hugs

Hi friends. Vera here and today I am showcasing one of the newly released stencil Cosmos Border Stencil set.

My cards are actually pretty simple and straightforward. I simply inked up the stencil with Carribbean Turquoise, Hot Tourmaline, Parisian Blue, Miami Cool & Meadow. I made 2 sets and for each set I simply alternate which flowers I colored with blue and turquoise. Whoops, almost forgot, I also used Grand Fuchsia to add a bright pop of color to my otherwise pastel card.

For the center of the flower I just colored them with Copic markers. For the sentiment, I die cut the letters from Tall & Skinny Alpha Coverplate dies set. I die cut the letters from white cardstock and then colored them with Copic. Of course, I could die cut them with colored cardstock, but I was too lazy to shift through my cardstock stash. Hah!

The sentiment just for you is one of the sentiment from Grouped Fresh Daisies set. This is one of the thing I love about The Ton sets, many of the sets are just timeless and can always be used years after they’re being released.

I hope you enjoy today’s post and I hope my cards inspire you to get crafty. May the rest of your week be a good one and may something wonderful happened to you. Cheers…

Birthday Dahlias Postage

Hi friends. Happy leap year! To those who has a birthday today, I hope you get to celebrate your special day in a special way. Vera here today to showcase combination of new and previously released sets.

For my card I am using the new Postage Part Die set and Coming Up Dahlias stamp & Climbing Dahlias Layering Stencil set.

To start, I die cut the postage background and then stamped the dahlia image on it using Caviar ink. Then using the layering stencil colored the flower with Dolled Up, Grand Fuchsia, Iris Blooms and Soft Garden. Adhere the postage panel to card base. Then, I stamped some more details from Not A Bill set and for the sentiment I used sentiment from Postage Sentiments set. Finished by adding some mix size Diamond gem rhinestones.

I feel like I don’t use purple too often, but am quite happy with the way this card turned out. I guess the fuchsia blended with purple make great combination and the green add freshness to the whole design. I hope you love our anniversary release and as always thank you for all your support for The Ton throughout the years. May your weekend be a great one. Cheers….

Pink Cosmos

Hi friends. Vera here today. Even though it’s almost mid of January, I think I can still wish you all a happy New Year. My intention this year is to create more for fun, to enjoy the creative process more. I am not in as many design team as I used to and with more free time, am really hoping to use older sets more and combine older and new sets more. After all, I have so many sets that I just love and yet they don’t get used as much as I would like to. Hoping to change that. Anyway, for today, I am sharing this card I made using The Ton Jumbo Cosmos Layering Stencil.

To start I inked up the stencil with Orchid Crush. Once done die cut the image using Coordinating Jumbo Cosmos Dies. Splatter the flower with white ink. As I was looking for what background to use, I notice this chartreuse patterned paper that been sitting on my scrap paper pile for the longest time and remembering my intention to mix the old with the new more, I decided to use it. Don’t ask me where it came from, as I seriously don’t remember. I just figure the soft leaves pattern and the color of the paper works for my background. I also die cut a frame using Dome Frames Slim Borders Coverplate Dies. However when I start arranging all the pieces, i feel like it still missing something. So, I stenciled some leaves using Rose Leaves Layering Stencil with Moonlight ink. Die cut the leaves using Rose Leaves Coordinating Die. Adhere all the pieces. For sentiment I used one of the sentiment from Many Banners set. Finish by adding mix size dew drops.

Well peeps, that’s all I have today. I hope you enjoy today’s card and I hope this weekend you get to create for fun!! Cheers…

Birthday Peruvian Lilies

Hi friends. Vera here bringing you weekend edition inspiration on behalf of The Ton. Honestly, it’s been so freaking hot herein Texas that on weekend, I really don’t want to do any outdoor activity whatsoever. So, that means quite a bit of crafting time!!

Today, I am showcasing the newly released Climbing Peruvian Lilies Layering Stencil. This stencil coordinate with the previously released Coming Up Peruvian Lilies and I am over the moon over this because I don’t consider myself as really good at coloring with markers and the stencil truly made a huge difference.

To start, I stamped the lilies a couple times and using the stencil colored them with Dolled Up, Deep Peony, Grand Fuchsia, Amber Citrine, Matcha and Meadow. For the antenna (hah, my mind just went blank and I really can’t remember what that long loop on the center of the flower is called, so antenna it is) with Copic markers. Once done, I die cut the image using Coordinating Coming Up Peruvian Lilies dies.

Finish the card by adding sentiment from Rose Labels set stamped with Grand Fuchsia ink pad. Seeing how this card turned out, I think I’ll be playing with this stencil quite a bit. I love the detailed coloring it created. that’s all I have for today. I hope you enjoy today’s inspiration and wishing you all a great weekend. Cheers.

Rose Duo

Hi all. Vera here. Today, I am featuring one the new stencil set from this summer release. This Rose Duo Layering Stencil is a beauty and definitely a fun one to play with.

To start, I inked up the stencil with Dolled Up, Coral Cavern, Hot Tourmaline and Ocean Teal. Once that done, I die cut the piece using Rose Duo Coordinating die. I want to stick with sweet theme and for me scalloped frame always convey sweetness. So, for the background panel, I used one of the layer for Scalloped A2 Nested die set.

Arrange and adhere everything to the card base. And, for dimension, I curved the rose in the middle and use thicker foam adhesive for the middle part and adhere the edges directly to the card. I actually used to do this to most of my floral cards back in the days and somehow I forgot this along the way. It add more interest than just adhering the whole pieces with foam adhesive.

Finish the card by adding sentiment from Blooming Shelves and some mix size enamel drop. All in all this card comes together pretty quick. I hope you enjoy today’s inspiration. That’s all I have for today and I wish you all a lovely day. Cheers….