If you haven’t heard about the grouped Layering stamp sets yet, you have to check them out! It is an ingenious layering system, which helps you layer multiple images at the same time. There are coverplate coordinating dies for these stamp sets, which cut the whole panel of stamped images in a single pass through your die cutting machine!
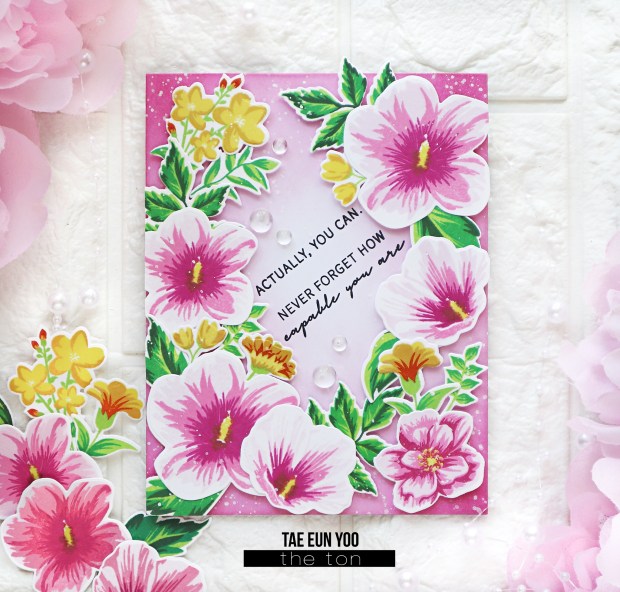
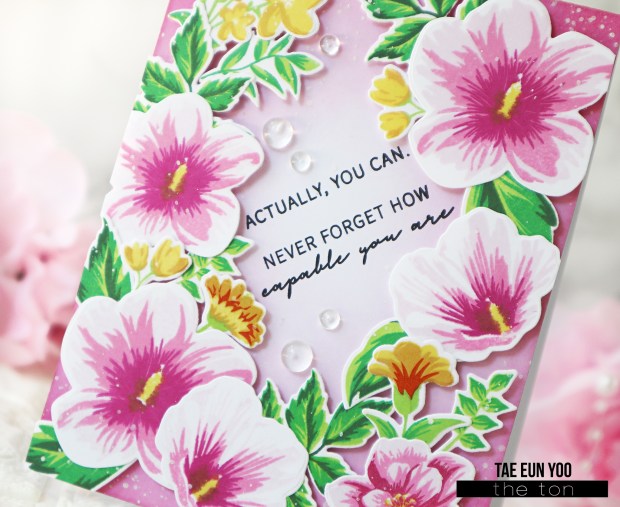
I then started assembling my card. I mounted the background panel flat on a pink cardbase and arranged the floral clusters. I adhered the leaves flat on the background and raised the flowers using some foam tape. The letters were added with foam adhesives. The small sentiment is from Layered Floral Alpha stamp set. I white heat embossed it on a strip of yellow cardstock and added it to the card. To finish off I scattered some Glass Slippers Round Confetti sequins.
I cut the flowers using the coordinating die, arranged them on a piece of A2 sized paper, secured the arrangement with a piece of Press’n Seal wrap and adhered foam tapes on the back of the floral arrangement.
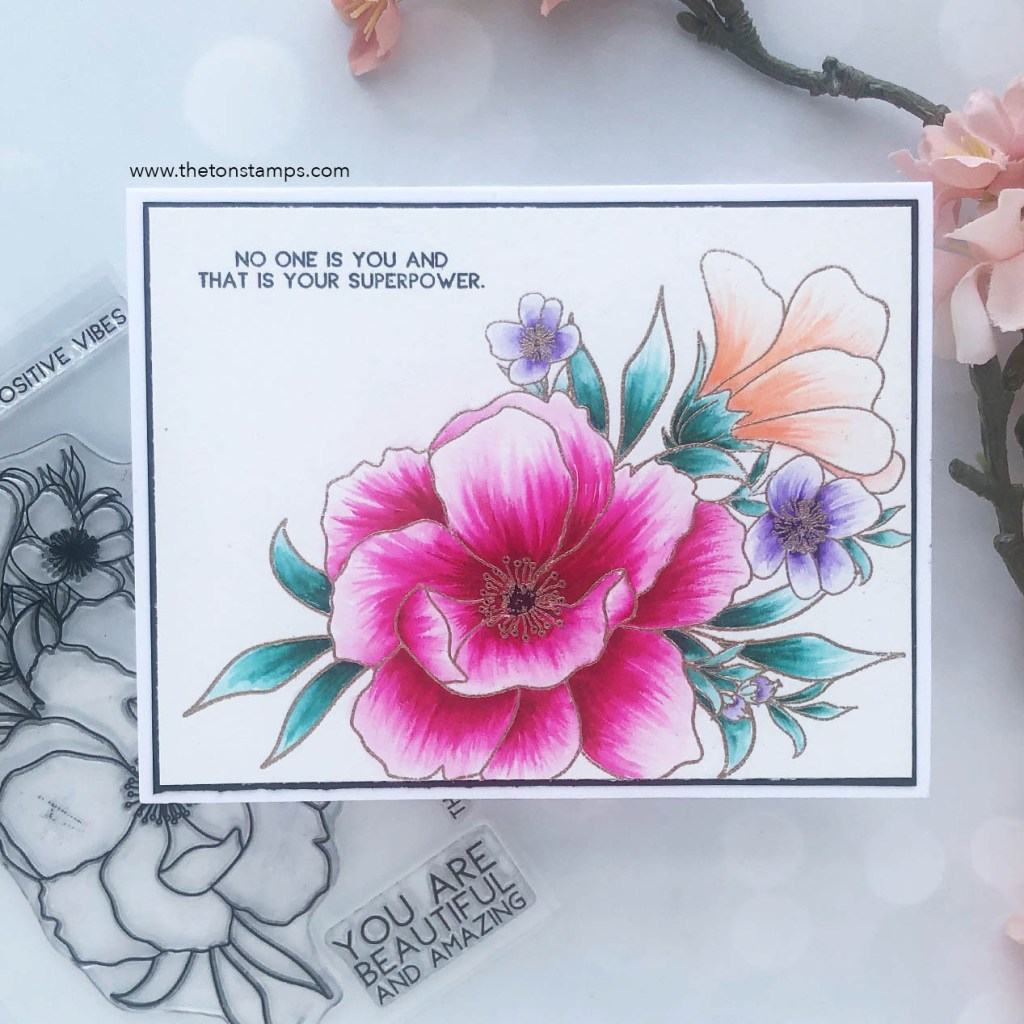
I ink blended Ballet Slippers, Hollywood Star and Cosmopolitan Pink on the front of a white cardbase making the perimeter darker than the center and added white splatters. I stamped the sentiment from Rose of Sharon set in Noir and transferred the floral arrangement onto the cardbase. I cut off the excessive area of the floral arrangement and added a few clear Dew drops to finish off the card.
Using the grouped layering stamp sets and coordinating dies you can stamp and cut the floral elements and sentiments only with several steps. I really love to have the finished florals in my stash for my next projects!
Hello and welcome back, everyone! I’m so excited to begin our stamp debuts for our Fall 2019 Release! For this release, we have 14 new clear stamps. Fourteen! We have some fashion themed sets, florals, seasonal and seasonal florals. We’ll debut nine sets today and the rest tomorrow. Everything will be available for purchase tomorrow at 9am EST on our shop’s website. Shipping for new release orders will begin on August 28th.
NEW RELEASE PRODUCT LINKS WILL GO LIVE ON WEDNESDAY, 8/21
Then be sure to join us on Instagram from the 22nd to the 24th for three Instagram hops with our team and special guests! The hops will begin on our Instagram account.
Free Gift with Purchase Promotion
We have one free gift with purchase promotion for this release. Receive our Mini Pine (3×4 stamp set) with it’s coordinating die with a $60* new release order.
Order must include a Fall 2019 Release physical stamp.
Please type GWP in notes to redeem this promo.
*THRESHOLD AMOUNT: This threshold amount is calculated BEFORE shipping and taxes but AFTER any promotions or gift cards or giveaway codes are applied.
This promotion does not apply to prior orders. No raincheck.
The GWP stamp will not show up in your cart. They will be added to qualified orders.
Promo ends on August 26, 2019.
We also have some giveaways so be sure to scroll all the way down for the details!
Let’s begin our stamp debuts for today!
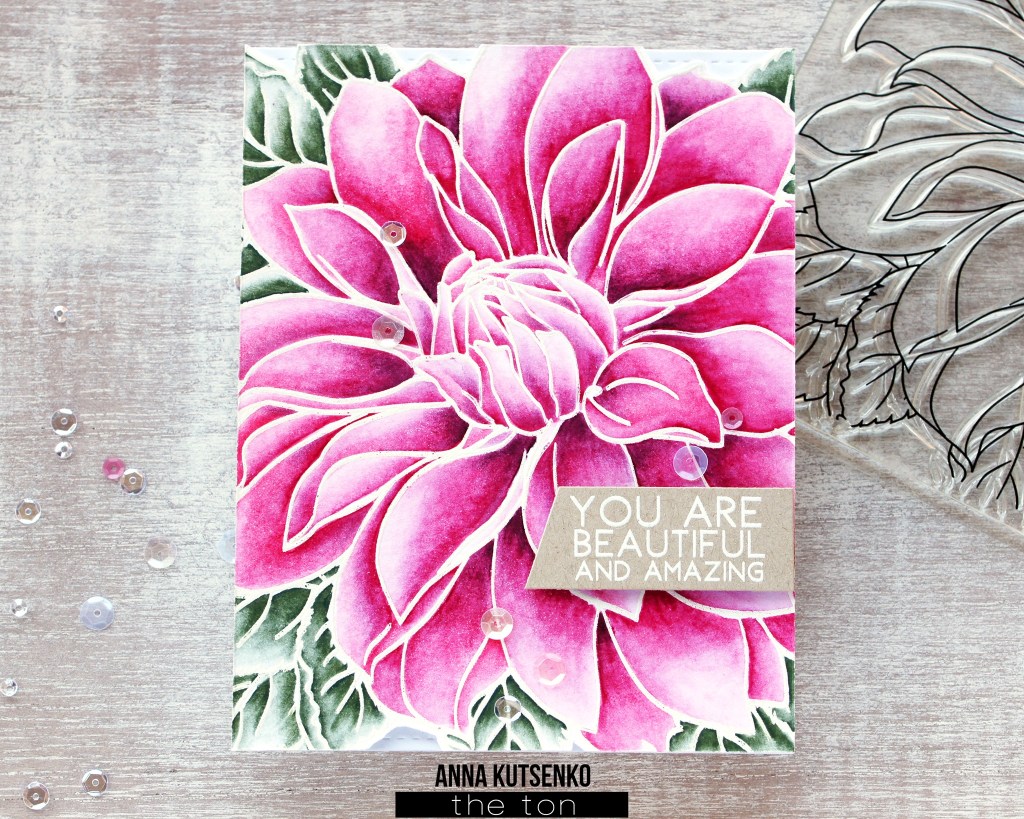
Dahlia Close Up 2, 5.75 x 5.75 Photopolymer Stamp Set
First up is our Dahlia Close Up 2 clear stamp! This is the latest addition to our close up stamps and we’re so excited about this one because it’s a dream to color! Use all the different coloring mediums in your stash to get different results!
Colored by Effie using Tombow Markers (left dahlia) and Spectrum Noir Sparkle Pens (right dahlia).
Be sure to subscribe to our YouTube Channel for more inspiration! I update our channel on a weekly basis!
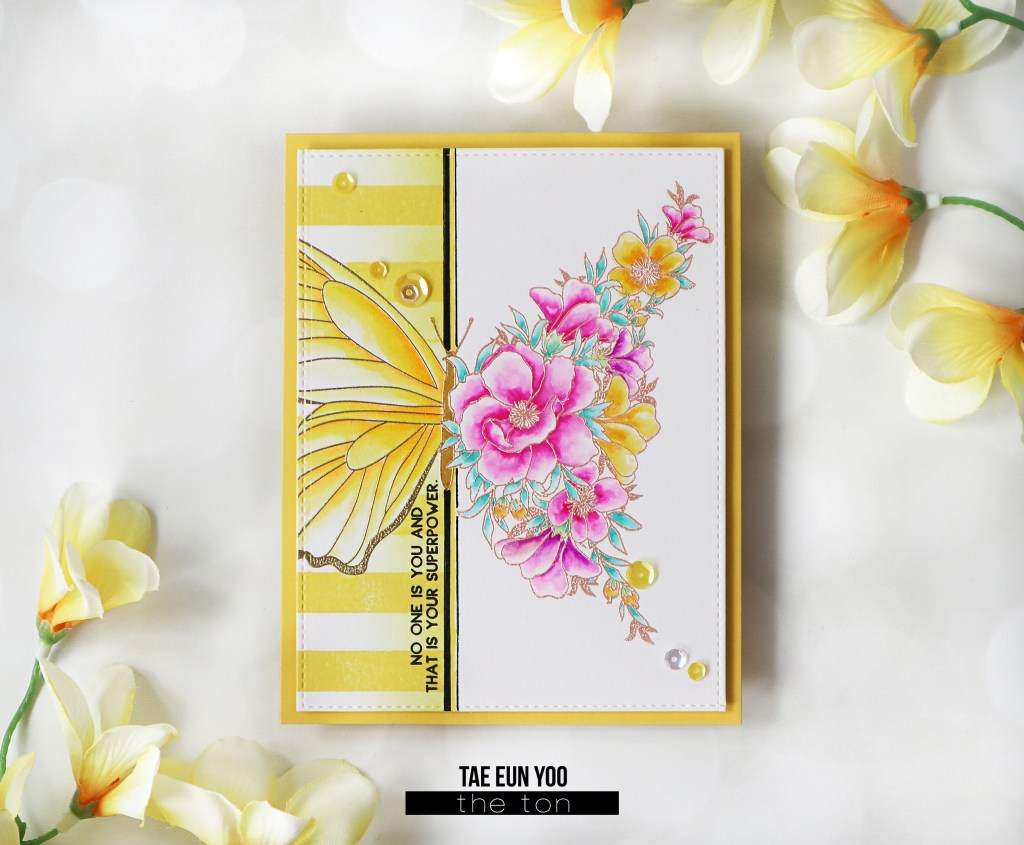
Transformation, 5.75 x 5.75 Photopolymer Stamp Set
Our Transformation set features a beautiful butterfly and floral hybrid image that you can color in for your next project! This set also features individual floral elements so you can customize your own arrangements making this an extremely versatile stamp set. The coordinating SVG digital cut file will be available here.
Projects by Effie. For the top right card, I heat embossed the Transformation image onto Bristol paper. Then I watercolored the image using Tombow Dual Tip markers. Then I blended our Miami Cool and Iris Blooms Dye Inks around the edges of my panel. Lastly, I stamped the sentiment with our Noir Dye Ink.
For the bottom left card, I selectively heat embossed the floral wing portion of the Transformation stamp and then watercolored the images with Tombow dual tip markers. Lastly, I embellished my card using our Gold Medallion sequins.
Projects by Effie. For this card, I stamped the floral images using our Noir Dye Ink. Then I cut and colored out the images using Tombow markers. Next I created my blended panel by blending our Soft Garnet ink using makeup brushes. For the grid background, I used our Small Grid Stencil (created from our SVG cut file) and Thermoweb’s White Pearl Metallix Gel.
Be sure to subscribe to our YouTube Channel for more inspiration! I update our channel on a weekly basis!
Sweet Bouquet, 4×6 Set
Our newest floral cluster stamp is our Sweet Bouquet! This set features a large stamp that is great to color with several sentiments to create all occasion cards. The coordinating SVG digital cut file will be available here.
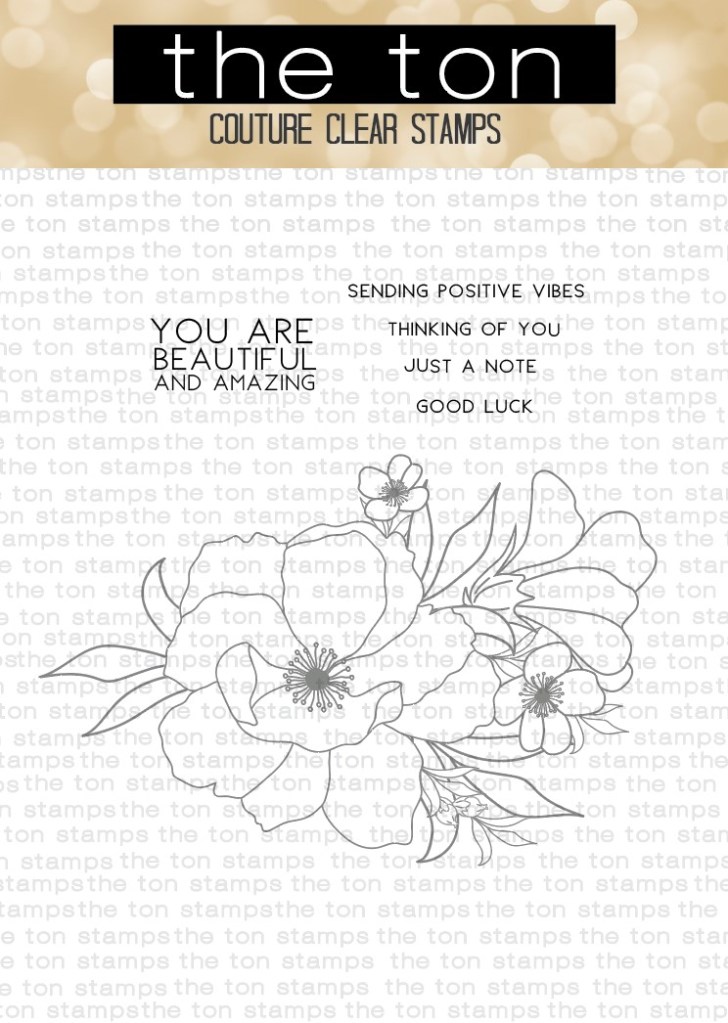
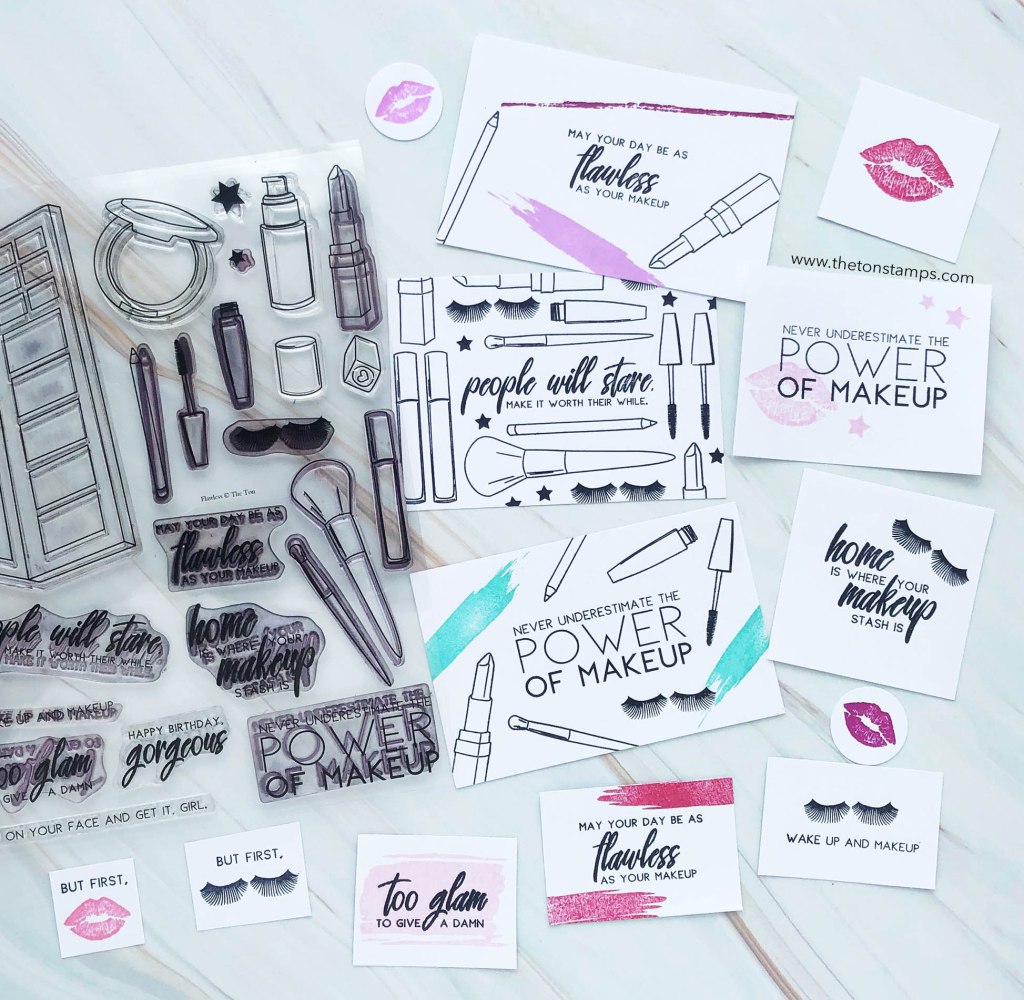
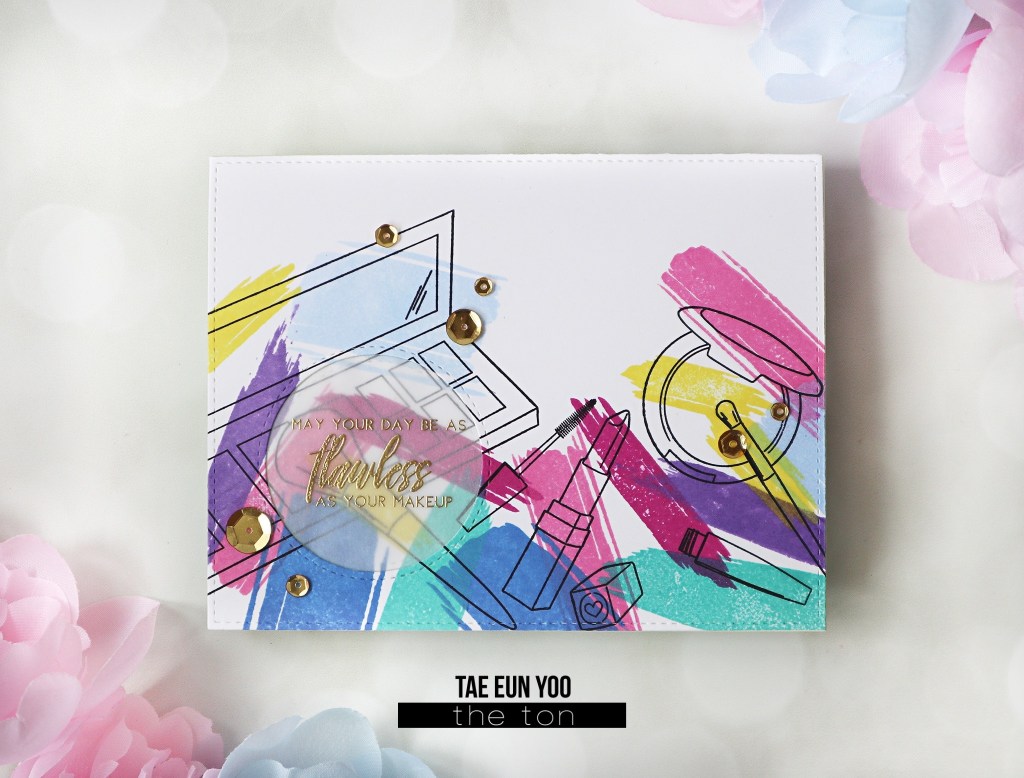
Our new Swatch It set features several different kinds of bold brushstrokes. Pair this set with our new Better in Red or Flawless stamp sets! Or use it alone for a more graphic result! Keep scrolling to check out how the team used this set with our new makeup themed stamps!
Better in Red, 6×6 Set
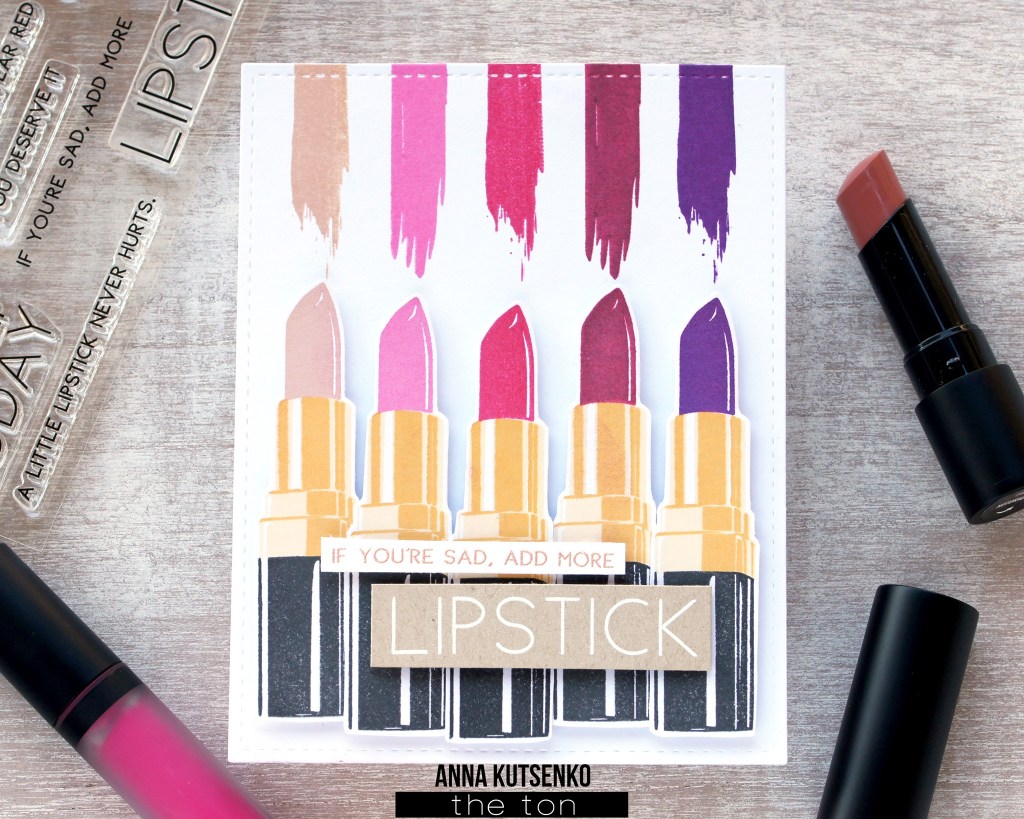
Our new Better in Red set features layering lipstick stamps with chic and fun sentiments! The coordinating SVG digital cut file will be available here.
With our new Better in Red set, I created some fun scrapbooking embellishments and ephemera. This set also coordinates well with our Smooched stamp set!
For the layered lipsticks, I used the following inks: Noir Dye Ink for the base, Vanilla Frosted Cupcake and Beach Blondie for the gold hardware and Plum Wine for the lipstick color.
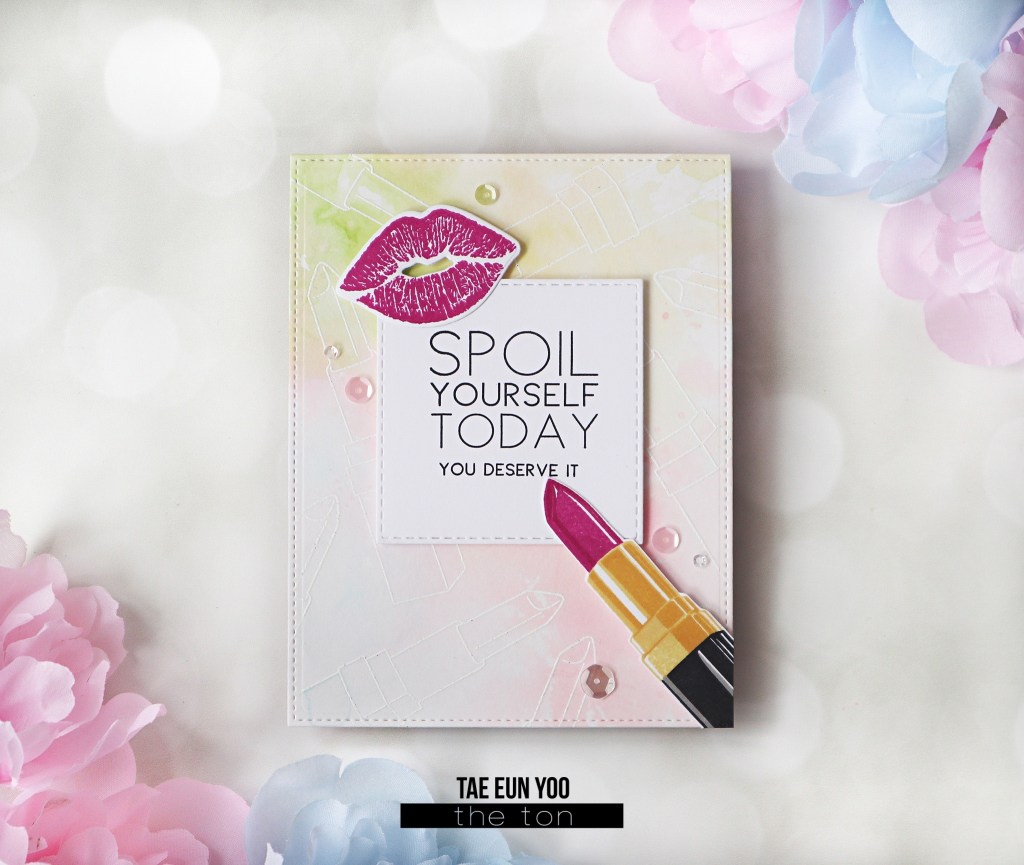
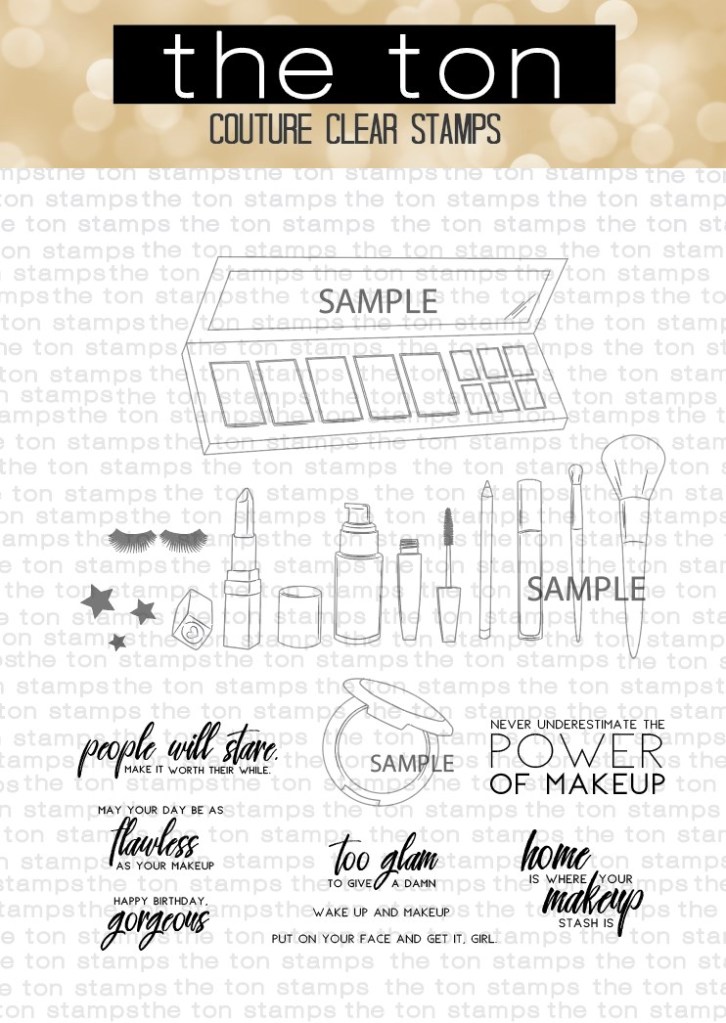
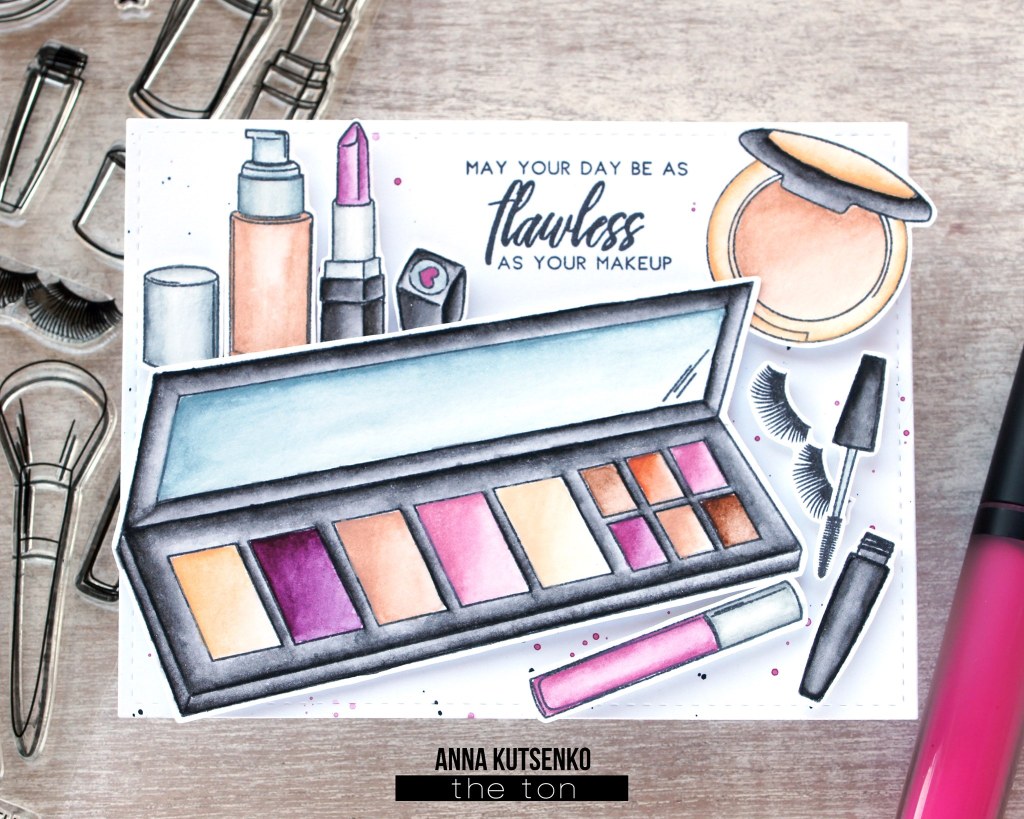
Next up is our Flawless stamp set! This set features chic makeup images so that you can create fashionable stylized projects! The coordinating SVG digital cut file will be available here.
I created more scrapbooking embellishments and ephemera using our Flawless and Smooched stamp sets.
Next up is our Autumn Sweater Stamp! This is such a fun background stamp. I designed our Christmas Sweater stamp in the past and thought I’d create a fall version. This one has squirrels in it! How fun whimsical is this?
White heat embossed on colored cardstock.
Project by Effie. For this card, I white heat embossed the Autumn Sweater Background onto light coral cardstock and trimmed it about an eighth of an inch on each side. I set that aside and stamped the squirrel and leaf stamps (from our Oak Leaf Print set – below). For these smaller stamps, I used our Spiced Chai, Lipstick red and Found Topaz inks. Next I cut these images out and arranged them onto a circle die cut. I popped it up along with the sentiment onto my white embossed background and finalized my card with Gold Medallion Sequins.
Oak Leaf Print, 4×6 Photopolymer Set
Next up in our seasonal lineup is our Oak Leaf Print! This is the fall version of our Folk Art Christmas Tree stamp. I wanted to create a whimsical fall themed stamp based on this folk art theme. Use the large oak leaf as a focal point or use the smaller stamps to create your own fall scene! The coordinating SVG digital cut file will be available here.
Stamped using a combination of our inks: Amber Citrine, Peach Blossom, Coral Cavern, Spiced Chai
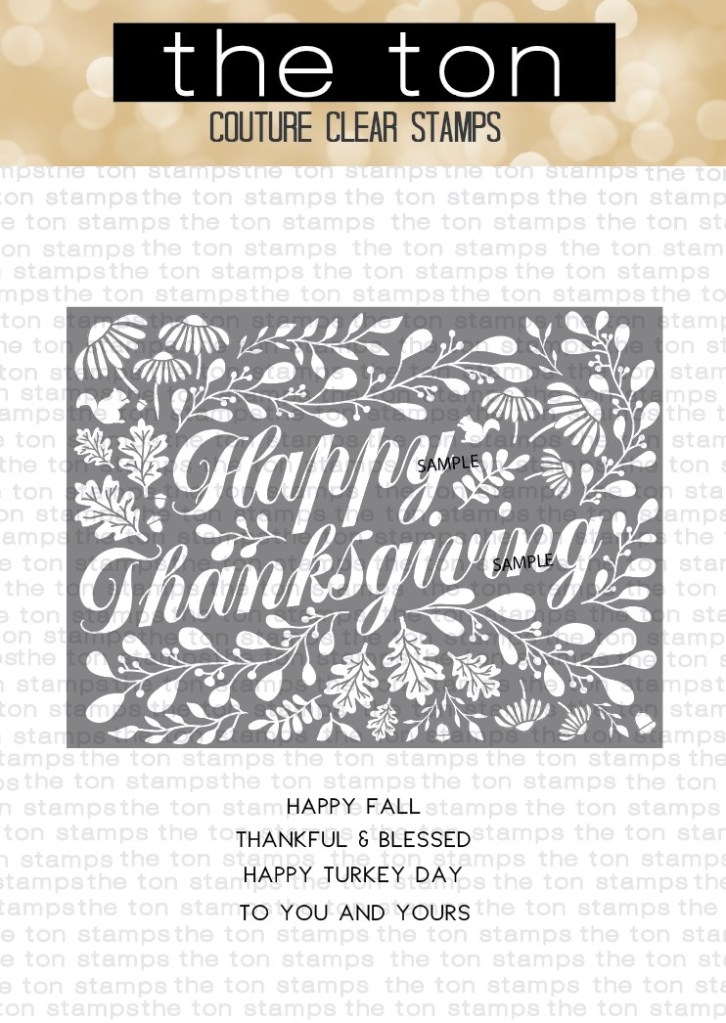
This is the Thanksgiving version of our Vintage Christmas Block! It will be easy to mass produce your Thanksgiving card this year with our new block print design stamp.
I stamped this new fall themed block design using our Cocoa Collection inks and Peach Blossom, Coralline Hybrid and Coral Cavern inks. I also used the butterflies from our Sunny Folk Garden to embellish the cards.
I created an ombre effect using our Peach Blossom, Coralline and Coral Cavern inks. I used my Misti to stamp each color layer and obtain this perfect ombre result.
GIVEAWAY
We have two stamp giveaways to be won for our debut days! We’ll choose one winner from today’s mini hop and one winner from tomorrow’s mini hop. Leave a comment on each blog on each mini blog hop day as we debut our new release! Winners will be announced on August 27 here on our blog.
Now that you’ve checked out Day 1 of our release, head on over to each design team member’s blogs for more details on their new release projects! Be sure to leave them some love to be entered in our giveaway.
I hope you enjoyed today’s gallery of new designs and inspiration projects by our talented team! Join us back here tomorrow at 9am EST for the rest of our release!
Thank you all so much for stopping by and making The Ton a part of your day. Your next stop is Tae Eun!
Hello and welcome back to blog for the final blog hop of our 4th Anniversary celebration!! We hope you’ve been enjoying our week long celebration. If you missed the previous release days/hops, you can check out our 4th Anniversary Debut post here; Blog Hop Day 1 here; Blog Hop Day 2 here and Blog Hop Day 3 here. Scroll down for giveaway and promo details!
Our new Gifted, 6×8 Set is our promotional free gift with purchase GWP set for this release. This set is a free gift with $175* purchase.
This promotion does not apply to prior purchases*. The threshold amount is calculated BEFORE taxes and shipping and AFTER any gifts codes/giveaway codes are applied. This promotion cannot be combined with other specials, promotions or giveaway codes. This promotion will continue until January 8, 2019 at 11:59pm EST or until supplies last. Limit one incentive package per customer. No coupon code needed. All incentive products will automatically be added to qualified orders (they will not show up in your cart but will be added to orders as we pack them).
**There must be a new Anniversary 2019 Release product in your order to qualify for our GWP promotion.** These GWP products are available for immediate purchase.
Let’s begin our hop! Here’s the fabulous lineup for today:
For my first card, I used our Coming Up Peonies and did a little bit of watercoloring with Ken Oliver Color Bursts.
I started off by white heat embossing this beautiful large peony cluster image from our Coming Up Peonies onto watercolor paper. Once embossed, I did a little bit of loose, wet in wet watercoloring. I started off by applying clean water to the largest peony petals.
Be sure to subscribe to our YouTube Channel for more inspiration! I update our channel on a weekly basis!
Then I dropped in bits of Peony Color Bursts and then some Marigold Color Bursts for a two toned look. I used the same pigments for the peony buds. Once the warm colors were down, I used Lime Color Bursts for the stems and leaves. I made sure to watercolor a little bit outside the embossed lines to give it a more artsy effect.
Once I finished painting, I trimmed my panel into a size that’s slightly smaller than A2. Next I stamped the Good Luck sentiment with Caviar Hybrid ink and then added some Clear Rhinestones to finish my card.
I love the amount of white space of the panel against the bright color bursts!
This is more of a multi step stamp set and the results are really pretty! In the end, you have a multi toned chic lantern with floral elements and a candle.
I started off stamping the lantern frames. The frames should be stamped in three parts. Once the frames were stamped in our Found Topaz and Aspen Cocoa inks, I stamped the leaves of the florals cluster in Bright Emerald and Ocean Teal Dye Ink. Then there are two 2-step floral clusters consisting of four stamps in total. For the larger cluster, I used a combination of Soft Garnet and Red Sangria. For the smaller cluster, I used Amber Citrine and Coralline inks.
Once the frame of my lantern and floral clusters were stamped, I went ahead and stamped the candle. I used our Crystal Pewter first. Then I used the rock and roll technique to partially ink up the right side of the same candle stamp. I then stamped the candle again giving the image a bit of shading. Then I stamped the flame in Amber Citrine and the two step rope stamps in Warm Hazelnut and Found Topaz inks.
Couture Color Inks
I used the same inks for the two smaller lanterns in my card.
Once my lanterns were complete, I stamped my sentiment with our Aspen Cocoa Ink and finished my card by adding some Bermuda Blue sequins.
GIVEAWAYS – We have giveaways everyday on these mini hops! Win a stamp of choice from our 4th Anniversary Release. To enter, leave a comment on each blog each day. We’ll choose one winner per day (4 winners total) and announce the winners on our blog by January 12. The comment period for all release giveaways will close on January 11 at 7pm EST.
Now that you’ve seen my projects, head over to the talented Isha’s blog!
Thank you all for celebrating our 4th Anniversary with us the past few days!! It’s truly amazing to make it this far and I hope to continue to introduce fresh and unique designs to this industry for many more years! Thank you again for making this possible!
Hello and welcome back to Day 3 of our 4th Anniversary Release Blog Hops! Today, we have a special guest for our blog, Heba Alsibai from My Little Journal. We’re very excited to have her joining us on our blog today! Her talent is truly amazing. She has really inspired me to begin scrapbooking in a traveler’s notebook.
We have giveaways on all 5 days of our release. Head over to our 4th Anniversary debut post here. Day 1 of our blog hops can be found here. Day 2 can be found here.
For our 4th Anniversary, we released 9 new stamp designs with coordinating dies.
Our new Gifted, 6×8 Set is our promotional free gift with purchase GWP set for this release. This set is a free gift with $175* purchase.
This promotion does not apply to prior purchases*. The threshold amount is calculated BEFORE taxes and shipping and AFTER any gifts codes/giveaway codes are applied. This promotion cannot be combined with other specials, promotions or giveaway codes. This promotion will continue until January 8, 2019 at 11:59pm EST or until supplies last. Limit one incentive package per customer. No coupon code needed. All incentive products will automatically be added to qualified orders (they will not show up in your cart but will be added to orders as we pack them).
**There must be a new Anniversary 2019 Release product in your order to qualify for our GWP promotion.** These GWP products are available for immediate purchase.
**We’re also issuing DOUBLE REWARDS POINTS for all purchases made from January 4 to January 7, 2019 at 7pm EST.
Let’s move onto to today’s hop!! For today’s lineup we have some very talented guests who specialize in scrapbooking! Let’s start hopping to check out these projects!
For today’s project, Heba used our Hustle and Grind sentiment set to create this awesome traveler’s notebook spread.
I love Heba’s layouts! I’m always so inspired after watching her videos 🙂
GIVEAWAYS – We have giveaways everyday on these mini hops! Win a stamp of choice from our 4th Anniversary Release. To enter, leave a comment on each blog each day. We’ll choose one winner per day (4 winners total) and announce the winners on our blog by January 12. The comment period for all release giveaways will close on January 11 at 7pm EST.
We only have one day left to celebrate! Join us tomorrow for the last day of our blog hops to celebrate Year 4. So head on over to the next stop of today’s hop – the awesome Tazhi!
Hello and welcome back to Day 2 of our Anniversary Blog Hops! We’re continuing to celebrate our 4th Anniversary! If you missed Day 1 of our hop, head over here (Our Day 1 hop post contains all the details on our free gift with purchase promo and double points promo going on right now). If you missed our Anniversary Release debut blog post, head over here. All of our new products are available for purchase now and new release orders will begin to ship on the 11th.
Today’s lineup of talented team members and guests are:
For my project today, I used our beautiful Smiling Cosmos set. This is our new 4×6 floral cluster stamp. The actual stamp is large! It almost covers an entire 4×6 panel.
Be sure to subscribe to our YouTube Channel for more inspiration! I update our channel on a weekly basis!
I started off by heat embossing the floral image onto watercolor paper with our Rose Gold Embossing Powder. Then I did some loose watercoloring with Ken Oliver Color Bursts. For my cosmos petals, I added three different colors: Cerulean Blue, Indigo and Orchid. I love the three toned look to the petals once the paint finally dried.
Once the petals were painted, I painted the leaves with Olive Green color bursts. There are other smaller foliage and sprig elements in the cluster which I painted with Turquoise color bursts. The painting process went very quickly for this card since the design is more stylized.
Once my panel was dried, I die cut the watercolor panel into a stitched A2 panel using the largest die from our Double Stitched Rectangles Large Die Collection. I stamped (Caviar Hybrid Ink) my sentiment from the same set, trimmed it out and then popped it up onto my panel. Next, I mounted the painted panel onto a top folding A2 base and added some Gold Medallion sequins to embellish my card.
That’s all from me today! Your next stop on this hop is our super talented DT member Tae Eun!
GIVEAWAYS – We have giveaways everyday on these mini hops! Win a stamp of choice from our 4th Anniversary Release. To enter, leave a comment on each blog each day. We’ll choose one winner per day (4 winners total) and announce the winners on our blog by January 12. The comment period for all release giveaways will close on January 11 at 7pm EST.
We still have two more days of hops left! Join us tomorrow and Tuesday to continue celebrating our 4th Anniversary.
Hello and welcome back to The Season! Today is the first day of four blog hops. We’ll continue to celebrate our 4th Anniversary with our team and special guests everyday until January 8th.
For our 4th Anniversary, we released 9 new stamp designs with coordinating dies. All products are available for purchase now and will be ready to ship beginning 1/11/19. Head over here to our Anniversary Release debut blog post if you missed it yesterday!
All of our new products are available for purchase now and will begin to ship on January 11. Be sure to scroll down for promotion and giveaway details!
For our mini hop today, we have some super talented guests joining us!
For my first pair of projects, I used our GWP Promotion stamp: Gifted. This set features three different gift box clusters (in addition to individual gift boxes). I really love this set for it’s ability to customize the different tones for each of the different gift boxes in the clusters since they are spaced out. You can just ink up different portions of each stamp creating a multi toned stamped image.
Be sure to subscribe to our YouTube Channel for more inspiration! I update our channel on a weekly basis!
This is our promotional free gift with purchase GWP set for this release. This set is a free gift with $175* purchase.This promotion does not apply to prior purchases*. The threshold amount is calculated BEFORE taxes and shipping and AFTER any gifts codes/giveaway codes are applied. This promotion cannot be combined with other specials, promotions or giveaway codes. This promotion will continue until January 8, 2019 at 11:59pm EST or until supplies last. Limit one incentive package per customer. No coupon code needed. All incentive products will automatically be added to qualified orders (they will not show up in your cart but will be added to orders as we pack them).
**There must be a new Anniversary 2019 Release product in your order to qualify for our GWP promotion.** These GWP products are available for immediate purchase.
**We’re also issuing DOUBLE REWARDS POINTS for all purchases made from January 4 to January 7, 2019 at 7pm EST.
For my first card, I stamped my gift cluster using a variety of our Couture Color Inks (Hot Tourmaline, Bright Emerald, Cosmopolitan Pink, Azurite, Cali Blue and Hollywood Star).
Once stamped, I fussy cut my stamped image (dies are available). Next, I rose gold heat embossed our Delicate Grid background stamp onto white cardstock. Then I created a border using the two largest dies of our Double Stitched Rectangles (large) die collection. Then I assembled my card by mounting the border onto the rose gold embossed background. I additionally popped up my gift cluster.
For my sentiment, I used our Hugs word die (die cut from black cardstock). I adhered this directly onto my background. The Happy Birthday portion of the sentiment is from our Basic Banners (white heat embossed onto black cardstock and popped up). Lastly, I embellished my project using our Gold Medallion Sequins.
For my second card, the process was almost identical with a different background stamp. First, I stamped our Bare Tones background in Cali Blue ink. Then I die cut a white stitched panel using the second die from our Double Stitched Rectangles Large Die Collection. Then I assembled the background panel, white stitched panel and Gifted stamped cluster image together. I added our Gold Medallion sequins to complete my card.
For my next pair of cards, I used our layered Power Pumps set which I am currently obsessed with!
My first card was very simple (left)! I stamped the three step layered heels stamps in our Caviar Hybrid Ink, Smoky Quartz (highlight) and Red Sangria Hybrid). The sentiment was also stamped in our Caviar. Lastly, I trimmed my panel which I popped up onto a side folding A2 base.
The second card was created in a similar fashion. I just changed up my ink colors (Azurite, Cobalt Breeze and Vanilla Frosted Cupcake) and added more panels to layer my mats for more contrast. I also added the jeweled element to my shoes (stamped in our Caviar Hybrid Ink and Crystal Pewter).
GIVEAWAYS
We have giveaways everyday on these mini hops! Win a stamp of choice from our 4th Anniversary Release. To enter, leave a comment on each blog each day. We’ll choose one winner per day (4 winners total) and announce the winners on our blog by January 12. The comment period for all release giveaways will close on January 11 at 7pm EST.
That is all from me today. Thank you for making The Ton a part of your day today! Your next stop on today’s hop is the talented and awesome Amy!
Hello and welcomeback!! Today we’re celebrating our Fall 2018 release with a blog hop! We have some talented guests and amazing team members showcasing our new designs. For more details on our release, head over to this post. For this release, we have 12 new stamps, coordinating dies, one Pop Up die and…. a Snowflake Layering Coverplate Die collection! All new products are available and ready to ship now!
Also, Happy World Cardmaking Day! This is the day that kicks off holiday cardmaking season. So I have a post that is jam packed with Christmas cards. Enjoy!
GIFT WITH PURCHASE PROMOTION
This promotion does not apply to prior purchases*. The threshold amount is calculated BEFORE taxes and shipping. This promotion will continue until October 7 2018 at 11:59pm EST or until supplies last. Limit one incentive package per customer. No coupon code needed. All incentive products will automatically be added to qualified orders (they will not show up in your cart but will be added to orders as we pack them).
Spend $150 or more: Receive a 4×6 Christmas Tree set;
Spend $250 or more: Receive a 6×8 Wonderland Print Bundle (and a Christmas Tree set).
**There must be a new Fall 2018 Release stamp in your order to qualify for our GWP promotion.** These GWP products are available for immediate purchase.
We also have some giveaways so be sure to scroll all the way down for all the details. Winners from our 9/24 post will be posted at the same time as our hop winners in a few days. Thank you for your patience!
For today’s hop, here is a list of all of the fabulous participants:
Snowflake Layering Coverplate Dies (A and B), 4.25 x 5.5in Coverplate Dies
This is our newest layering die collection which features an A and B plate. When combined, the result is a fun and whimsical design perfect for winter themed cards.
In this photo, I layered both A and B coverplate die cuts. The color combinations for these dies are truly endless. Just add a sentiment for a quick holiday card. Also, break out all of your colored cardstock for this die bundle!
For this next photo, I used the A plate die cut only and adhered it over white cardstock. Then I took the design a step further by using some of the snowflake die cuts that are produced with each pass and layered some of elements over each other for a more intricate and fun layered snowflake effect.
The beautiful thing about our Snowflake Coverplate bundle is that there’s more to the bundle than just layering the cover die cuts. You can take all of the negative snowflake die cuts and layer the elements together to make your own layered snowflake embellishments. This is a great way to stretch these dies! Also, layering the snowflakes and coming up with different color combinations is really fun and addicting! You can also try adding some Blizzard Hugs die cuts to your layered snowflakes for an additional design element!
For this card, I simply layered both coverplate die cuts (I cut A from mint cardstock and B from white cardstock). Prior to mounting the layered die cuts onto a base, I adhered some of our Silver Ribbed Glitter Adhesive paper as a background. For the sentiment, I silver glitter heat embossed the large sentiment from our Brushed Merry stamp set. Then I die cut the sentiment three times and layered them together to create an embellishment type sentiment. Lastly, I stamped the christmas sentiment in our Noir Dye Ink onto a sentiment strip and popped up across the merry. This was a very simple card to make – little effort but high impact!
Be sure to subscribe to our YouTube Channel for more inspiration! I update our channel on a weekly basis!
For this card, I started off by layering some of my leftover snowflake die cuts from the A+ B coverplates. I also added a Blizzard Hugs snowflake die cut behind my layered snowflake for an added embellishment. Once my snowflake was assembled, I adhered it onto a round die cut and set it aside. Next I blended some Bright Emerald and Hot Tourmaline onto the bottom portion of an A2 panel. I blended the color towards the top of the panel for a minty ombre effect. Next, I die cut the panel using the largest die from our Double Stitched Rectangles Small Die Collection. Then I used the A Plate in our Snowflake Layering Cover Dies and used that as a stencil to apply embossing paste onto my blended panel. This was matted onto a piece of black carstock which was then adhered onto a cardbase. For my sentiment, I gold glitter heat embossed the large Brushed Hugs and die cut it three times to create my sentiment embellishment. Next I adhered the sentiment onto my card and added the blizzard sentiment which was stamped in our Noir Dye Ink.
For my next card, I white heat embossed our new Coming Up Poinsettias onto watercolor paper and then used Color Bursts (Alizarin Crimson + Lime Green) to color in the outline images. After I painted the poinsettias, I heat embossed more foliage using the foliage cluster image from our Cardinal Friends. Once my background was complete, I die cut the panel into an A2 sized stitched panel and set it aside. Next I stamped this adorable cardinal and foliage cluster images onto cardstock with our Caviar Hybrid copic friendly ink. After I colored the images with copics, I die cut them and popped them up on my watercolored panel.
For my next card, I stamped the clusters in our Wonderland Print set (Bright Emerald Ink, Orchid Crush Ink and Rose Gold Embossing). Then I die cut the panel using the largest die from our Double Stitched Rectangles Small die collection. I also die cut the inner negative space of my stamped border using the coordinating die. I set my stamped window panel aside to blend some Bright Emerald and Hot Tourmaline dye ink onto my card base. I wanted an minty ombre effect to show behind my shaker window. Next I created my shaker window using acetate and dimensional foam tape. Before I filled my shaker window, I stamped this large sentiment using our Noir Dye ink. Then I filled the window with some 3mm Glass Slippers sequins and beads (Diamond, Flurries and White Satin Beads). Lastly, I mounted the window panel over the base to complete my shaker card.
For my final card, I created a simple stamped project using our Blizzard Hugs set. I tamped the mid sized and smallest snowflake burst stamp a few of times onto an A2 panel in our Cali Blue Dye Ink. Next I stamped the smaller solid snowflakes in our Blue Diamond and Azurite inks. Lastly, I stamped the sentiment (Noir Dye Ink) to finish this simple card.
Giveaways
For today’s hop, there are giveaways on each stop so be sure to leave a comment on each blog for a chance to win a stamp set of choice from our new release! The comment period for this giveaway will close on Monday, October 8 at 11:59pm EST. Winners for this giveaway and our Release Debut Post giveaways will be announced shortly after the 8th.
I hope you enjoyed my projects! Your next stop is the talented Svitlana!
Hello and welcome back to The Season for our Spring 2018 Release Blog Hop! I hope you enjoy the last two days of product debuts. We introduced a total of 14 new stamps, coordinating dies and 3 standalone dies.
For our Spring 2018 Release, we have two new Gift with Purchase (GWP) items: Nesting Peonies (4×6 Clear Set) and Toned Squares (6×8 Clear Set).
This promotion does not apply to prior purchases*. The threshold amount is calculated before taxes and shipping. This promotion will continue until April 10, 2018 at 11:59pm EST or until supplies last. Limit one incentive package per customer. No coupon code needed. All incentive products will automatically be added to qualified orders (they will not show up in your cart but will be added to orders as we pack them).
Spend $200 or more: Receive a 4×6 Nesting Peonies set;
Spend $250 or more: Receive a 6×8 Toned Squares set (and a Nesting Peonies set).
**There must be a new Spring 2018 Release stamp in your order to qualify for our GWP promotion.** These GWP products are available for immediate purchase.
For my first pair of projects, I used our new Pop-Up Peony designs. I made front panels that would not take away from the floral inside.
For the project on the left side in the photo, I used our Petal Cut Peony dies, Modern Labels and Geo Mountain Coverplate A design. I added additional Petal Cut Peony die cuts for the inner floral sections with my pink Pop-Up Peony for an all over cohesive design.
For the project on the right side, I used our 2 Piece Foliage Coverplate Die for the front panel which I die cut from our Matte Gold Adhesive Paper. I also used our Modern Labels for a clean and simple sentiment. The gold panel will be used for the front of my red Pop-Up Peony card. *For purposes of this photo, I did not attach the front facing panels onto my card bases*
For my next project, I watercolored our Dahlia Bouquet set. This is our newest 6×6 clear set and the bouquet image is larger than life!
Be sure to follow us on YouTube for more inspiration! I update our channel on a weekly basis!
I started off by white heat embossing the image onto watercolor paper. Then I painted the dahlias using my Ken Oliver Color Bursts in Peony, Fuchsia and Sap Green. Next I colored in my vase using my gold wink of stella marker. I also painted a shadow at the base of my vase to ground my bouquet onto my panel.
Once I finished painting the panel, I die cut the panel into an A2 sized panel using the largest die from our Double Stitched Rectangles Large Die set. This die also added stitching to the edges for some texture and interest.
Next, I white heat embossed the sentiment onto black cardstock and then popped up the sentiments right over my dahlia bouquet. Lastly, I added Clear Rhinestones to my project to give it a bit of bling!
GIVEAWAYS
Three new release stamps will be given away to random commenters from the hop participant blogs. To qualify, you must leave a comment on each blog on this hop. The comment period will close on Friday, April 6 at 5pm. Winners will be announced on our blog shortly after the comment period closes.
Hello and welcome back to The Season for Day 2 of our Spring 2018 Release! This is also the final day of sneak peeks so all of our new products are available for purchase now!All new release orders will begin to ship on Monday, April 9.
For this release, we have 14 new stamp designs and coordinating dies and 3 standalone dies. Be sure to join us on tomorrow for a fabulous blog hop with our talented team and guests! We have a giveaway for this release so make sure you scroll to the bottom of this post for more details.
For our Spring 2018 Release, we have two new Gift with Purchase (GWP) items: Nesting Peonies (4×6 Clear Set) and Toned Squares (6×8 Clear Set).
Created by Laura Jane using our Nesting Peonies.
This promotion does not apply to prior purchases*. The threshold amount is calculated before taxes and shipping. This promotion will continue until April 10, 2018 at 11:59pm EST or until supplies last. Limit one incentive package per customer. No coupon code needed. All incentive products will automatically be added to qualified orders (they will not show up in your cart but will be added to orders as we pack them).
Spend $200 or more: Receive a 4×6 Nesting Peonies set;
Spend $250 or more: Receive a 6×8 Toned Squares set (and a Nesting Peonies set).
**There must be a new Spring 2018 Release stamp in your order to qualify for our GWP promotion.** These GWP products are available for immediate purchase.
Let’s move on to our debuts!
Geo Mountain Layering Coverplate Dies (ABC Bundle) – Also available individually (A, B, C)
Our new layering coverplate dies allow you to add some great dimension and texture with three layering die cuts.
**The projects made using our Geo Mountain Layering Coverplates were cut using electric cutting machines since we did not receive the dies in time for release week. However, the dies will similarly cut all the pieces as represented in the photos below.
The newest addition to our Garden Cling stamps is our Blooming Peony Garden. This design is comprised of delicate outline peony images against a solid backdrop.
Our Peony Laurel set features a beautiful laurel image with outline peonies and buds that are perfect for coloring with your favorite mediums.
Peony Laurel Coordinating Dies
The coordinating dies for our Peony Laurel stamp set also features word dies that will cut out the stamped sentiments. You can also use the word dies as standalone wordplate dies without stamping the sentiments.
Our Dahlia Bouquet is the latest installment in our bouquet stamp collection! However, this Dahlia Bouquet is larger than life measure approximately … This is a great stamp for making quick cards since the image covers a large surface area.
Our Coming Up Dahlias feature a beautiful dahlia bloom accompanied by a trio of buds.
Now that you’ve seen the rest of our products debuting today, please enjoy the gallery of projects made by our talented team! There is a list of links at the end of the post to each DT member’s blogs for more details on their projects.
Created by Tae Eun using our Peony Duo and Toned Squares sets.
Created by Effie using our Peony Duo and Peony Laurel sets.
Be sure to follow us on YouTube for more inspiration! I update our channel on a weekly basis!
Created by Mayline using our Dahlia Bouquet Set and Bold General Greetings Wordplate Dies.
Created by Brenda using our Dahlia Bouquet Set and Hugs Word Die.
Created by Jenny using our Dahlia Bouquet Set.
Created by Tae Eun using our Dahlia Bouquet and Wild Dahlias Sets.
Created by Mayline using our Wild Dahlias and Friggin Fabulous Sets.
Created by Jenny using our Wild Dahlias Sets.
Created by Vera using our Wild Dahlias and Toned Squares sets.
Created by Mayline using our Coming Up Dahlias stamp.
Created by Jenny using our Coming Up Dahlias stamp.
Created by Anna using our Coming Up Dahlias stamp.
Created by Eunji using our Coming Up Dahlias stamp.
Created by Olga using our Coming Up Dahlias and All Occasion Confetti sets.
Created by Tae Eun using our Coming Up Dahlias stamp.
Created by Vera using our Coming Up Dahlias stamp.
Created by Eunji using our Coming Up Dahlias set.
So that’s it for our final day of sneak peeks for our Spring 2018 Release! We hope you enjoyed checking out our new release! Let us know in the comments which stamp was your fave from today. Be sure to tune back to our blog tomorrow for super mega blog hop with our team and guests!
You can also head over to our shop for our new release as everything is available for purchase. Shipping for all release orders will begin on Monday, April 9.
GIVEAWAYS
For each Release Day (1 and 2), we are giving away a stamp set of choice from the new release! To qualify, you must leave a comment on each day of our release posts – let us know which of our new stamps are your favorite for each day! Leave a comment on each Design Team member’s blogs to increase your chances of winning. The comment period for all giveaways will close on April 6, 5pm EST. Winners will be announced on our blog shortly after.
So head on over to our team member blogs for more details on their projects and be sure to leave a little love for each of them to up your chances of winning our giveaways.
Hello everyone and welcome back to our FINAL Anniversary Release Mini Hop! It’s been about a week since our release launch and I had so much fun creating with our new products. I hope you enjoyed seeing all the inspiration this week by the team and our special guests!
For this release, we released 23 new stamps, coordinating and standalone word dies, 9 new Couture Mixes and additional gilding. Everything is available in our shop now!
We have two free gifts with qualifying purchases: Daisy Duet and Peony Notes Bundle. This promotion does not apply to prior purchases***. The threshold amount is calculated before taxes and shipping. This promotion will continue until January 28, 2018 at 11:59pm EST or until supplies last. Limit one incentive package per order. No coupon code needed. All incentive prducts will automatically be added to qualified orders (they will not show up in your cart but will be added to orders as we pack them).
BOTH STAMPS ARE AVAILABLE FOR IMMEDIATE PURCHASE!
Spend $125 or more: Receive a 4×6 Daisy Duet set;
Spend $250 or more: Receive our Peony Notes Bundle (and a Daisy Duet set).
**There must be a new release stamp in your order to qualify for a GWP.**
Coordinating dies for these sets are also available now.
If you’re joining us today for the first time during our Release Week, head on over to Days 1, 2and 3 for a more in depth look at our new products!
For my first two projects, I used our GWP (Gift with Purchase) Daisy Duet set. I cannot stress how much I love coloring this stamp. The size of the blooms are really wonderful. So for today’s projects featuring this large image, I went with a cool and warm color palette to showcase how amazing this floral stamp is.
Photo taken against our Cabin and Natural Wood Backdrop Boards
For my first card, I did some masking (created with the coordinating die) and then rose gold embossed an entire panel using the large Daisy Duet image onto watercolor paper (Canson XL 140LB). I created my own background that is ready for watercoloring. I used my Color Bursts for this card (Lemon Yellow, Marigold, Sap Green and Terre Vert).
I started off by painting a base layer of Lemon Yellow onto my daisies. Then I added a second layer of color using my Marigold CBs but I went back in and added a more concentrated amount of Marigold to the inner petals. Next, I finished my painting by watercoloring my leaves – first layer of Sap Green, then Terre Vert. Next I took the largest die from our Double Stitched Rectangles (Small) set and die cut my panel and then adhered it to a side folding A2 base using strong double sided adhesive sheets.
Next I die cut my thank you sentiment from our Bold General Greetings Word Plate Die set. Using the negative space as a guide, I popped up my sentiment onto my card using pop up squares. Next, I added a white heat embossed sentiment strip (Peony Notes) to my card. Lastly, I embellished my card using our Clear Rhinestones.
Photo taken against our Cabin and Natural Wood Backdrop Boards
For my next card, I masked and rose gold embossed my Daisy Duet the same way as my first card.
However, I didn’t emboss the entire panel. I left about a third of the panel unembossed for my sentiment. I used my Shinhan watercolors for this card. Next I painted my daisies using a combination of blues and purple (Cerulean Blue, Ultramarine Deep and Permanent Violet). For my leaves, I used a combination of Gray and Neutral Tint.
Once my florals were painted, I added shading to the areas surrounding my clusters using my Indigo paint. Once my panel was dried, I rose gold embossed the thanks sentiment (Peony Notes) and added stitching to the edges of my panel using the largest die from our Double Stitched Rectangles (large) set. Lastly, I added our Clear Rhinestones to further embellish my card.
I hope you all liked my cards! Thank you so much for joining us these last couple of weeks to celebrate this milestone with us. As we go into our fourth year, I will continue to strive to bring you all fabulous, quality designs and products.
GIVEAWAYS
For each day of our Third Anniversary blog hop festivities (1/19 to 1/26), we’re giving away a stamp set of choice to a lucky commenter. To qualify, you must leave a comment on each blog stop for the respective giveaway day for which you are entering. The comment period for all giveaways closes on January 28, 5pm EST.