Heartfelt Blossoms

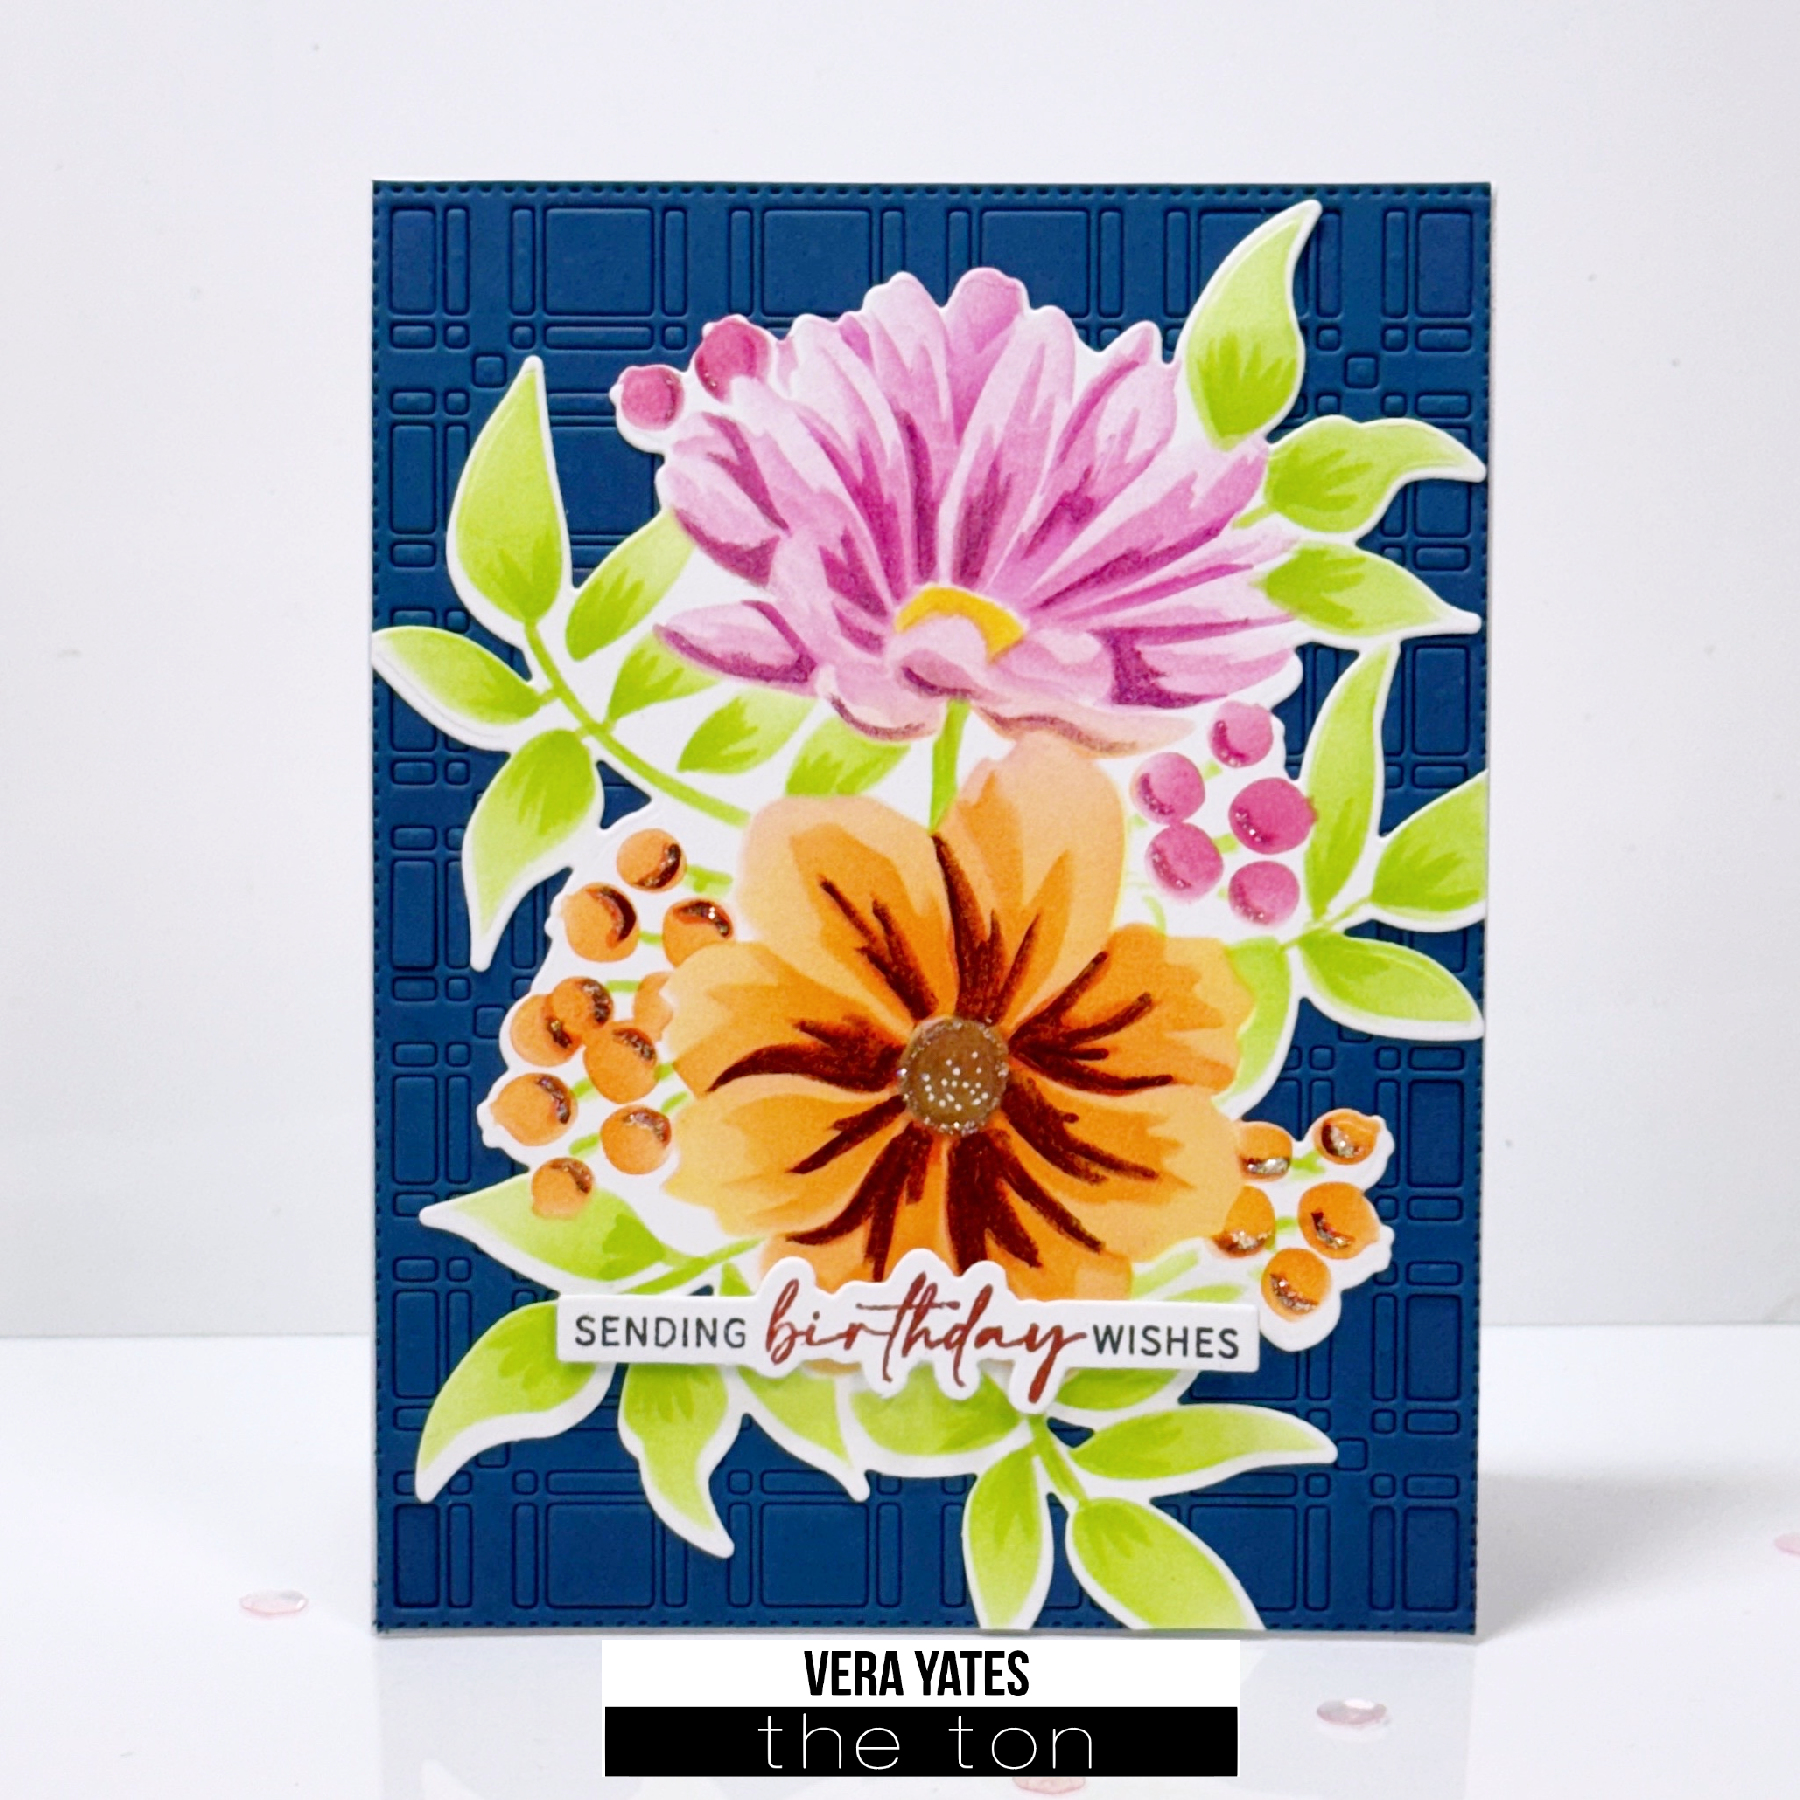
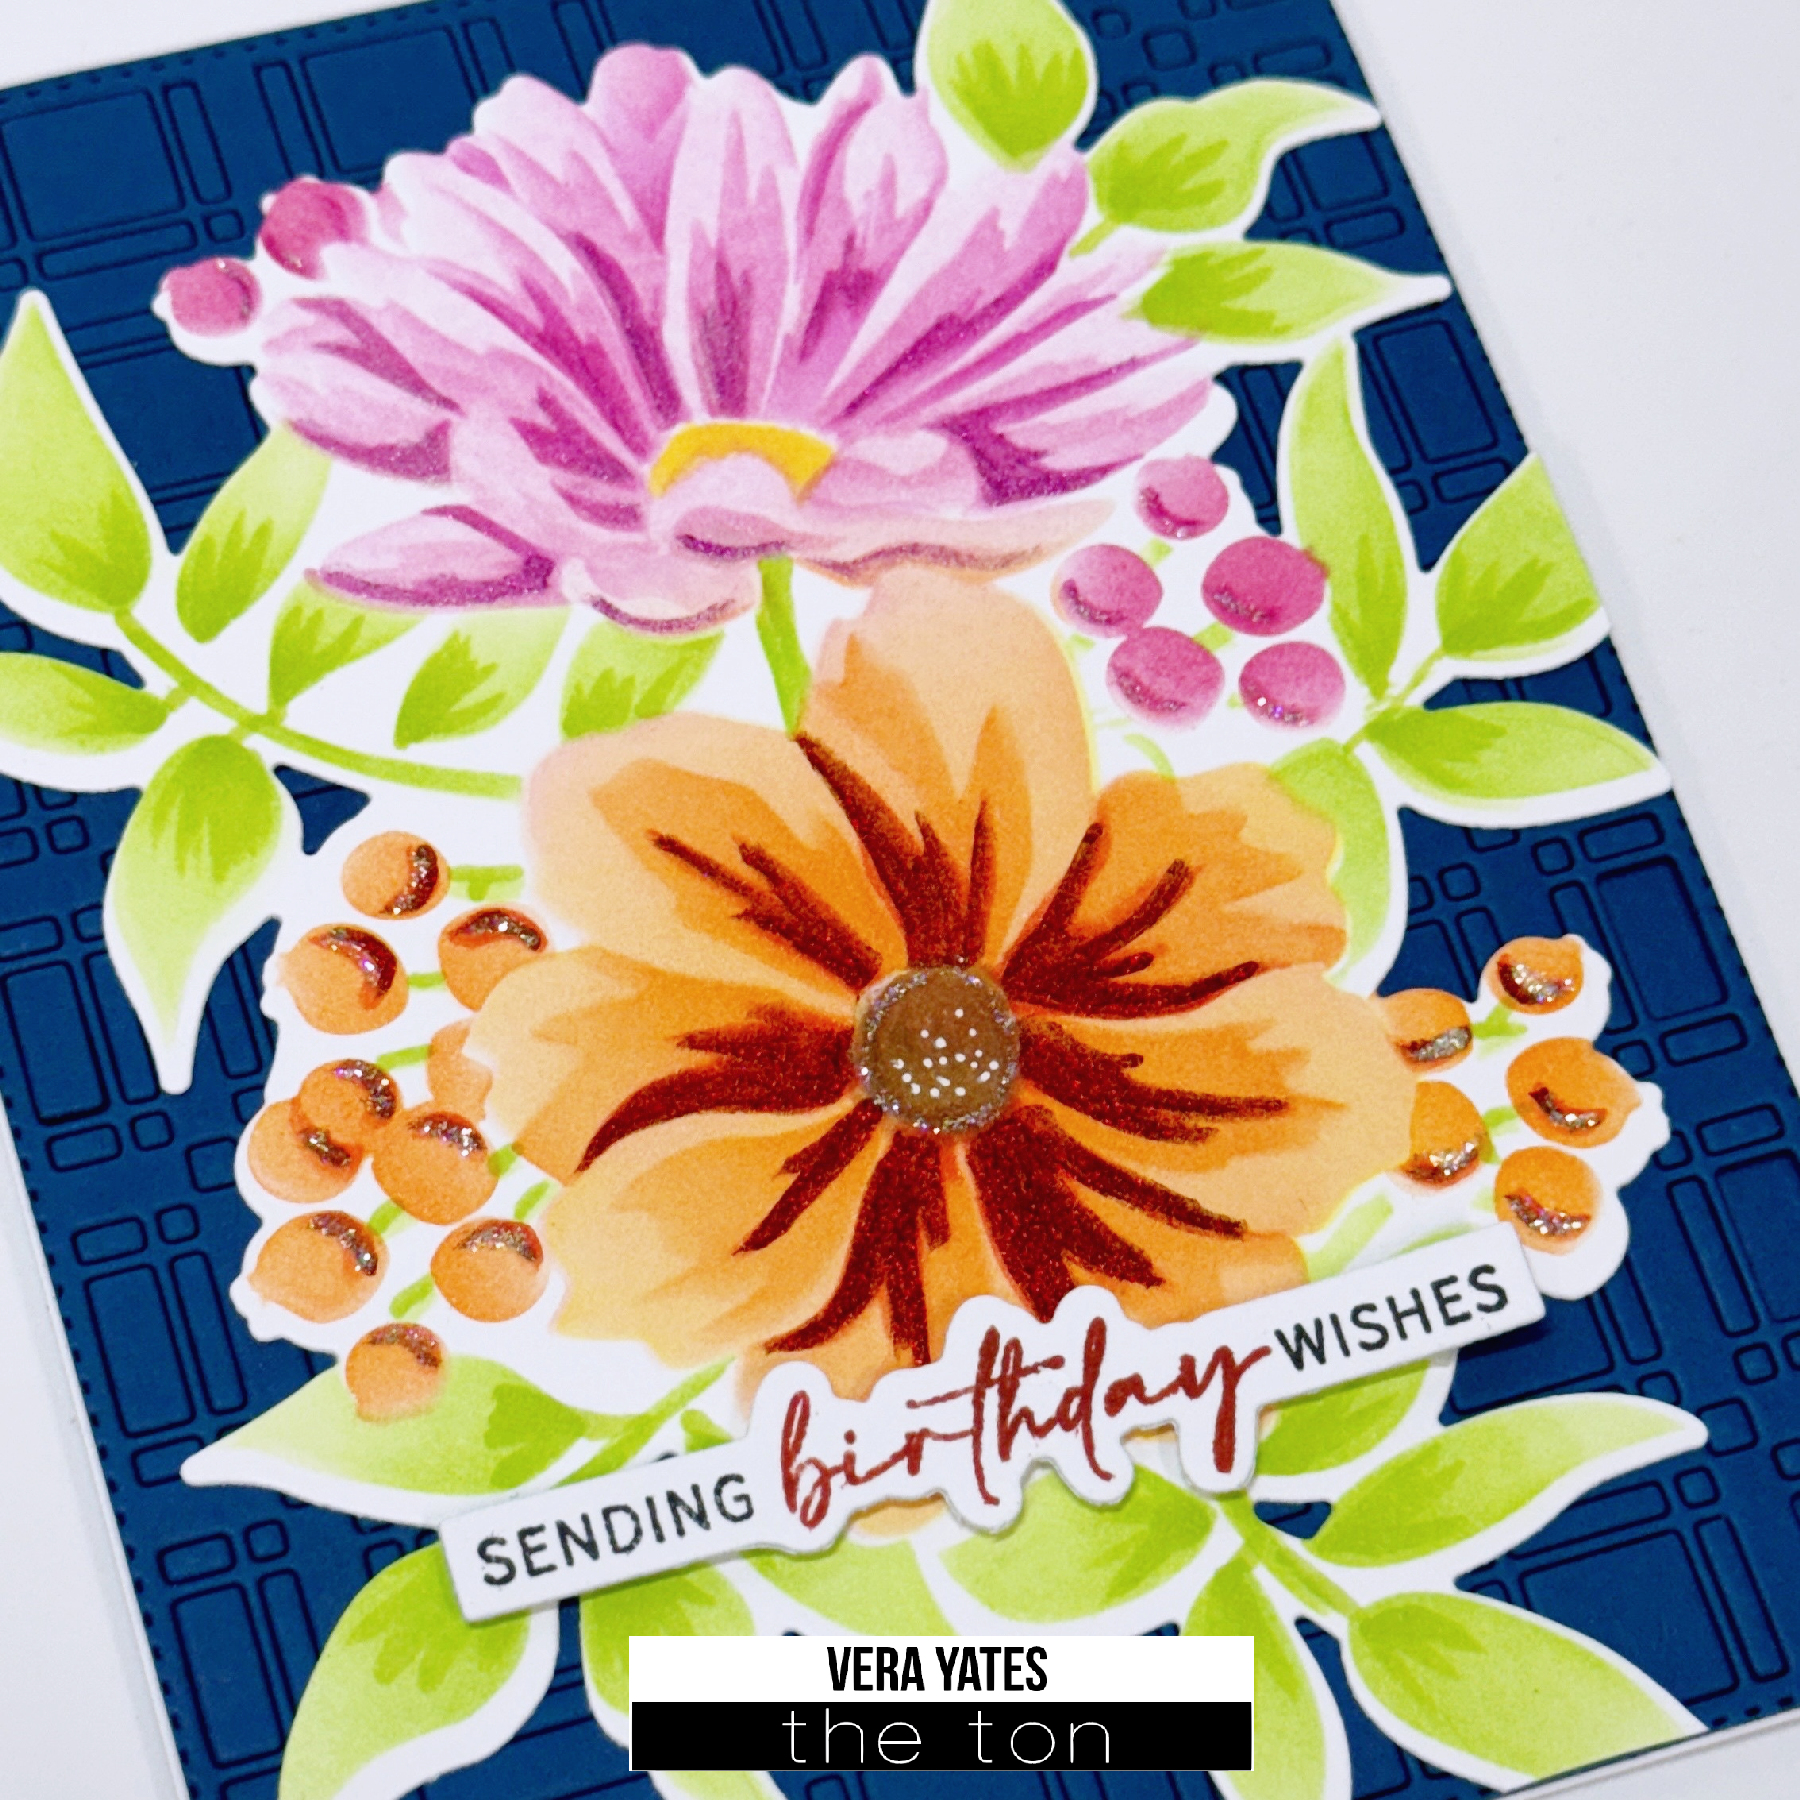
Hi friends. Vera here. Today I have a couple cards to share. Am showcasing one of my favorite set, Heartfelt Blossoms. Let’s get on with it, shall we? Here’s the first card.

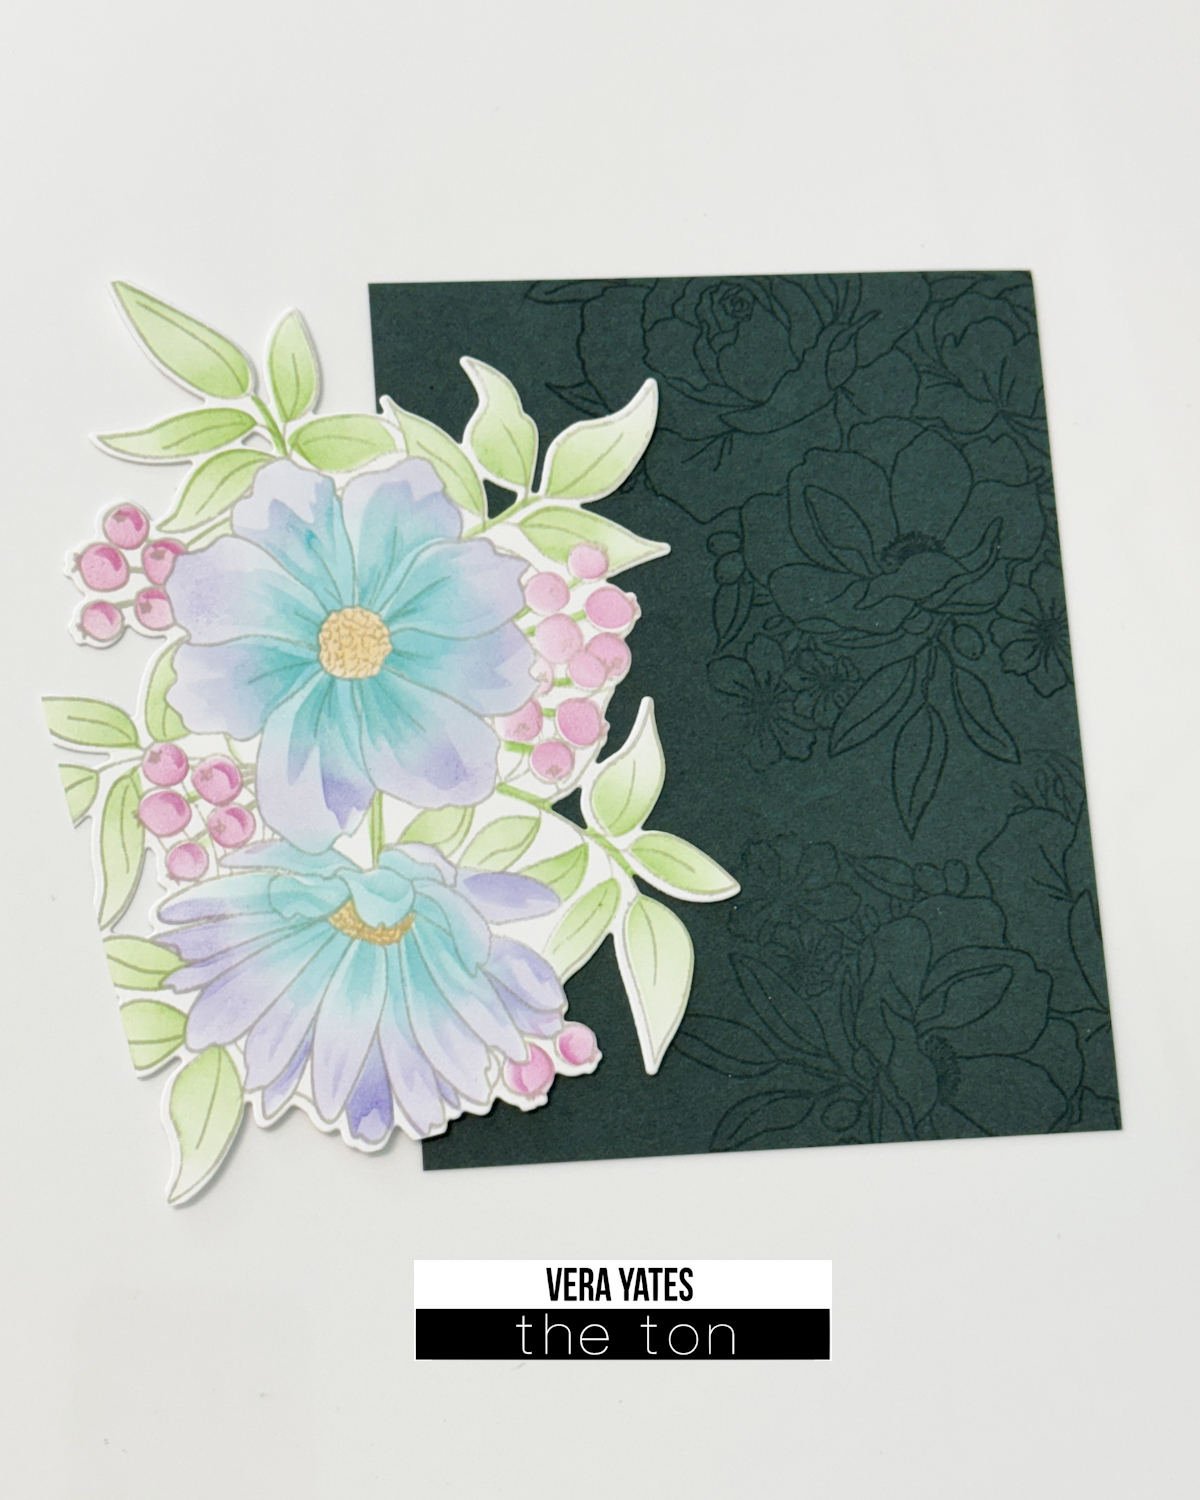
I start by stamping the flower bouquet from Noteworthy Blooms set with Hot Tourmaline. Once this done, I stamped the floral from Heartfelt Blossoms using Soft Ash. Then using Heartfelt Blossoms Layering Stencil set, I colored the flower using Bright Emerald, Iris Blooms and Matcha. For the berries I used Grand Fucshia. Finished with the coloring, I die cut the piece using Heartfelt Blossoms Coordinating dies.

I play with where I want to lay the colored piece and trim any extra part. Adhere the piece to the card base with foam adhesive. Finished with sentiment from Noteworthy Blooms.

I love creating with this technique and made a second card, except this one I did a vertical card and change the color of the card base.

I guess because I haven’t been crafting as much, when I do, I tend to do a couple cards. To be honest, part of it is so I don’t have to pull and clean the sets twice. Hah!! Can’t really call it lazy since making 2 cards it’s not lazy. 😀 Well friends, I hope you enjoy today’s cards. Till next time!

Heartfelt Blossoms

Hello friends. Vera here to start this week with inspiration on behalf of The Ton. I love that The Ton keeps coming out with matching stencils for previously released sets as seriously these stencils really help me in coloring the flowers beautifully in a jiffy. Way easier than using markers, even though I still enjoying coloring with markers. Today, I am highlighting Heartfelt Blossoms layering stencil set.

I love this flower set and I immediately play with this set as soon as I got it. I used Lemon Drop, Coralline, Coral Cavern, Dolled Up, Deep Peony, Aspen Cocoa, Soft Garden & Matcha ink.

As you can see above, I started with Lemon Drop ink on the first layer of the bottom flower, but when I almost done, the yellow just didn’t quite work out, so I blend the left over Coral Cavern on the brush on top of it to make the colors blend better. Once I am done with the stenciling, I die cut the piece with the Heartfelt Blossoms Coordinating die. Then I die cut the background using Single Plaid Coverplate die. And, honestly, by accident, I didn’t put the right layering when I run the die, so pretty much all the pieces still intact, and I actually like the way it look, so I keep all the pieces like that and use it for the background the way it is. Adhere the flower and finish with sentiment from Easy Expressions set.

At last minutes, I decided to add some shimmer and glitters. I used metallic watercolor and Stickles. As always, I think a little glitter never hurt. Hah! BTW, I was going to use the card below for today post actually, but then I received the Heartfelt Blossoms set. So, here’s a bonus card I made using Poinsettia Wreath Layering Stencils for your enjoyment. 🙂

Well peeps, that’s all I have for today. Hope your holiday season be a good one. May the joy and peace of the season be yours and your family this holiday season. Cheers…

Heartfelt Hugs

Hi all. Vera here. Hope you started 2022 in a wonderful way. I basically fell asleep before midnight, but hey, I considered having a good night sleep as a good way to start the day/year. Hah!

Even though right now is winter, I figure we couldn’t go wrong with floral card. That goes for all season, right?

For my card today, I used the lovely Heartfelt Blossoms set. I first ink blending Tourmaline on a piece of cardstock panel. I could use colored cardstock, but I really want this particular color background and decided to go with ink blending. Once done, I stamped and heat embossed the image off to the right side of the panel with Versamark ink and white embossing powder. Next, I stamped the same image again, die cut with coordinating Heartfelt Blossoms die and colored it with Copic markers.

I colored the white area around the flowers with Copic marker as well to make it blend better with the background. Once I am done with the coloring, I trimmed the panel to remove the dark edges and adhere it to the card base. Next, I adhere the colored blossoms with foam adhesive and trim the parts that sticking out. Turned out I am not too happy with the pink flower coloring once I adhere it, so I keep working on it till I achieved the look that I want. Finally, stamped the sentiment on a strip of cardstock and add to the card. Finished by adding some Dew Drop Clear Enamel Dots.

I am loving this color combination and I hope you enjoy today’s card as well. Stay tune for our anniversary release that’s coming this week. All I can say, lots of pretty sets coming. Thank you all for stopping by here and may your week starts off wonderfully. Cheers….

Watercolored Heartfelt Blossoms

Hello friends! Hope you’re having a great week so far! It’s TaeEun here today with a watercolored floral card! The Ton has released so many beautiful floral outline stamps recently. As you might know I love coloring flowers and I was so excited about the Spring release! 

For today’s card I played with Heartfelt Blossoms stamp set. This is a large floral cluster with two wildflowers (they look like cosmos flowers for me) and berries. 

I stamped the image in Caviar hybrid ink which is watercolor friendly. I stamped the image a bit to the left side to have a larger blank area on the top right corner.
I then watercolored the image loosely using Cotman watercolors. I worked in a few layers to get the look I wanted. I also colored the background in the same green I used for the leaves and cerulean blue for some area. 

After the panel was dry I splattered black watercolor mainly on the background part and white opaque ink on the flower part. I let the splatters dry and cut it with the second largest die of the Rectangle A2 Nested Die set and foam mounted it on a white cardbase. 

The sentiment is also from the Heartfelt Blossoms stamp set. I white heat embossed it on a strip of black cardstock. As finishing touch I added some Glass Slippers sequins.

Hope you enjoyed looking my card! Please check out the Spring Release, if you haven’t already. There are so many beautiful floral designs!

Thank you so much for looking!

Wishing you a crafty day! 

Hugs,

TaeEun