Happy New Year! Wishing you all the best year yet ❤️!
It’s TaeEun here today sharing a couple of cards I made using some gorgeous new items from The Ton! As you may know, Effie introduced new stencils and dies in December 2023 (links to Release post1, Release post2)! Please check out the release posts if you haven’t already!
I’ve created a New Year’s card and a shaped floral card! Let’s take a look at the New Year’s shaker card first !
This card is featuring the Darling Daisies Layering Stencils, Dome Frames Slim Borders Coverplate die and the Dome Nested Dies from the new releases. The Darling Daisies Layering stencils measure 4.75 x 6 inches, providing a stenciled panel filled with pretty white daisies slightly larger than A2 size.
I began by stenciling the Darling Daisies image. First, I stenciled the background in Parisian Blue and Violet Fringe. The leaves were stenciled in Meadow, and the center of the daisies in Lemon Drop and Amber Citrine. There is no stencil for the petals in this set. You stencil the shadow between the petals, creating lots of white daisies 🙂 ! Pretty clever, don’t you think ? For the shadow, I used Moonlight and added a bit of Periwinkle for a darker shade. After stenciling, I lightly ink blended Bubblegum on the petals.
To create a shaker card, I cut a dome from the stenciled panel using a die from the Dome Nested Die set. Then, I dry embossed the dome-shaped piece using the Dome Frames Slim Borders coverplate die and adhered it to a white cardbase.
After that I prepared the shaker part. I adhered a clear acetate sheet on the back of the negative die cut piece from the stenciled panel and made a wall using two layers of foam tape.
For the shaker element I filled the well with Crystal Clear Rainbow rhinestones, Glass Slippers sequins and Pink Diamond Couture Mix. I added some Silver Rainbow Opaque rhinestones to the background panel for extra bling and assembled the shaker card. I also glued a white dome frame to the acetate sheet for a more defined look.
The die cut “happy” was cut using the Script Word Dies Bundle. I cut it four times from white cardstock to stack them for dimension and heat embossed it in Diamond Sparkle embossing powder. The “NEW YEAR” sentiment is from the Ribbons Holiday stamp set. I heat embossed it in white on some navy cardstock and made it into a banner.
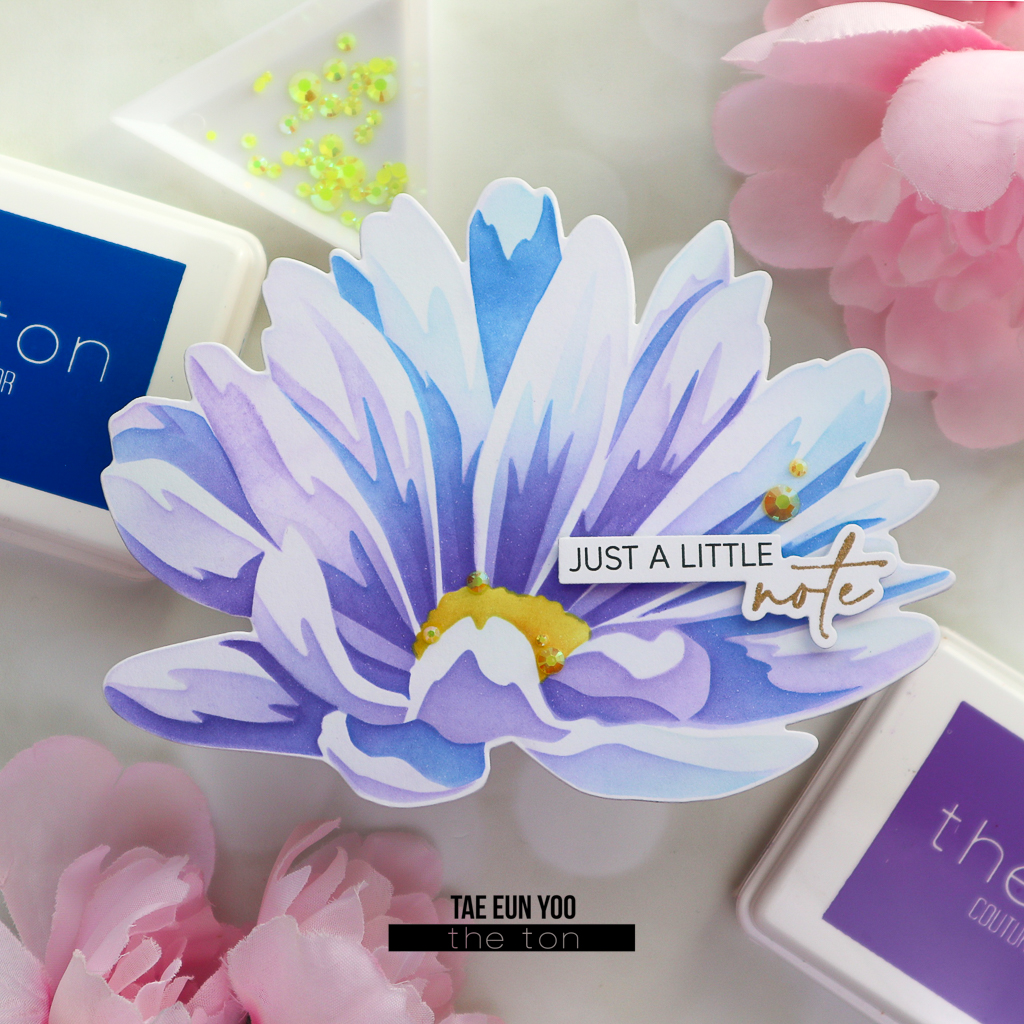
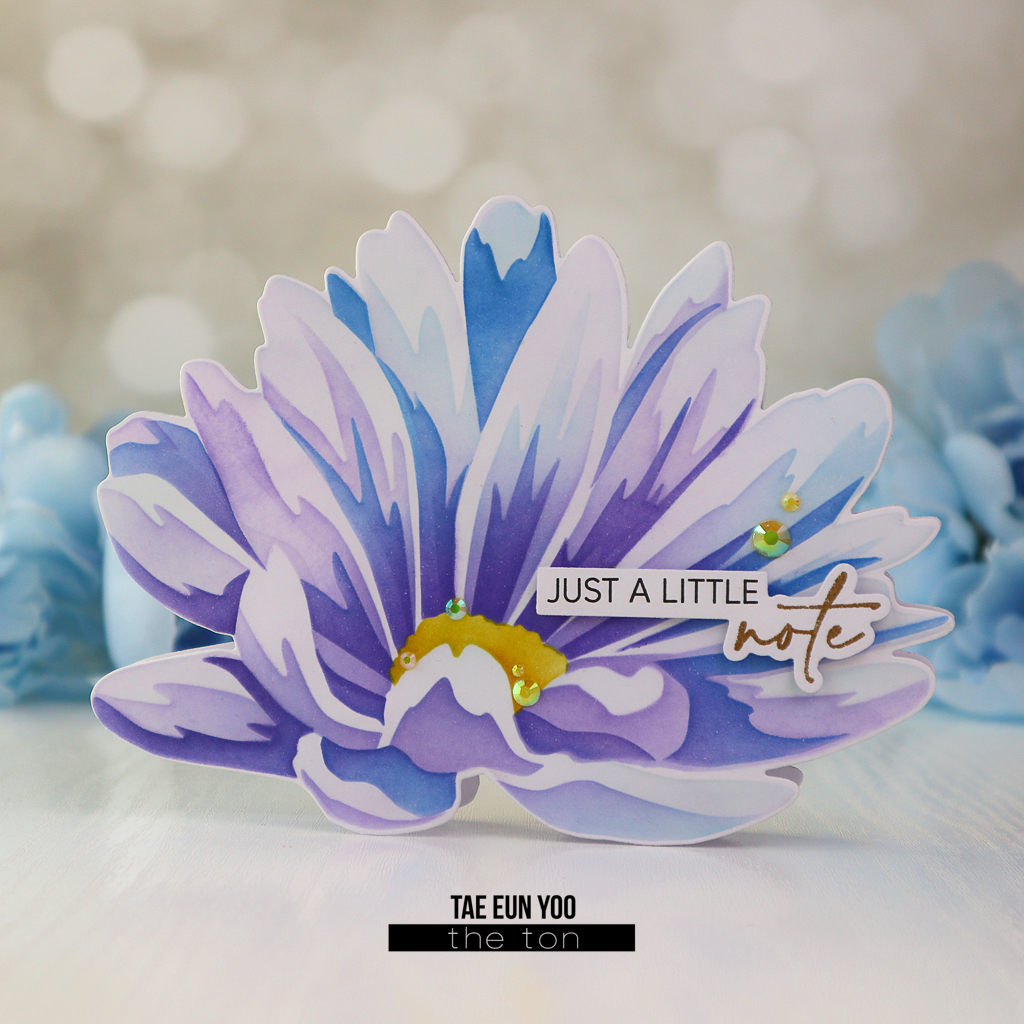
For the second card, I used the Jumbo Cosmos Layering stencils. The stenciled floral image measures approximately 5.9 x 4.3 inches at its widest points. So I thought I could make a shaped floral card using it !
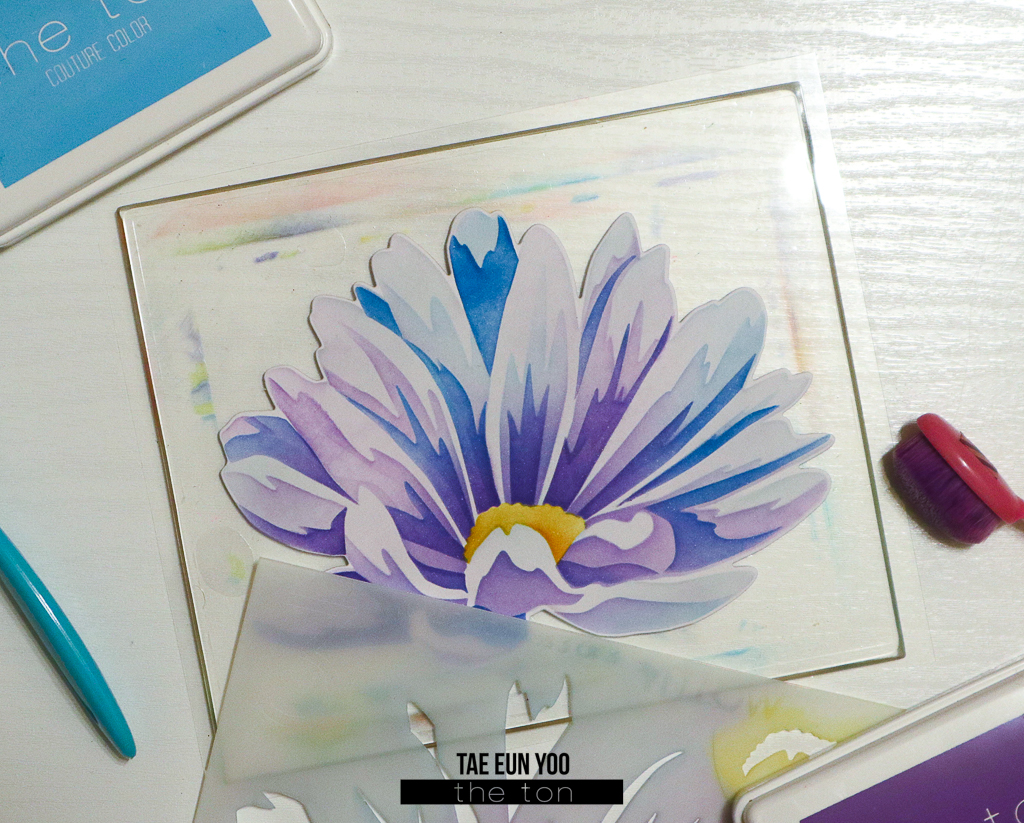
To make it easy to align, I first die cut the Jumbo Cosmos from some white cardstock using the coordinating die. Next I placed it on the Grip Mat and started stenciling. I chose to color the cosmos in two tones : blue and purple. So, I pulled out Cali Blue, Soft Amethyst, Iris Blooms, Azurite and Violet Fringe to stencil the three layers of the cosmos. The center of the flower was stenciled in yellow using Lemon Drop and Amber Citrine.
I die cut one more Jumbo Cosmos from some heavyweight white cardstock, added a score line on the top part of it, and adhered the top edge to the back of the stenciled cosmos .
The sentiment is from the Easy Expressions Just Because set. The scripty part of the sentiment was heat embossed in gold, and the other part was stamped in Noir, I added it to the card using foam tape and scattered a few Pale Orange Opaque rhinestones on the card to finish it off.
Thank you so much for visiting today!
Wishing your first weekend of the New Year is a crafty one!
TaeEun