Holiday Trio

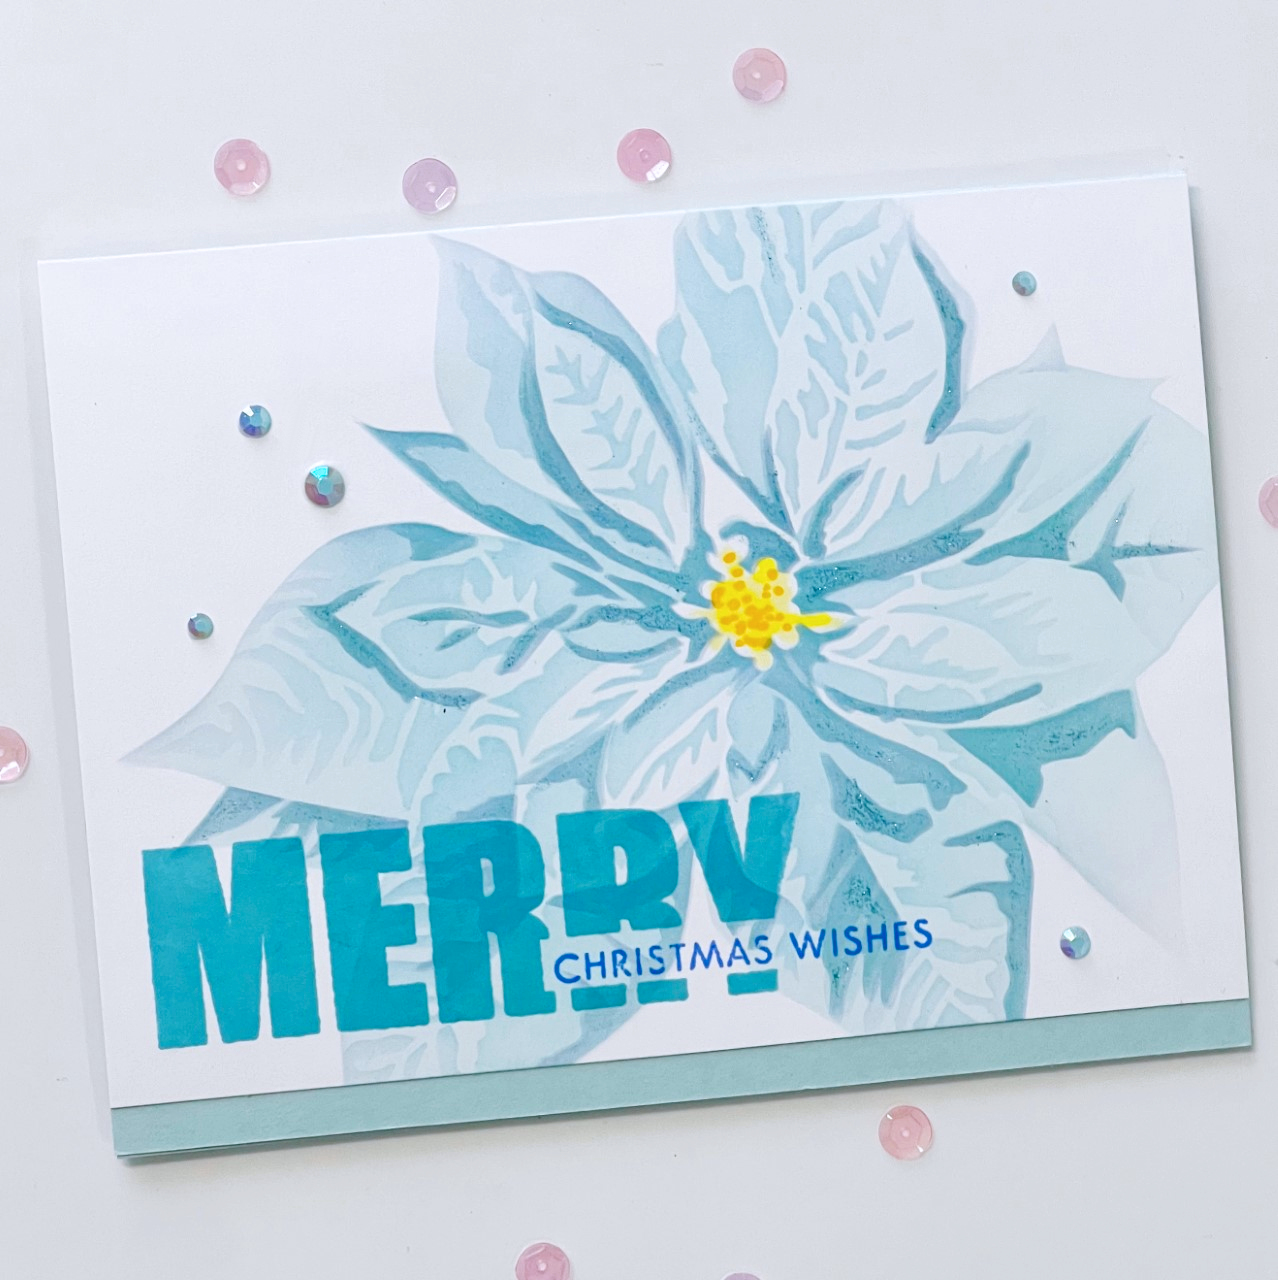
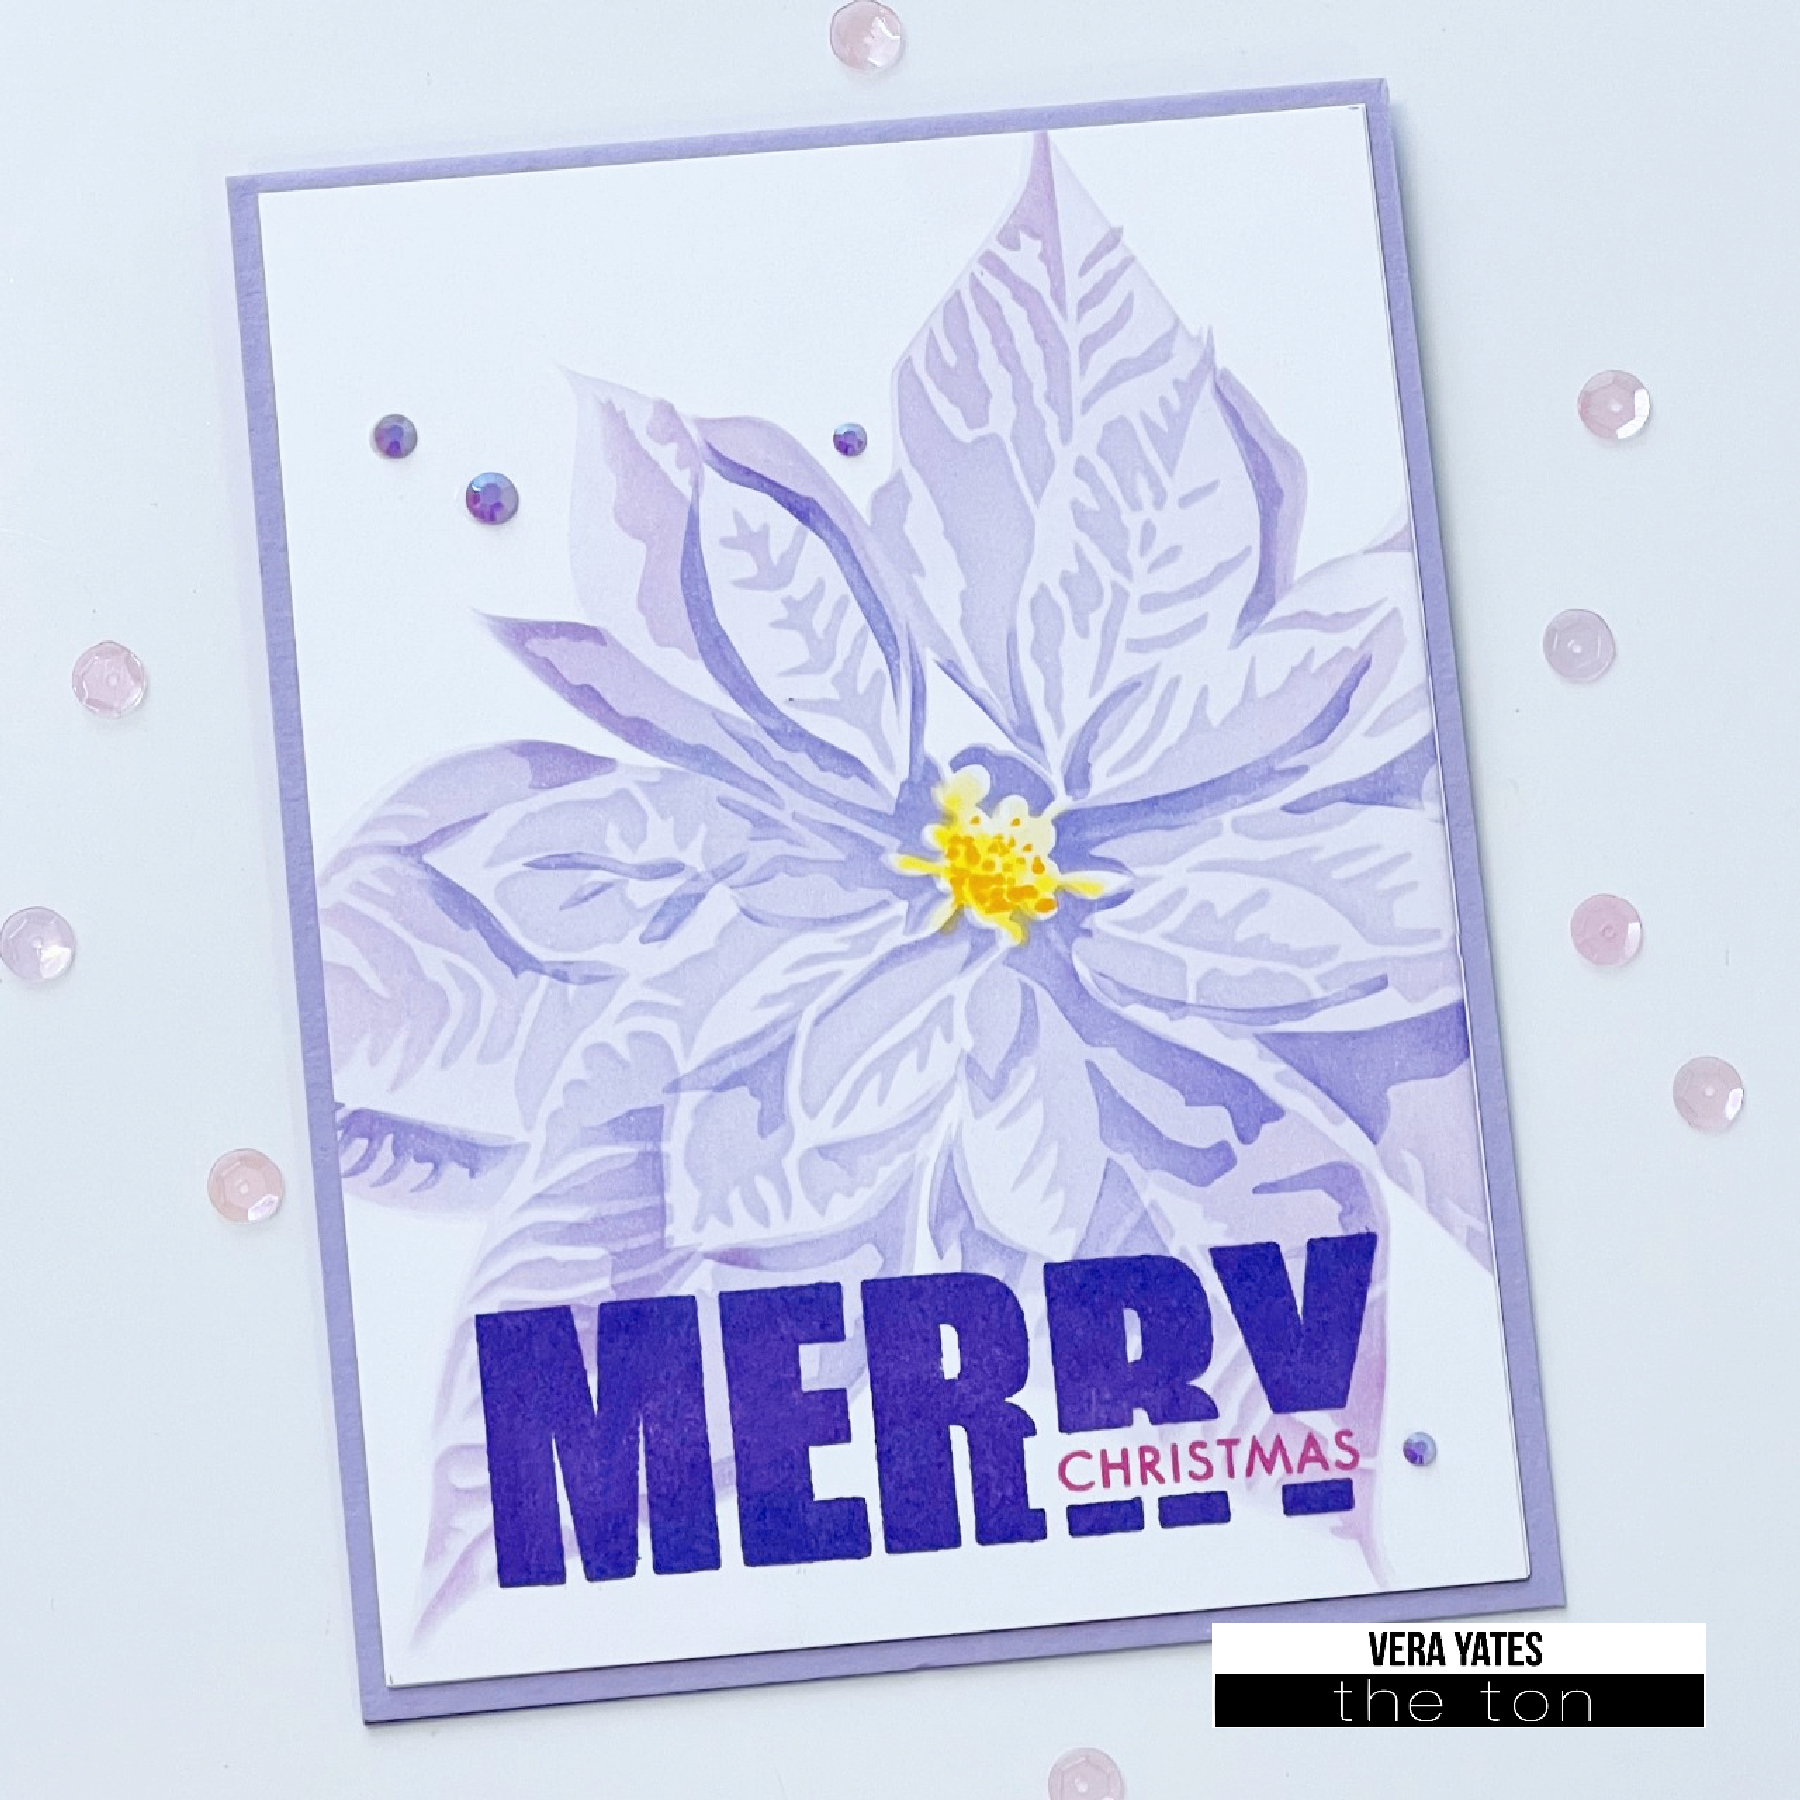
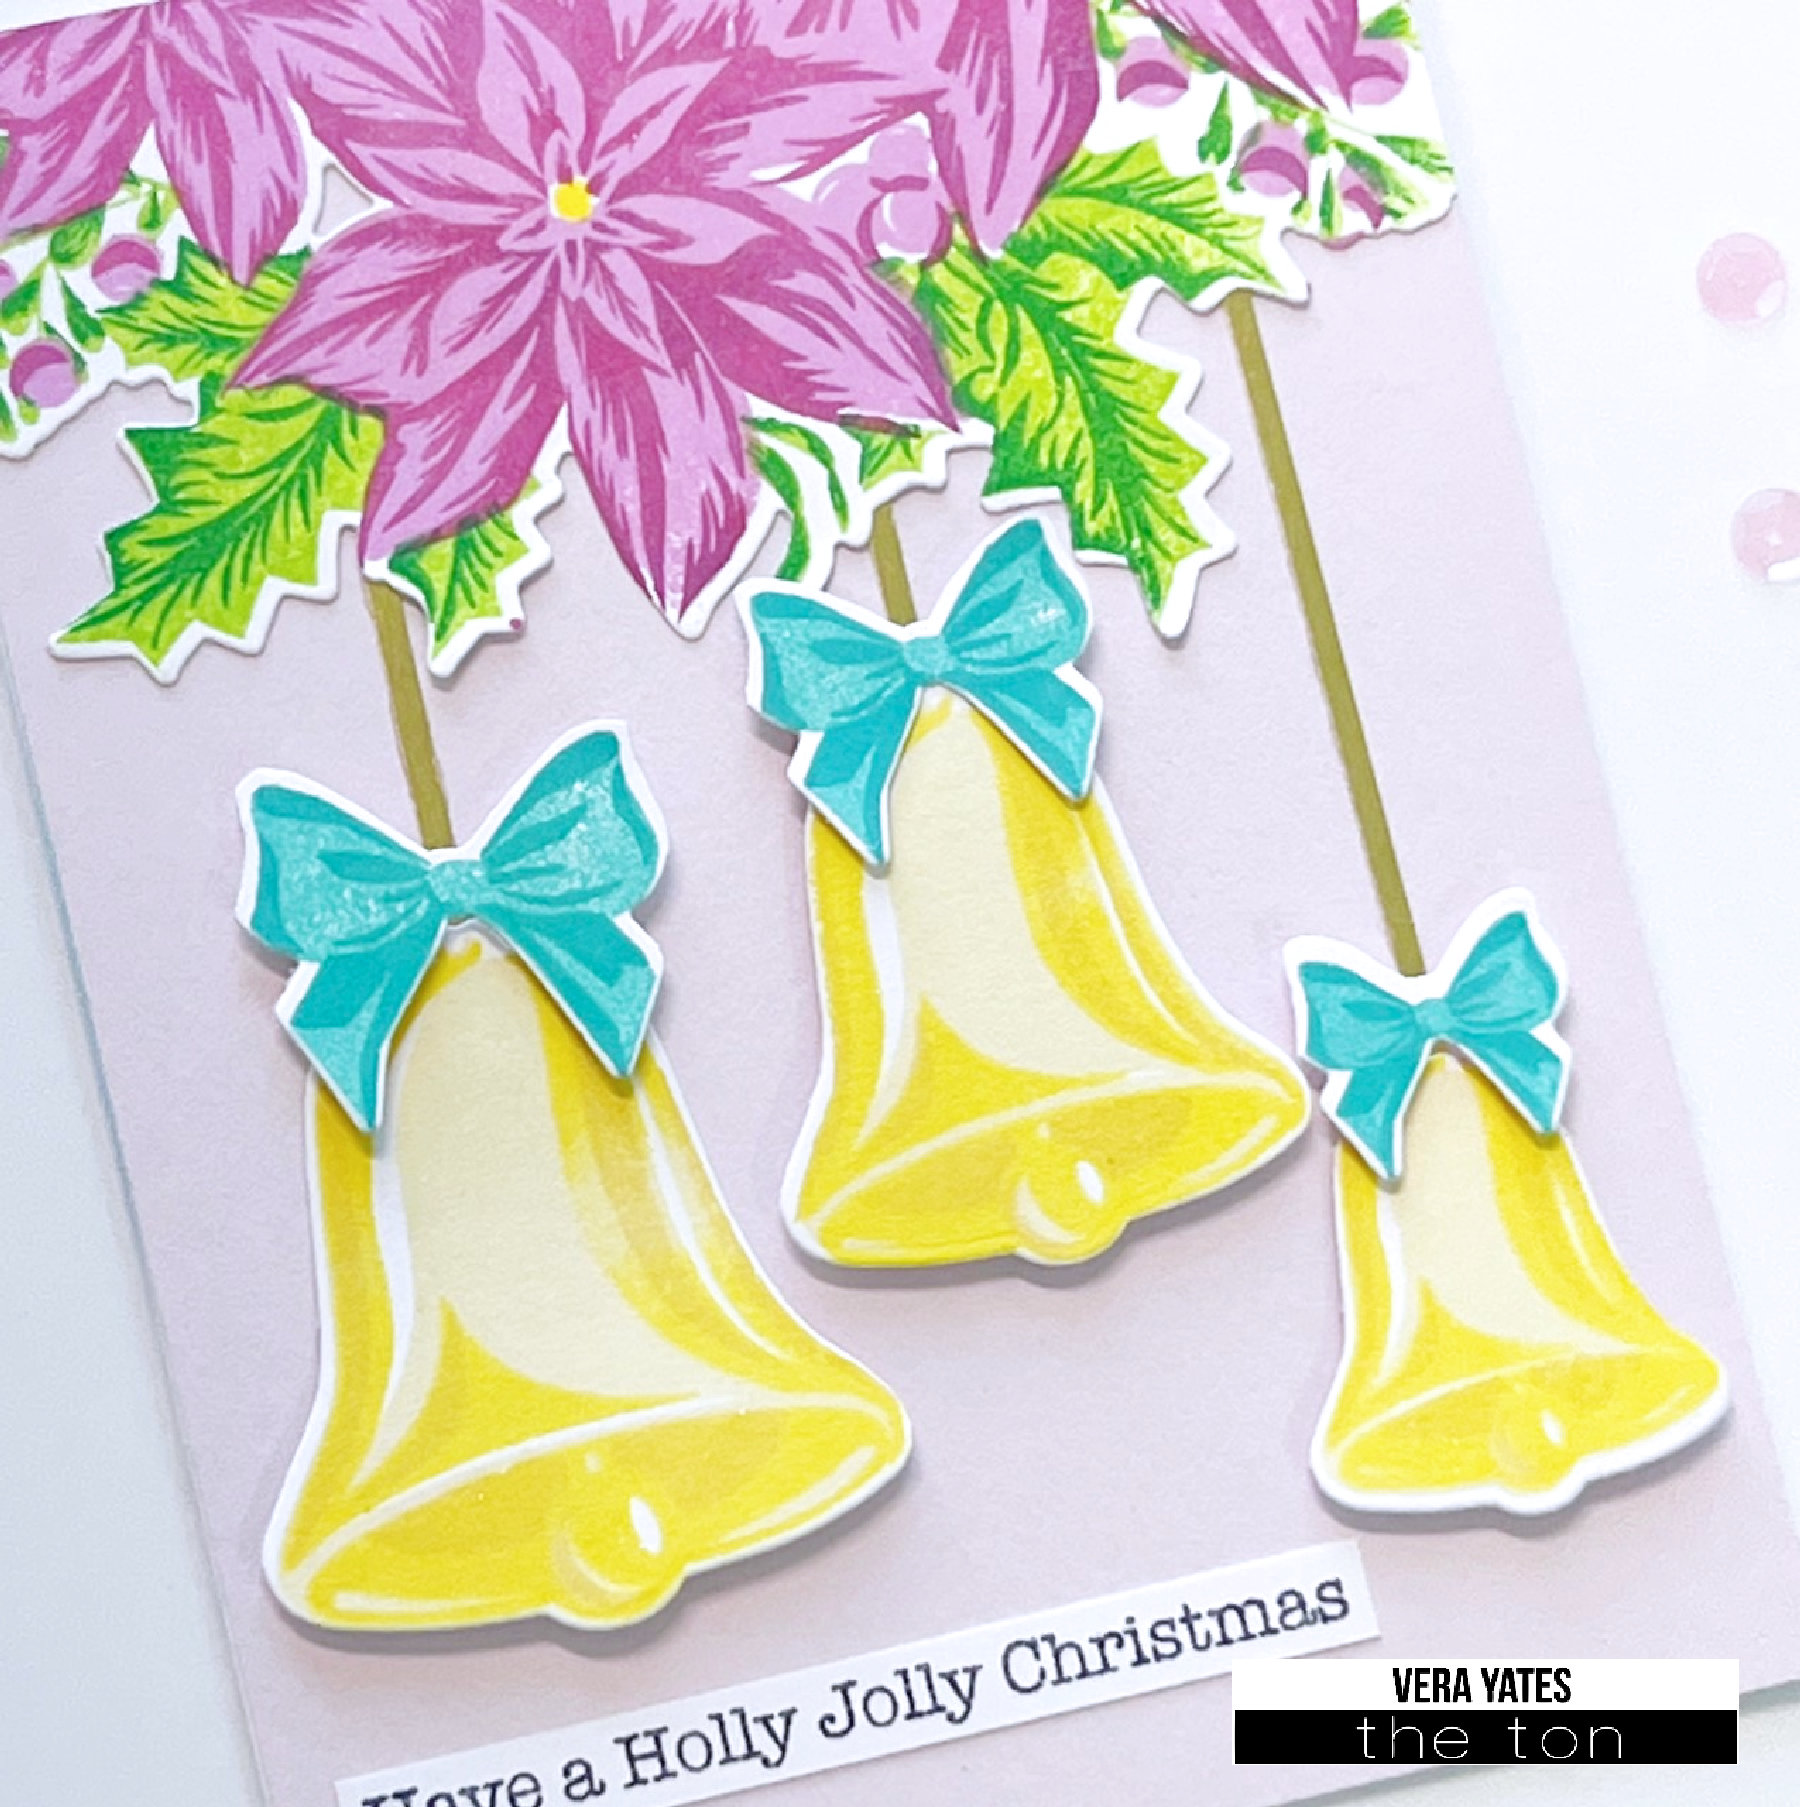
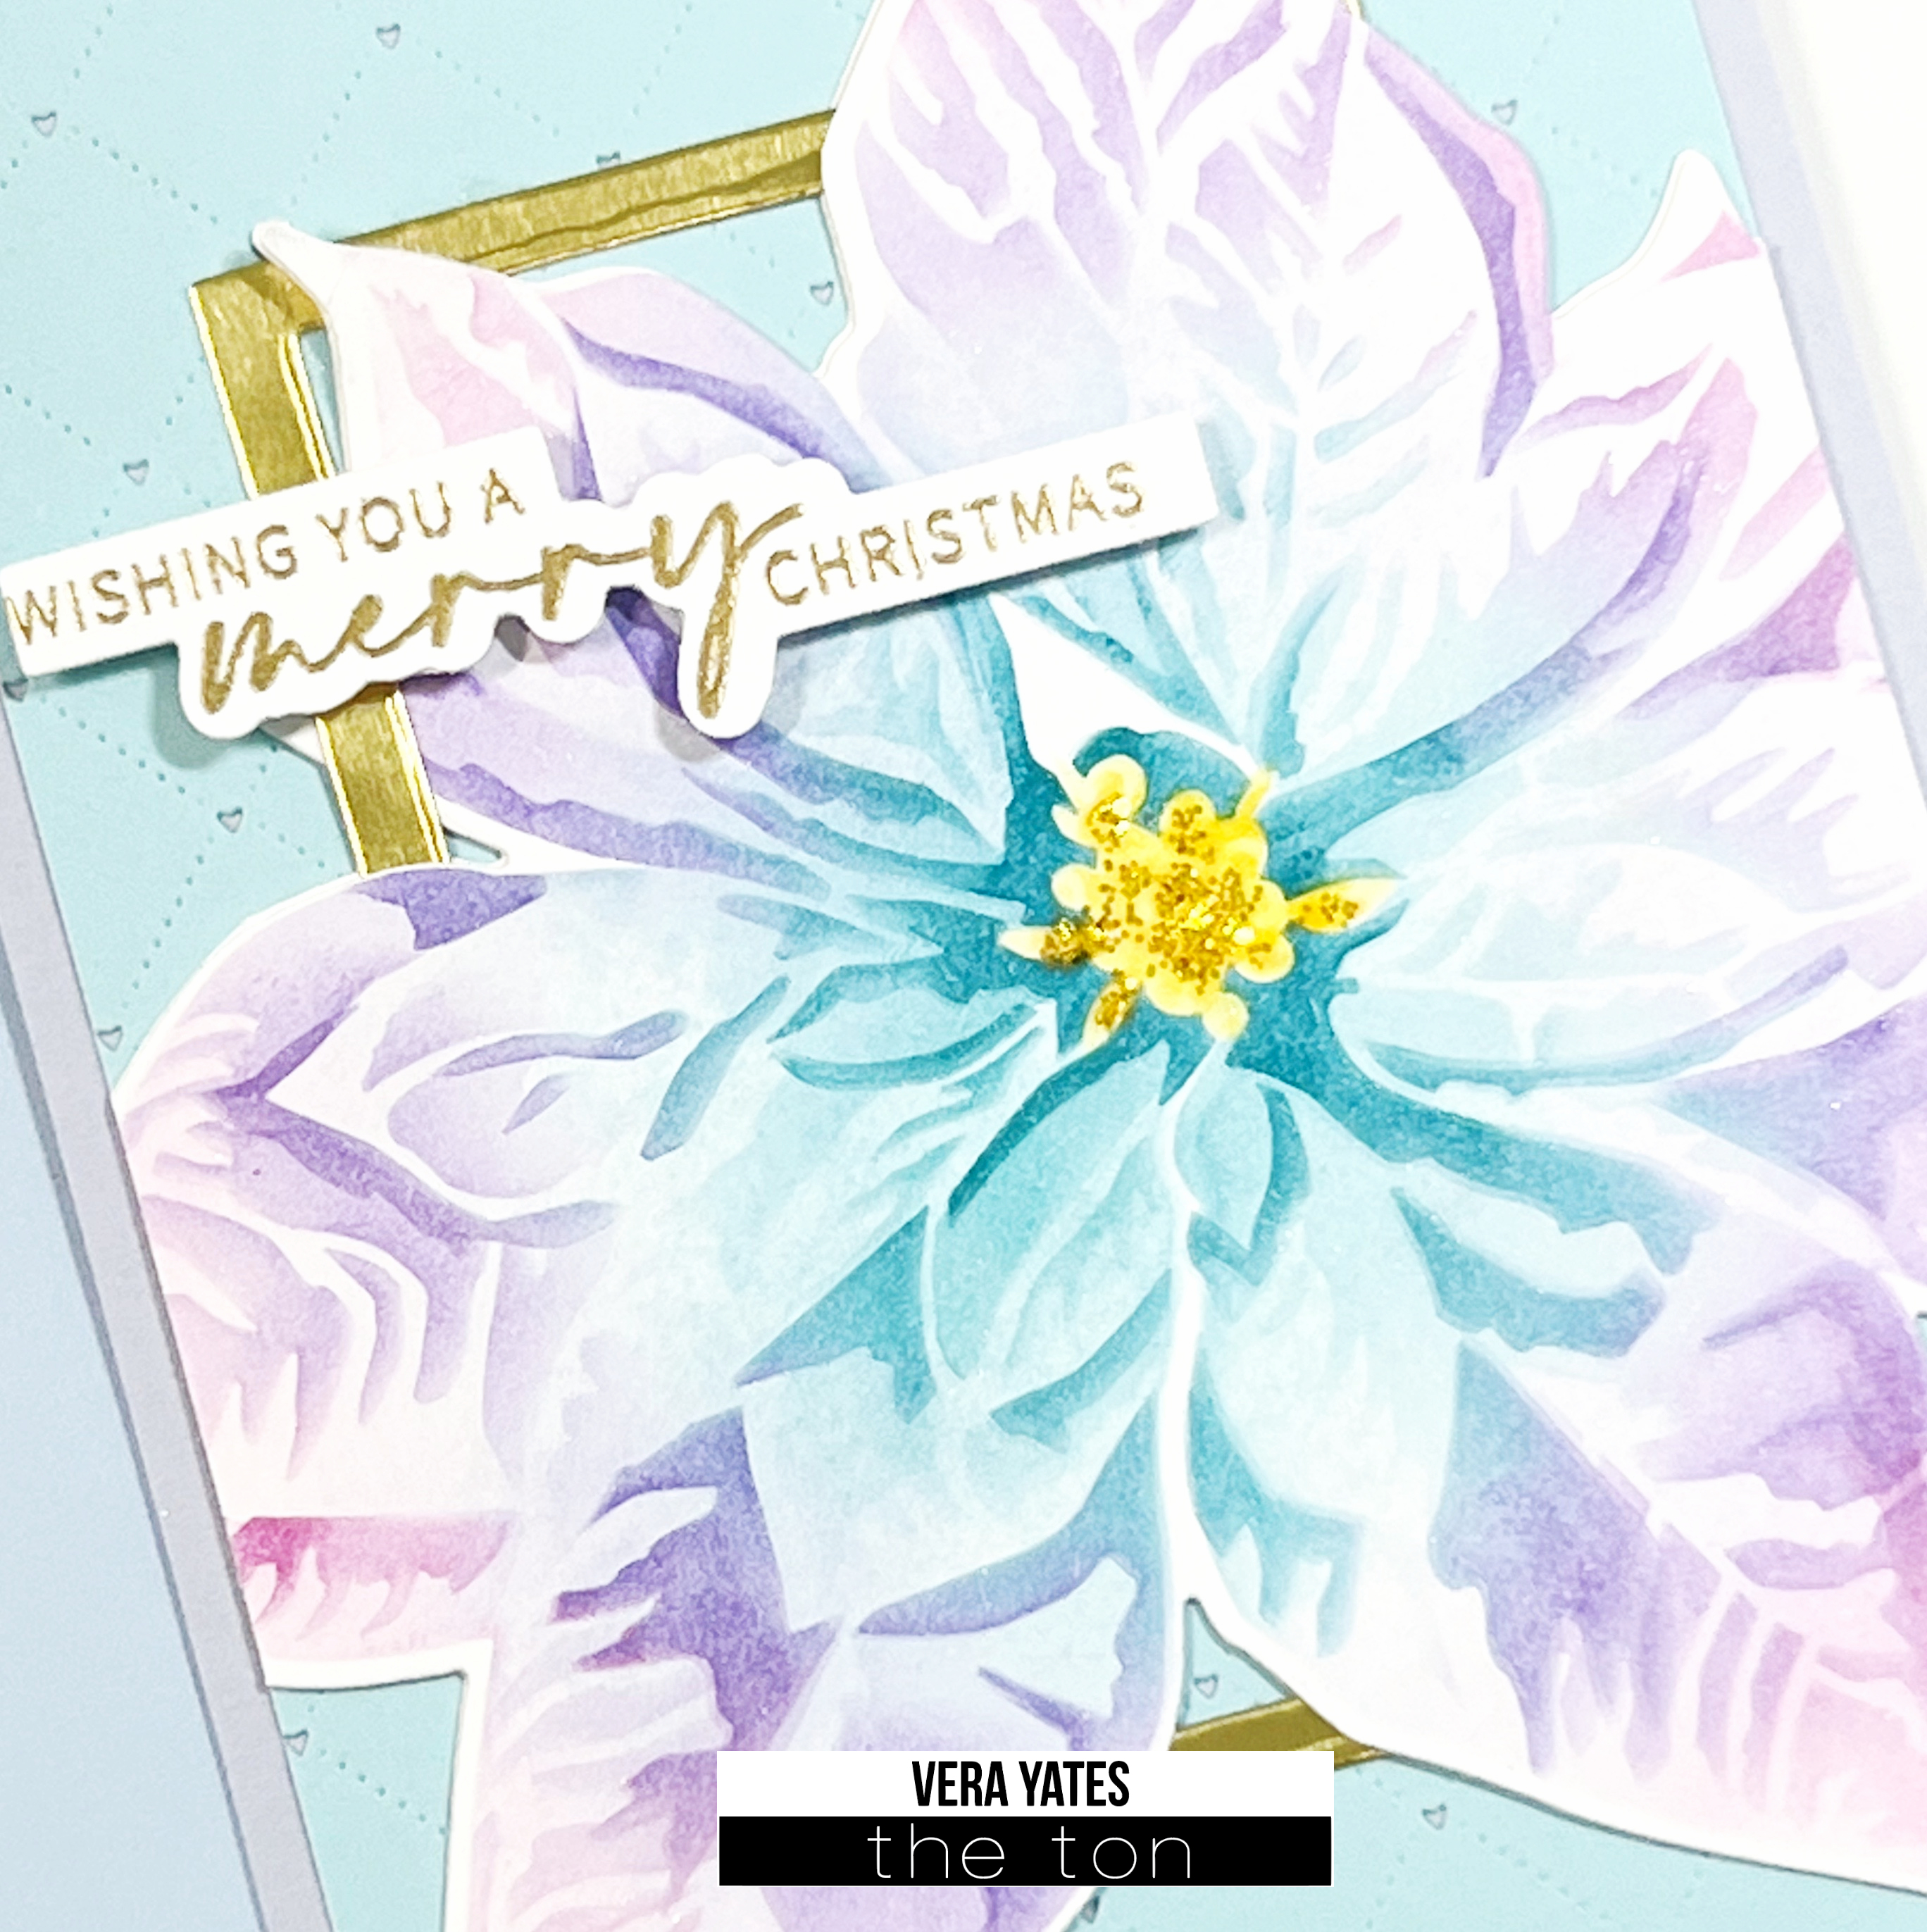
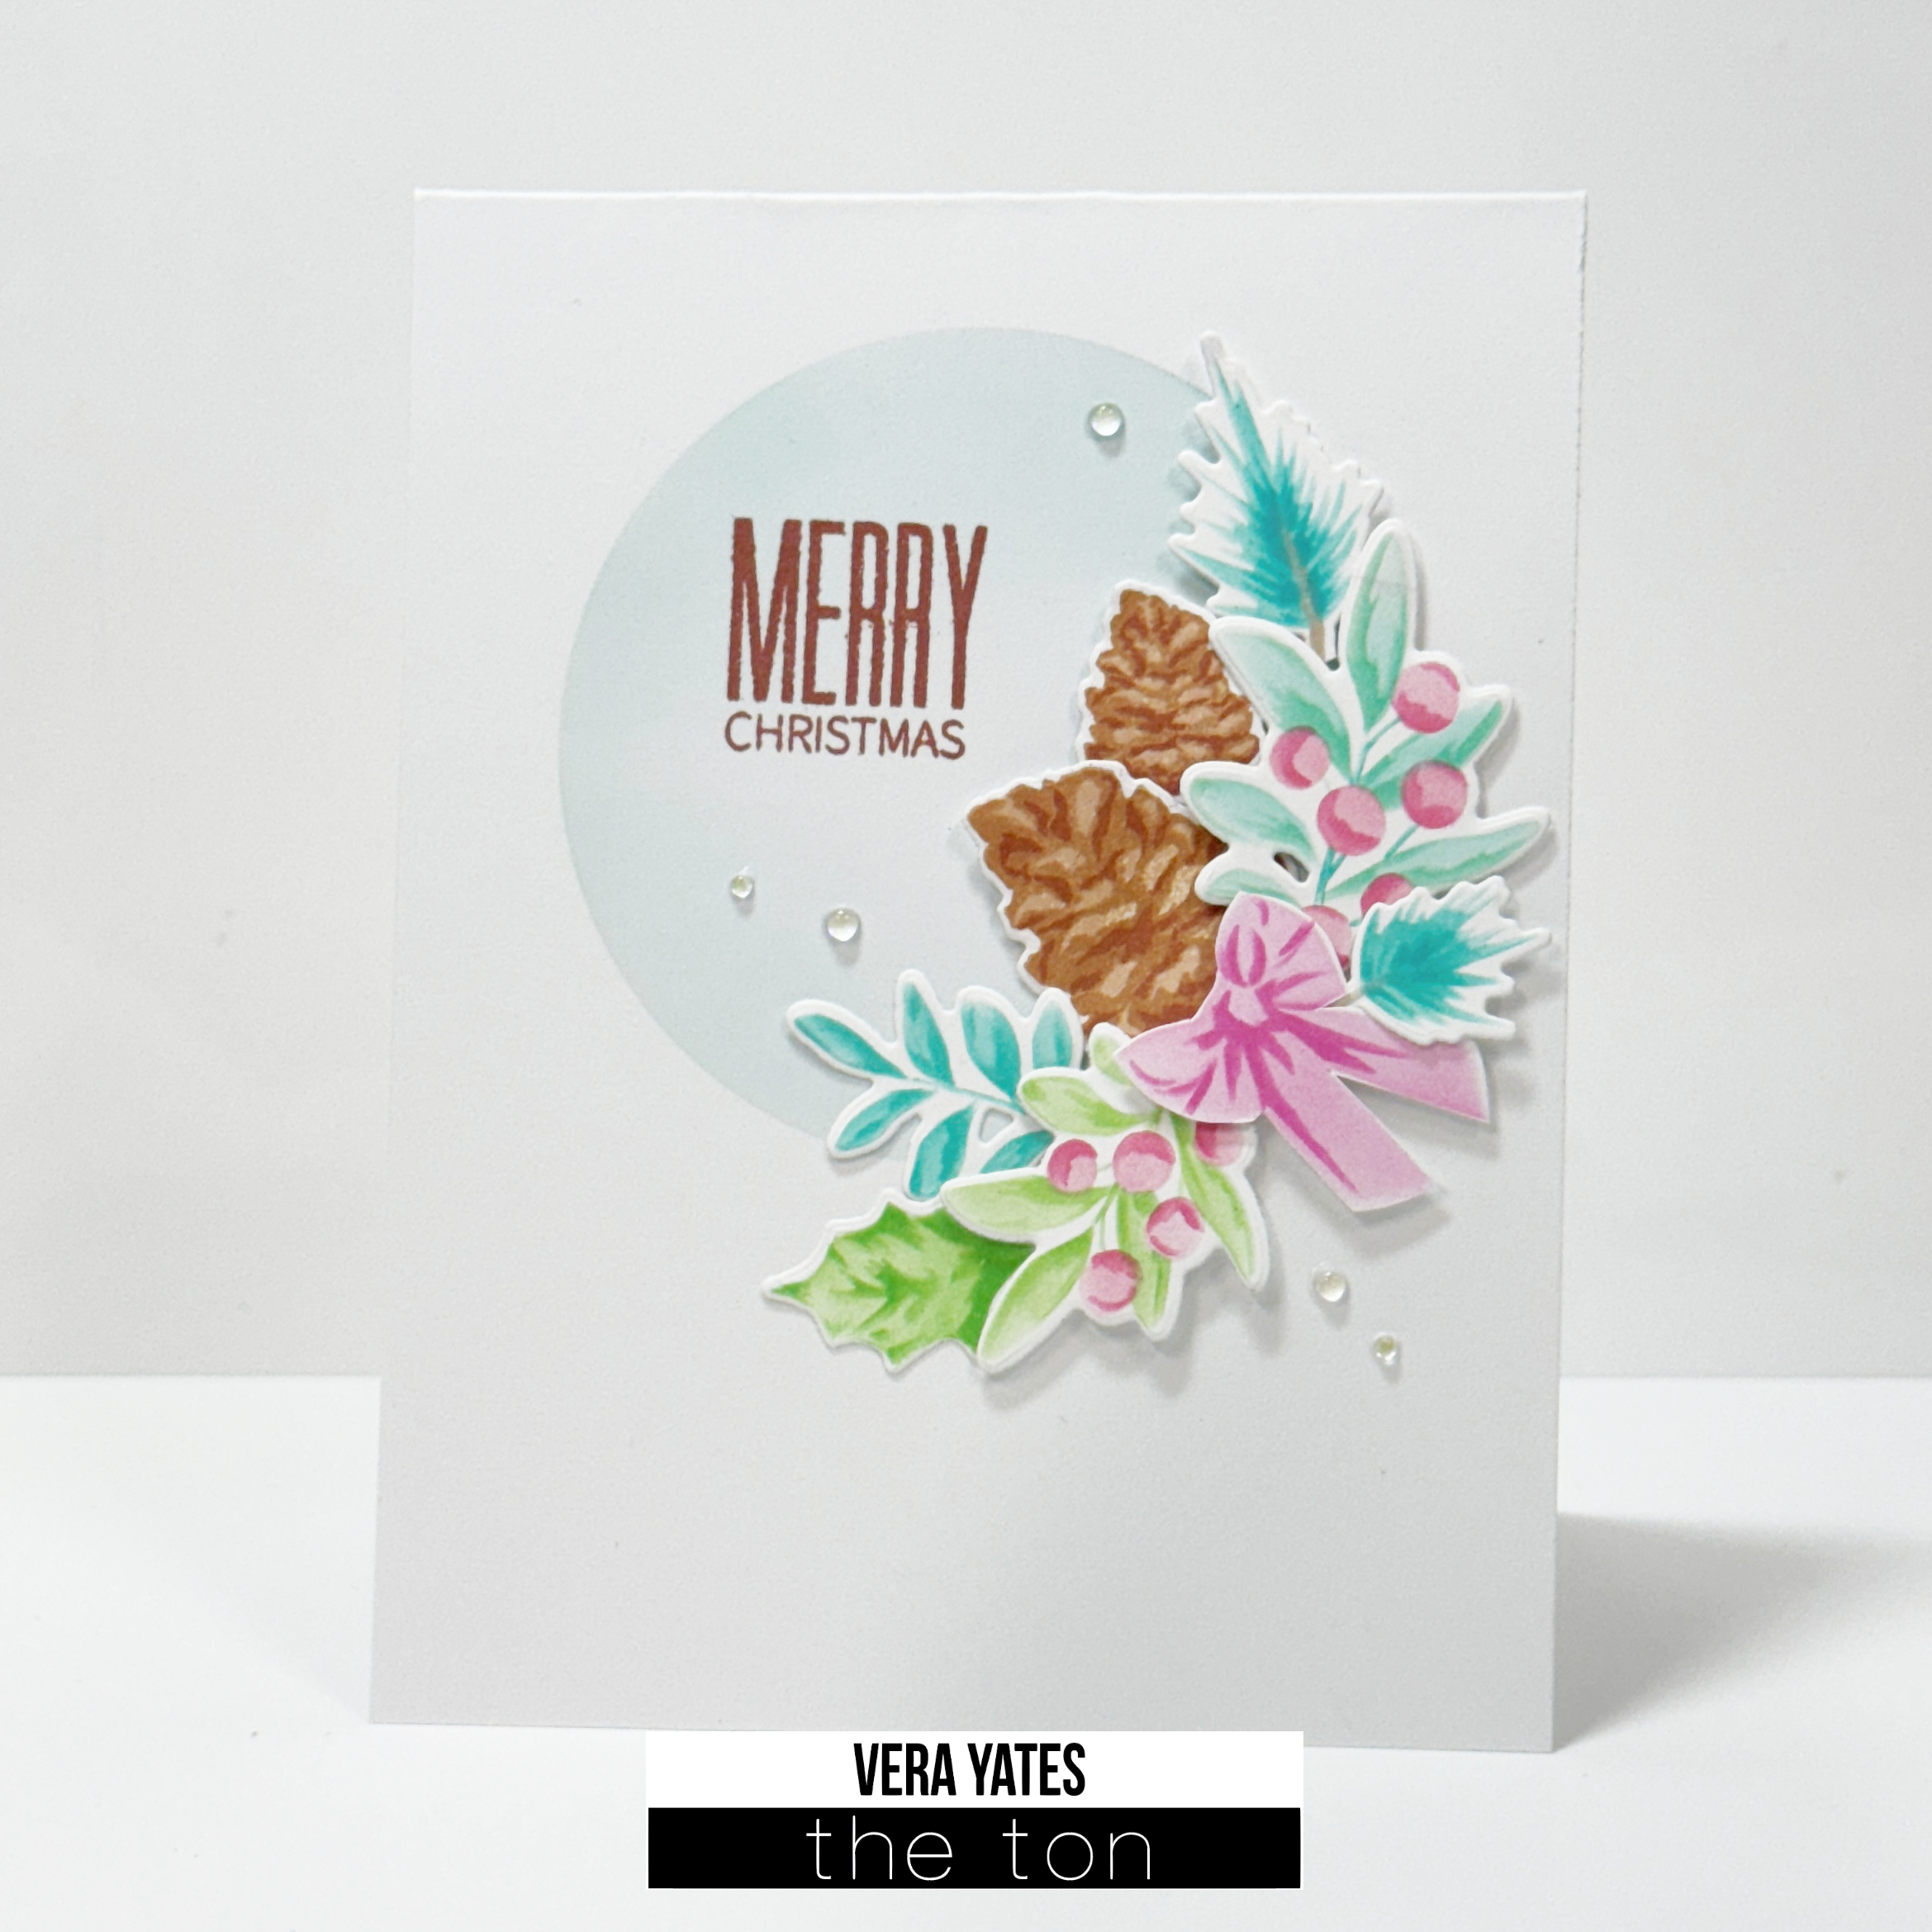
Hi friends. Vera here. Today I am sharing a trio of holiday cards. I hope they inspires you to start working on your Christmas card stash. For my card, am featuring a few layering stencils. I used Berry Bits Layering Stencil, Winter Foliage Layering Stencil, Christmas Bows Layering Stencil and Pine Cones stamp set. Originally, I plan on doing 1 card. However, once I die cut all the pieces I realized that I can actually completed several cards. So, of course I went to town with it and made 3 cards.

To color the Berry Bits I used Matcha, Spring Salad and Dolled Up. For Winter Foliage I used Spring Salad and Bright Emerald. For Christmas Bows I used Dolled Up and finally for the Pine Cones I used Warm Hazelnut, Found Topaz and Spiced Chai. Of course, I’d encourage you to use any colors that you love. Experiment and if needed used unusual color combo.

Anyway, once I am done with the stenciling, I die cut them with the coordinating dies of each set. Put aside all the pieces. Using one of the circle from Circle Nested Dies, I die cut a circle on a piece of scrap paper and use this as a stencil to create the circle focal point of the card. Arrange the pieces around the circle. Adhere with glue and some with foam adhesive to create depth. Finish with some enamel drops.

I honestly very happy with the way these cards turned out. Clean and simple is my favorite type of cards. And, when I get to mix several sets in one card, that make me even happier.

Friends, I hope you enjoy today’s cards. With everything that’s going on in the world right now, my wish for you is that you find or see something good today that makes your heart smile. Till next time!

Joy & Cheer

Hi all. Vera here today as we’re getting closer to Christmas, so needless to say I have more Christmas theme card to share. As always, classic Poinsettia never go out of style in my opinion. My cards today featuring an older Boundless Poinsettias set.

I stamped the images with Hollywood Star, Deep Peony, Dolled Up, Meadow & Bright Fern. Then die cut it with the Boundless Poinsettias Coordinating die. I keep the design simple since I feel this green is bight and don’t need anything extra. Finish by stamping the sentiment that come in the set.

Since I have a couple of this flower stamped, I figure I might as well make an extra card, except this time, I used the bright green as frame and use a soft green as the background.

And, on this one for the sentiment I used the Ribbons Merry Layering stencil and paired it with the sentiment from Poinsettia Wishes set stamped in Bright Fern.. Again, another older stamp set that I feel deserves some love. Finish by adding some Fern Green rhinestones.

Quick and to the point post as I have my mom with me at the moment and since it’s so rare for me to have her here, I am not doing much crafting as I want to spend as much time with her as possible. I am beyond grateful that she’s still able to travel here and I am sure you all understand that I better treasure my moments with her. I wish you all a lovely day. That’s all from me today and I wish you all a lovely day.

Deck The Halls

Hello, everyone! Hope your week been going well! Vera here today and I’m sharing a couple Christmas cards I made using Holiday Bells Large Stencils.

When I colored this stencil, I had shared a couple pf the other cards HERE and today I am sharing the remaining 2 cards. To color the stencil I used Soft GardenBeach BlondieLemon DropFound TopazDolled Up and Bubblegum.  Finish with stenciling, die cut the image with the coordinating Styled Christmas Sentiment dies

I hope you can see it, on the red cardstock background I stamped it with Speckled Background stamp. Kind of hard to see since I used the Versamark ink, so it’s very subtle. Then I die cut the bells a couple more times from plain cardstock just to add thickness for layering. I finish the card with sentiment from Easy Expressions Holiday set.

Here’s my second card from the other stenciled panel.

Again, I simply repeat the same step. Yep, this one also has the Speckled Background stamped in Versamark. The lighting in my craft room make it pretty hard to get it right in the picture.

It’s pretty much crunching time right now to get some Christmas cards done, so I hope I was able to inspire you to make some Christmas cards this week. Thank you all for swinging by here.

Jumbo Poinsettia

Hi all. Vera here as we end the month of November. Time flies and we are now in full swing of the holiday season. I had to finish several Christmas cards for a friend who ordered a bunch of Christmas cards from me, so when in need of speedy card, I reach to stencil. One of my favorite for quick card is the Jumbo Poinsettia Layering Stencil.

For this card I layered Cali Blue & Cobalt Breeze. I just varied the pressure when I did the blending to get more variety of hues just by using these 2 colors. Trim the panel and adhere to card base. For sentiment, I used Bold Fill In Holiday set and stamped it using Cobalt Breeze and Parisian Blue. Finish by adding some Seafoam Opaque rhinestones.

I made another variation of this card using same steps and this time it’s in purple tone and made it vertical.

On tis one I used Soft Amethyst & Iris Bloom ink for the flower and Violet Fringe & Deep Peony for the sentiment. Finish with Light Opaque Purple rhinestones.

There you go, a couple quick and easy Christmas cards. I can only do the same designs for a few before I get bored. Hah. So, mass production definitely not my favorite to do, but sometimes when you need a bunch of card in short time, that is the way to go. Hope you enjoy today’s cards and I wish you all a wonderful day wherever you are.

Jingle Bells

Hi all. Vera here as we get ready for Thanksgiving day. Today, I am showcasing Bells & Bows set. I love the classy design of this set.

To start I stamped the bells in Vanilla Frosted, Beach Blondie and Lemon Drop. Then for the bows I used Bright Emerald & Carribean Turquoise. Die cut the bells and bows using Coordinating Bells & Bows die set. I decided to pair them with an oldie but goodie set, the Boundless Poinsettias set that I stamped with Hollywood Star, Soft Garnet, Red Sangria, Soft Garden & Bright Fern. Die cut the Poinsettia & adhere to the top part of the card. Trim any extra part.

Then I simply arrange and adhere the bells and the bows to the card. For the ornament string I cut strips of gold cardstock. Finish with sentiment from Wonderland Print set, another older set that deserves some love. I love the end result. Pretty & classy, don’t you think?

I hope this card gets you inspire to get going with your Christmas card stash. I am scrambling at the moment to get more done. I always seems behind when I thought I am ahead. Hah!! Well peeps, that’s all from me today. I wish you all a very happy and blessed Thanksgiving. Cheers….

Purple Poinsettia

Hi peeps. Happy Friday. Vera here bringing you card inspiration for this weekend on behalf of The Ton. Today, I am showcasing the classically beautiful Jumbo Poinsettia Layering Stencil.

To start I inked up the stencil with Cobalt Breeze, Irish Blooms, Deep Peony and Lemon Drop. Then I die cut the Poinsettia using Jumbo Poinsettia Coordinating Die. Add some stickles to the center of the flower and let dry. While it dry, I worked on the background using one of my favorite background die, the Quilted A2 Coverplate Die. I just love the dainty design with the teeny tiny hearts.

For extra interest, I decided to use one of the leftover frame from previous projects that I had cut using Rectangle A2 Frames Slim Borders die set. Then, arrange all the elements on the card. I used foam adhesive on the top part of the Poinsettia and straight up glue on the bottom part to give a little dimension. I do have tendency to create using non traditional color and I sure love the way this card turned out.

The color gradient on the Poinsettia made it pop against the soft color background. What do you think? Anyway, that’s all from me. I hope you enjoy today’s inspiration and I wish you all a wonderful weekend. Cheers…..

Christmas Poinsettias

Hi all. Only 2 more days till Christmas! Of course, for today’s card I feel to be appropriate I should make a Christmas cards. Definitely too late to send it out, but I’d consider this early start to next year stash. 🙂 After looking through my collection, I decided to play with the gorgeous & classy Boundless Poinsettias.

To start, I made the background using Quilted A2 Coverplate die. I adhere this directly on the card base after trimming it slightly smaller. For the poinsettias I used Arctic Sky, Cali Blue and Periwinkle. Now, sometimes I got lazy in actually washing my stamp. I was originally planning on making turquoise poinsettias instead of blue & changed my mind. However, I just wiped the second layer stamp of the poinsettias and that’s why my second layer looks more turquoise than blue because it has left over residue. And, it came out pretty, so I don’t see any reason to start over and just continued layering the 3rd layer with Periwinkle. For the leaves I used Honey Dew and Meadow.

Now, since I grew up in tropic country, I thought it would be cool to mix it up a bit by adding some Multi Monsteras to the bouquet to add a hint of tropical atmosphere to the card. Adhere all the parts to the card. To add extra interest, I decided to add frame to the card to really make the middle part of the bouquet poop more. I used one of the cut out frame from the many frames that I got from using Rectangle A2 Frames Slim Border die. Add some enamel dot stickers and Merry Christmas sentiment from Winter Foliage set stamped with Hot Tourmaline ink. Of course, any Christmas card could use a little sparkle to make it more festive, right? So, I finish by adding ice stickles to the center of the flowers. Let dry and that’s it.

There you go. Last Christmas card for 2021 from my end. I hope you enjoy today’s card. And, to all of you who celebrate Christmas I wish you all a joyful and blessed Christmas. This year been crazy and to many may have been a tough year, and I wish you all peace and may we all be able to find joy in the small things like simply being with the your loved ones. Have a wonderful Christmas everyone. Let’s remember the reason for the season and be kind to one another. Cheers…

Warm Wishes Poinsettias

Hi all. Happy Monday. Vera here today to bring you Christmas inspiration on behalf of The Ton.

For my card, I decided to play with Jolly Border. Originally I was going to go with traditional color, but as usual I ended up going the other direction. Obviously, this set can be used to decorate an envelope, but I want to use it on a card. Simply stamped the image with The Ton Caviar ink and then colored it with Copic marker. Once that done, trim the panel slightly smaller than the card base and adhere to the card.

Next, I stamped the single Poinsettia that’s also part of the Jolly Border set. Die cut, color and adhere it to the card with foam adhesive. Next, I stamped the sentiment from Styled Christmas Sentiments set with Stormy Sea ink pad and die cut the sentiment with coordinating dies. I also use foam adhesive to adhere the sentiment. Finally, to finish I add some Pixie Pink Sparkling Clear Sequins.

I love the way this card turned out and I hope you love it, too. I am pretty happy with the amount of Christmas cards that I have finished for this year. For once, I am ahead of the game. Well peeps, that’s all from me today. May your week starts off wonderfully. Cheers….

Green & Pinks Poinsettias

Hi all. Happy Labor Day. Vera here today. With Christmas about 4 months away, I started working on my Christmas card stash. The new release from The Ton this month definitely helped me in get going.


For my 1st card, I used the gorgeous Boundless Poinsettias set. Now & then I do love using non traditional color for my Christmas card. That’s what happen with today’s card. Here for the poinsettia I used Matcha, Evergreen & Bright Fern. Then for the leaves I used Crystal Pewter & Smoky Quartz. Once the stamping done, die cut the bouquet using the coordinating Boundless Poinsettias die.

Trim a panel of white cardstock slightly smaller than the green card base and adhere to the base. Add a strip of stripe patterned paper and then adhere the poinsettias using foam adhesive. Then for the sentiment I used Styled Christmas Sentiments which I stamped and heat embossed with gold embossing powder. I also adhere this with foam adhesive and finished by adding some Mojito Sparkling Clear Sequins.

Since this past weekend, I was on a roll, I ended up making 2 cards.

For my 2nd card, I used combination of Dashing Poinsettias and Pleasing Poinsettias. For the Dashing Poinsettias I used Whisper Pink, Bubblegum & Dolled Up ink. For the Pleasing Poinsettias I used Bubblegum, Dolled Up & Pink Derby ink. Die cut all the pieces using the coordinating dies.

To put the card together, I trim a panel of white cardstock slightly smaller than the pink cardstock. Then, I die cut a panel of white cardstock with one of the coverplate from Gingham Plaid Layering Coverplate die set. I feel like the die cut plaid helped making the background not so plain. Before adhering the Poinsettias I die cut some extra filler using Mini Sprigs Coverplate. Arrange all the pieces and adhere to card. For the sentiment, like before I used Styled Christmas Sentiments set. Finished by adding enamel drops to the center of the Poinsettias.

Well peeps, there you go, 2 Christmas cards that hopefully inspire you to start working on your stack of Christmas cards as well. If you’re in the US, I hope you get to enjoy some time off and get some crafting time in. Have a wonderful day!!

Poinsettia Holiday Love

Hi peeps. Look at that. We are at the end of August. 4 months away from Christmas. So, I think it’s safe to say we can go ahead and work on our Christmas card stash. Especially when you have gorgeous set to work with.

For today, I am playing with The Ton beautiful Poinsettia Wreath set.

IMG2926.1

I started by stamping the wreath off center on a piece of watercolor paper and then heat embossed it with white embossing powder. Then I went to town and watercolor the wreath. This card is my first attempt in watercolor using Tombow marker and I have to say I love the result.

IMG2926.2

Once it dry, I stamped the sentiment from an oldie but goodie Holiday Love Poinsettia set. I think the classy  look of this sentiment is the perfect match for the elegant poinsettia. And, of course, I just had to add a little birdie from one of my all time favorite set Nesting Peony. Finished by adding some Pixie Pink Sparkling clear sequins.

Coloring this makes me fall in love with watercolor all over again. Cross fingers that on this long weekend I get time to play and do some watercoloring.

I hope you enjoy today’s card and inspire you to get started with your Christmas card. Thank you all for stopping by here and may your weekend be a great one. Cheers…

Vera