Climbing Hibiscus Layering Stencils

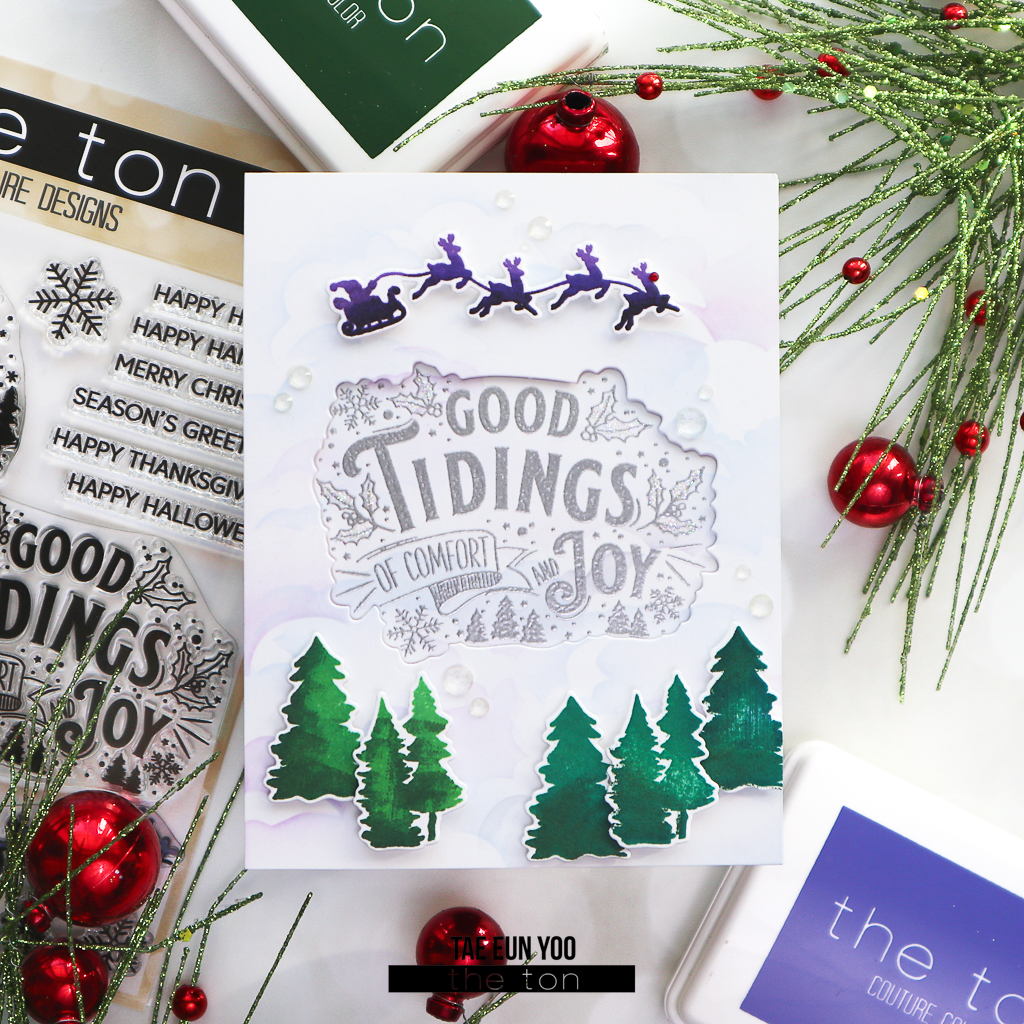
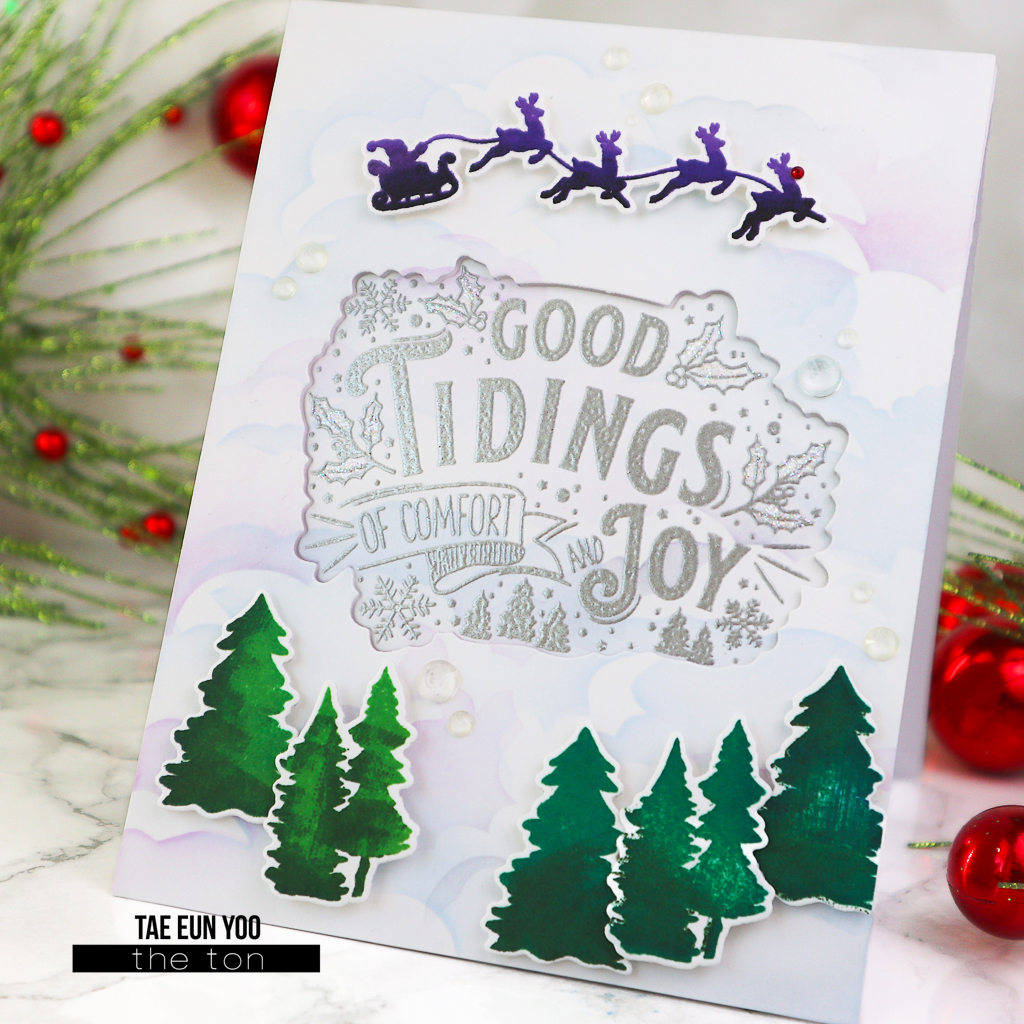
Hello, everyone! Hope you’re having a lovely weekend! It’s TaeEun here today with a stenciled hibiscus card. I used the Climbing Hibiscus layering stencils to create my card. There is a coordinating outline stamp called Coming Up Hibiscus. However, I didn’t use it to give my card a no-line coloring look. You can achieve this easily using the layering stencils !

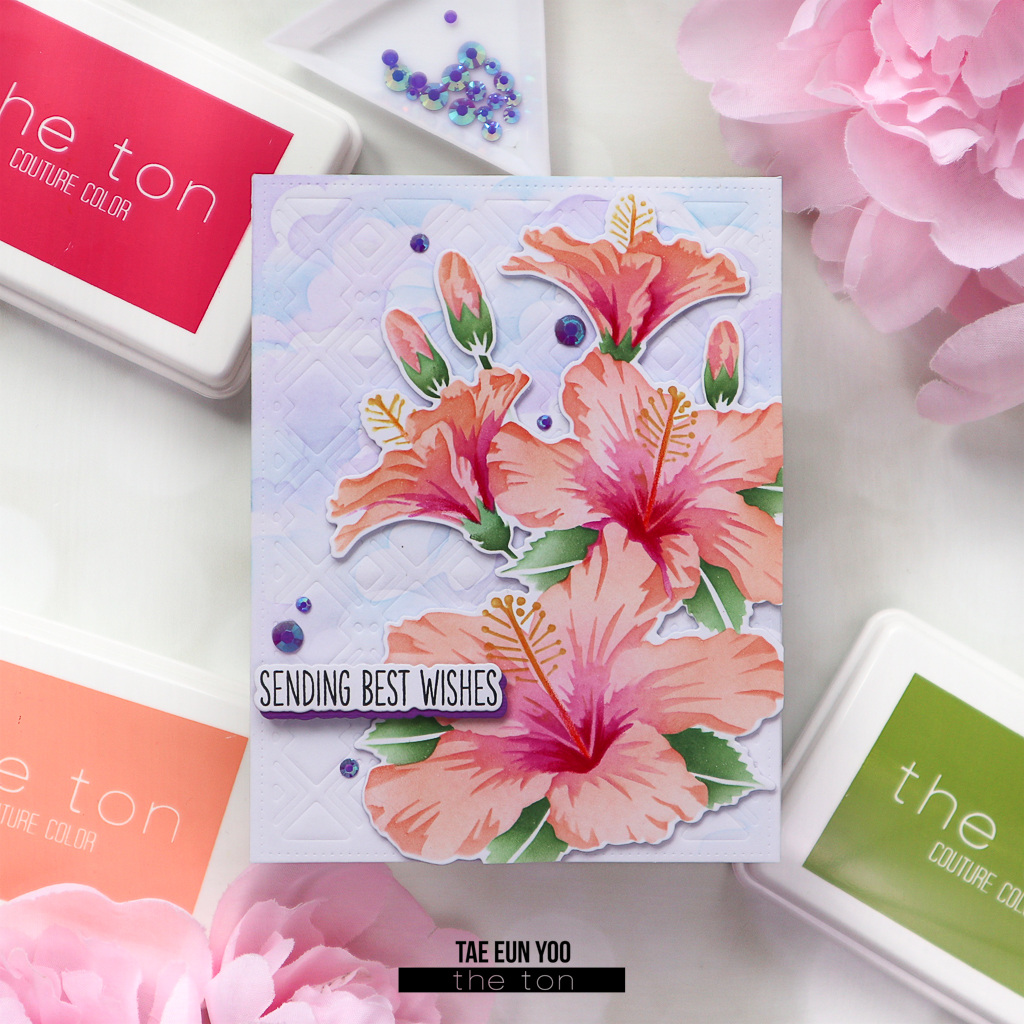
To start, I first cut white cardstock using the Climbing Hibiscus coordinating die. I placed it on the Grip Mat and began stenciling. It’s much easier to align the stencils, if you have the shape already cut. I stenciled the center of the flowers in pink and the tips of the petals in coral-orange. For the first layer I used Bubblegum and Peach Blossom, and for the second layer, Deep Peony and Coralline hybrid ink. The third layer was stenciled in Pink Derby. I stenciled the stamen in orange, and the leaves were colored in Matcha. I added a bit of Everglade Moss to the leaves for some depth. I also shaded the darkest part of the flowers using a dark pink colored pencil. 

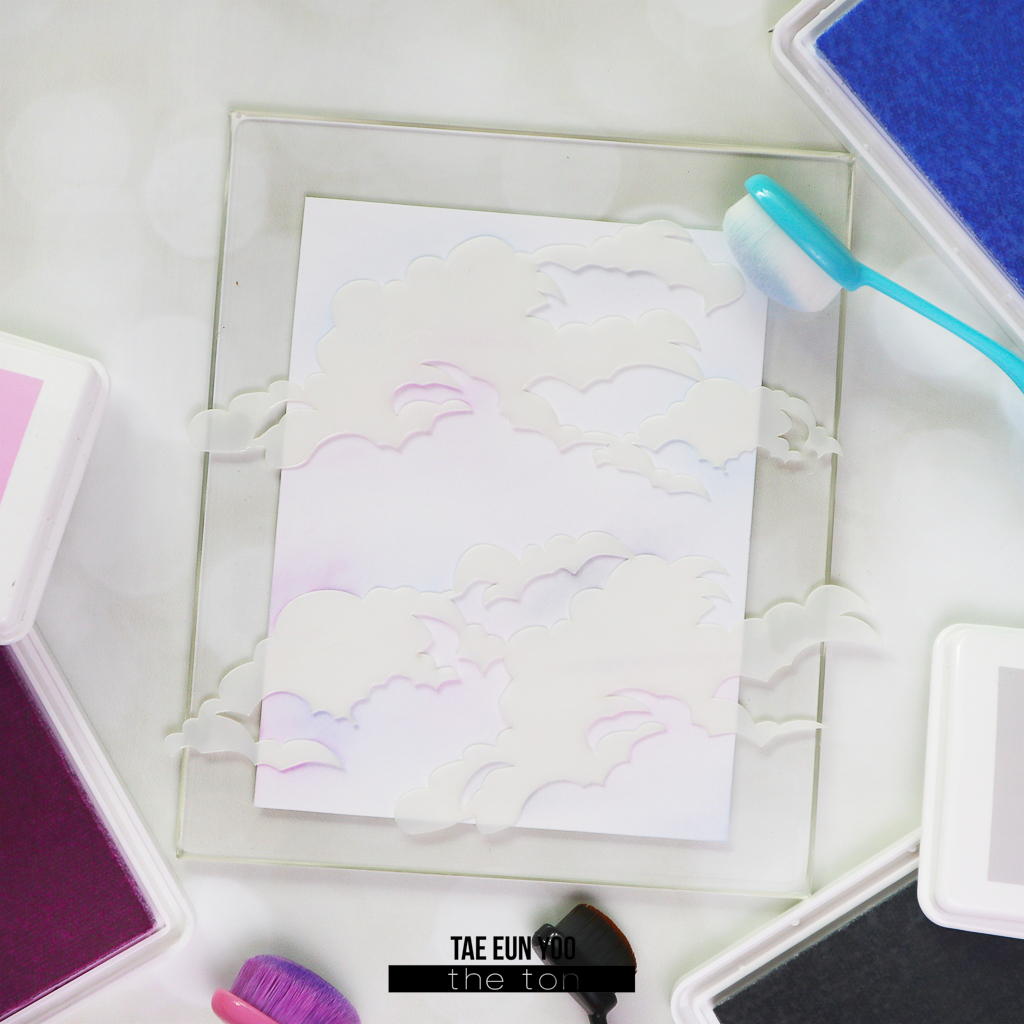
To create the background, I first stenciled a white panel using the Abstract Clouds stencil in Soft Ash, Cali Blue and Soft Amethyst. After stenciling, I dry embossed the panel with the Geo Triangles coverplate die and glued it onto a white cardbase. 

The Climbing Hibiscus image was then foam mounted to the background. 

The sentiment is from the Coming Up Hibiscus stamp set. I stamped it in Noir and cut it using the coordinating die. I cut it once again from some purple cardstock and layered it under the sentiment die cut piece, slightly shifted. 

I finished off the card with a few Dark Purple Opaque rhinestones.

Thank you so much for stopping by! 

I hope I was able to inspire you with my card today!

TaeEun

Good Tidings

Hello everyone ! Hope your week is off to a great start! It’s TaeEun here, sharing a holiday card with you. To create this card I used the Good Tidings Sentiment set and the Abstract Clouds stencil, both part of the Fall 2023 Release

To begin, I stenciled the Abstract Clouds onto an A2-sized white panel. Placing the panel on the Grip Mat, I positioned the Abstract Clouds stencils on it. The Grip Mat makes the stenciling process much more convenient, as there was no need to hold or tape the stencil. I ink blended the clouds in Soft Orchid, Soft Ash and Arctic Sky. Subsequently, I removed the cloud stencils and ink blended though the negative stencil in Arctic Sky on the panel. 

Once the background was complete, I heat embossed the Good Tidings Sentiment in silver at the center of the panel. Following that, I cut the sentiment using the coordinating die. Please note that there will be a correction in the manufacturing of the coordinating die , and it will be available soon!

I adhered the sentiment directly to the center of a white cardbase and foam mounted the negative background panel. 

The Santa’s sleigh from the same stamp set was stamped in Iris Blooms, Violet Fringe and Noir in an ombre style. Some of the trees were stamped in Evergreen and others in Deep Emerald. I added a touch of Everglade Moss to the trees for a darker shade. I then cut the trees and the Santa’s sleigh using the die and arranged them on the card ,as shown in the picture, using foam tape.

To embellish the card, I scattered some Crystal Clear rhinestones on it, adhered a tiny red gem on Rudolf’s nose, and added some Crystal Stickles to the holly leaves which are in the sentiment.

Thank you so much for stopping by today! I Hope I was able to inspire you with my card!

Wishing you all a crafty week!

TaeEun